Pumpkin carving is basically arts-and-crafts meets tiny home demolition: you start with a perfectly good squash,
remove its insides, and somehow end up proud. If you’re tired of the classic triangle-eyes grin, animal pumpkin
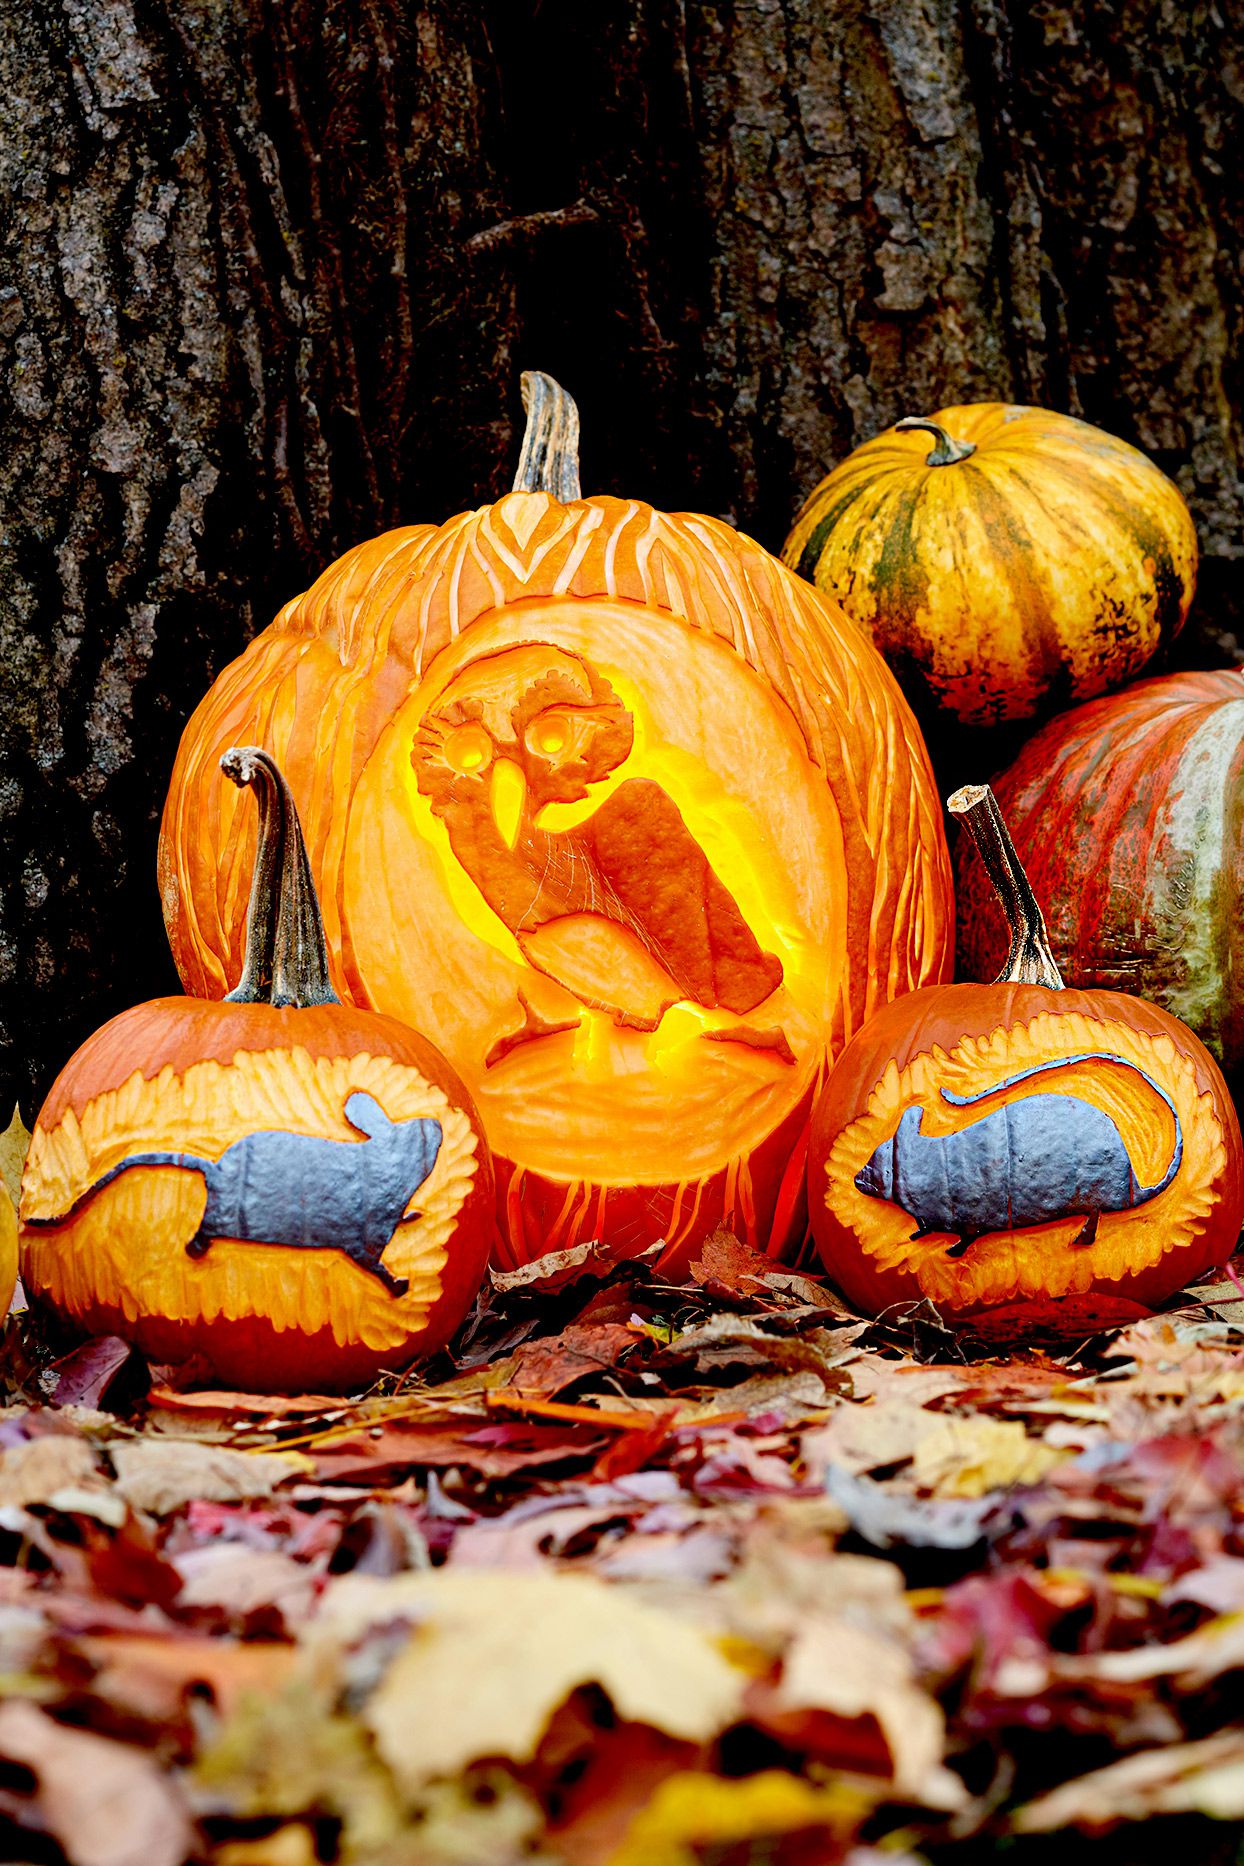
carving ideas are the cutest upgradebecause nothing says “welcome, trick-or-treaters” like a pumpkin that looks
like a wide-eyed owl judging your life choices.
The best part: you don’t need to buy fancy templates. With a marker, tape, and a little “I can totally draw a fox”
confidence, you can make free pumpkin stencils from simple shapescircles, ovals, triangles, and a
few strategic curves. Below are 12 adorable animal jack-o’-lantern designs, each with a quick, doable plan (plus
a few cheat-code tips to make them look surprisingly pro).
Before You Carve: Tools, Safety, and the “Make It Last” Tricks
Simple tools that work (no gadget hoarding required)
- Pumpkin carving kit (small saw + poking tool) or a small serrated knife for thicker cuts
- Big spoon or ice cream scoop for cleaning and thinning the wall
- Marker (washable is fine) for sketching your animal face
- Tape + printer paper if you want to make a stencil
- Toothpicks (for attaching ears, noses, tonguesyes, pumpkins can have tongues)
- Battery LED candle for lighting (brighter, safer, and less “pumpkin soup”)
Safety rule that saves fingers
Carve on a stable surface in good light, with dry hands and dry tools. If kids are helping, let them do the
drawing and scooping while an adult handles the cutting. (Little hands are great at creativity; less great at
“sharp object negotiation.”)
Make your carved pumpkin last longer
- Thin the wall behind your design (about 1/2 to 1 inch) so details carve cleanly and light shows through.
- Disinfect the cut surfaces with a diluted bleach solution (or another disinfecting rinse) to slow mold.
- Seal the cuts with a thin layer of petroleum jelly to reduce drying and shriveling.
- Use LED lights instead of open flames to avoid heating the pumpkin from the inside.
How to make a free stencil in 3 minutes
- Draw your animal on paper using basic shapes (example: owl = big circle head + two circles eyes).
- Tape it to the pumpkin. Make small snips around the paper edge so it curves smoothly.
- Poke-dot the lines with a pin/poker, remove paper, then connect dots with a marker.
12 Cute Animal Pumpkin Carving Ideas (With Free DIY Template Tips)
1) Wide-Eyed Owl Pumpkin
Why it works: Big eyes + simple shapes = instant “adorable.”
Free stencil tip: Draw two large circles (eyes) and a small diamond (beak).
- Cut out two big round eye holes (keep them symmetrical).
- Cut a small beak triangle or diamond between the eyes.
- Option: “etch” feather texture by scraping the skin (don’t cut through) in short strokes.
Extra cute: Add twig “eyebrows” with toothpicks for a wise-but-sassy look.
2) Sleepy Cat Pumpkin
Why it works: Closed eyes are forgivingand still charming.
Free stencil tip: Draw two curved “smiles” for eyes, a tiny triangle nose, and three whisker lines per side.
- Etch (scrape) the curved eyes so they glow softly without big holes.
- Cut a small nose triangle all the way through.
- Etch whiskers (thin lines) instead of cutting them out.
Extra cute: Carve two small ear shapes from a second pumpkin piece and toothpick them on top.
3) Happy Puppy Pumpkin
Why it works: Floppy ears + tongue = instant friendly vibe.
Free stencil tip: Sketch a big oval muzzle and a wide U-shape mouth.
- Cut two round eyes (or one wink, if you like personality).
- Cut an oval muzzle opening; leave a “bridge” for a nose shape above it.
- Make a tongue from a cut-out scrap and toothpick it inside the mouth.
Extra cute: Add eyebrows by etching two short arcs above the eyes.
4) Curious Fox Pumpkin
Why it works: Sharp ears and a pointy snout read “fox” fast.
Free stencil tip: Use a triangle face with two tall triangles on top for ears.
- Cut tall ear shapes near the top edge (or attach ears from scraps).
- Cut narrow almond eyes for a clever expression.
- Etch cheek “fur” by scraping V-shaped patches on each side of the snout.
Extra cute: Place a smaller pumpkin beside it as a “fox kit” companion.
5) Fluffy Bunny Pumpkin
Why it works: Long ears are dramatic, but the face stays simple.
Free stencil tip: Draw two long ovals (ears), two small circles (eyes), and a tiny heart nose.
- Cut or attach long ears (attached looks bold; toothpicked ears look whimsical).
- Etch the eyes so they glow gentlybunnies look cuter when not “laser-eyed.”
- Cut a small nose and add two etched buck teeth lines below it.
Extra cute: Add a cotton-ball tail… or a carved mini-pumpkin tail if you’re feeling fancy.
6) Little Bat Pumpkin
Why it works: It’s spooky-cute, and the wing shapes are easy triangles.
Free stencil tip: Draw two pointy ears, round eyes, and simple wing scallops.
- Cut two small triangle ears into the top silhouette.
- Cut round eyes and a tiny fang mouth (two small triangles).
- Optional: Cut wing shapes from side scraps and pin them on.
Extra cute: Put the bat pumpkin slightly higher on a step so it looks like it’s “hovering.”
7) Penguin Pumpkin
Why it works: A big “belly” patch is forgiving and looks great lit up.
Free stencil tip: Draw an oval belly, two dot eyes, and a small triangle beak.
- Etch the belly oval by scraping the skinleave a darker border for contrast.
- Cut small eye holes and a tiny beak triangle.
- Etch flippers (two curved side shapes) so they glow subtly.
Extra cute: Add a scarf (fabric or ribbon) and call it “Penguin Chic.”
8) Panda Pumpkin
Why it works: The eye patches do all the heavy lifting for you.
Free stencil tip: Draw two big eye ovals (patches) with smaller circles inside (eyes).
- Etch two large eye patches (scrape only) so they glow as soft shapes.
- Cut small round pupils through the pumpkin for sparkle-dot eyes.
- Cut a small nose and a short mouth line underneath.
Extra cute: Use two mini pumpkins as “ears” placed behind the main pumpkin.
9) Hedgehog Pumpkin
Why it works: The “spikes” can be texture, not perfect carving.
Free stencil tip: Draw a round face and a big semicircle “spiky” back area.
- Cut two small eyes and a tiny nose.
- Etch the back area and score short spike lines into it (no need to cut through).
- Optional: Push sunflower seeds into the etched area for 3D spines.
Extra cute: Give it rosy cheeks by lightly scraping two small circles on the face.
10) Trash-Panda Raccoon Pumpkin
Why it works: The mask pattern makes it instantly recognizable.
Free stencil tip: Draw a band across the eyes (like a superhero, but fuzzier).
- Etch a wide “mask” band across the eye area.
- Cut small eye holes inside the mask.
- Cut a rounded nose and add a tiny smile or curious mouth.
Extra cute: Place it beside a small bucket or a “treat bowl” for the theme joke.
11) Gentle Elephant Pumpkin
Why it works: A trunk silhouette is dramatic and surprisingly doable.
Free stencil tip: Draw a large U-shaped trunk that curls at the end, plus two big ear arcs.
- Etch the ears as big side patches (scrape skin) for a soft glow.
- Cut the trunk opening as a thick line shape (avoid skinny cuts that collapse).
- Cut small eyes high on the face to keep the look sweet.
Extra cute: Put a tiny “peanut” shape (carved from scrap) near the trunk tip.
12) Smiling Sea Turtle Pumpkin
Why it works: Shell pattern = fun geometry; face stays simple.
Free stencil tip: Draw a hexagon-ish shell pattern (imperfect is fine) and a small round head.
- Etch the shell area and score the pattern lines to create a stained-glass effect.
- Cut two small eyes and a tiny smile on the “head” area.
- Optional: Etch four flippers as curved side shapes.
Extra cute: Use a green LED light for an ocean-y glow.
Finishing Touches That Make Animal Pumpkins Look “Alive”
- Mix cut + etch: Cut the bold shapes, etch the details. It adds depth without fragile cutouts.
- Use your scraps: Ears, tongues, teeth, and little noses can be cut from leftover pieces and pinned on.
- Light placement matters: Move the LED closer to the face for brighter eyes and sharper features.
- Go “no-carve” for toddlers: Draw animal faces with markers; add felt ears with tape (still adorable, way safer).
Troubleshooting: When Your Pumpkin Starts Acting Like a Pumpkin
If the pumpkin wall is too thick
Thin the inside behind the design area. Thick walls fight detailed cuts and make light look dim. A scoop tool
(even a sturdy ice cream scoop) makes this faster than you’d think.
If small details keep breaking
Convert tiny cutouts into etched lines. For whiskers, feathers, fur, and shell patterns, scraping the skin is
stronger than cutting skinny holes all the way through.
If it’s drooping or molding early
Treat the cut surfaces with a disinfecting rinse, seal with petroleum jelly, and keep it as cool as possible.
Heat speeds up the sad pumpkin collapse phase.
Real-World Carving Experiences: What Usually Happens (and How to Win Anyway)
Here’s the honest truth about cute pumpkin carving: the first five minutes feel like a wholesome
fall commercial, and the next forty can feel like you’re doing minor surgery on a slippery bowling ball. That’s
normal. The “experience” most people share is learning that pumpkins have opinionsmostly about your plan to carve
tiny, delicate lines when the shell is thick and the table is wobbly. The good news is that animal designs are
incredibly forgiving if you lean into bold shapes and use etching for detail.
One common “aha” moment is realizing that the light does half the work. People often over-carve at
firstcutting big holes where a gentle etched patch would look softer and cuter. Animal faces especially benefit
from this: etched cheeks, feather textures, fur lines, and shell patterns glow like a lantern instead of turning
into a jagged window. In practice, the winning move is to cut only what needs to be bright (eyes, nose, mouth) and
etch what needs to be subtle (patches, textures, shading).
Another real-life lesson: symmetry is easier with a “center line.” Many carvers lightly draw a
vertical guideline down the pumpkin first, then mirror features on both sides. This is the difference between a
wide-eyed owl and an owl that looks like it just heard a plot twist. If you’re doing a fox, cat, or panda, placing
the eyes evenly is the whole vibeso taking 30 seconds to measure with your finger width (seriously) can save you
from the “one eye is in a different ZIP code” situation.
Families who carve together usually discover a surprisingly efficient division of labor: one person draws the
design, another scoops and thins the pumpkin wall, and an adult does the cutting. This not only speeds things up,
it makes the activity safer and more fun. Kids love being in charge of “face design,” and honestly, their cartoon
instincts often create the cutest animals anyway. If someone wants to participate but you’d rather not hand them a
blade, give them the job of poking the stencil dots, cleaning out seeds, or testing different LED light positions.
That last one sounds small, but it can transform a design from “meh” to “wow” in seconds.
The most relatable carving experience is also the most predictable: after all your work, you set the pumpkin
outside… and weather immediately tries to speed-run decomposition. Warm evenings, sun, and open flames shorten the
display time, so experienced carvers tend to use battery LEDs and keep pumpkins cool until the night-of. If you’re
aiming for a party or Halloween night, carving closer to the event (and preserving the cut surfaces) usually gives
you the best results. And if a piece snaps off? Congratulationsyour pumpkin just gave you a bonus accessory. Turn
that broken bit into a tongue, tooth, eyebrow, or tiny ear, attach it with toothpicks, and pretend it was the plan
all along. Pumpkin carving is 30% design and 70% confident improvisation.
Finally, the “best” real-world outcome isn’t perfectionit’s personality. Animal pumpkins don’t need to look like
a museum exhibit to be a hit. A slightly lopsided bunny can look extra sweet. A raccoon mask that’s uneven can look
mischievous. The goal is a lantern that makes people smile as they walk up. If it does that, you didn’t just carve
a pumpkinyou created a tiny fall mascot with main-character energy.
Conclusion
Whether you go full wide-eyed owl or sleepy cat, animal pumpkin carving is the easiest way to make your Halloween
decor feel playful, creative, and uniquely yours. Keep your shapes bold, etch the details, light it with LEDs, and
remember: if something breaks, it’s not a mistakeit’s a feature you haven’t named yet.