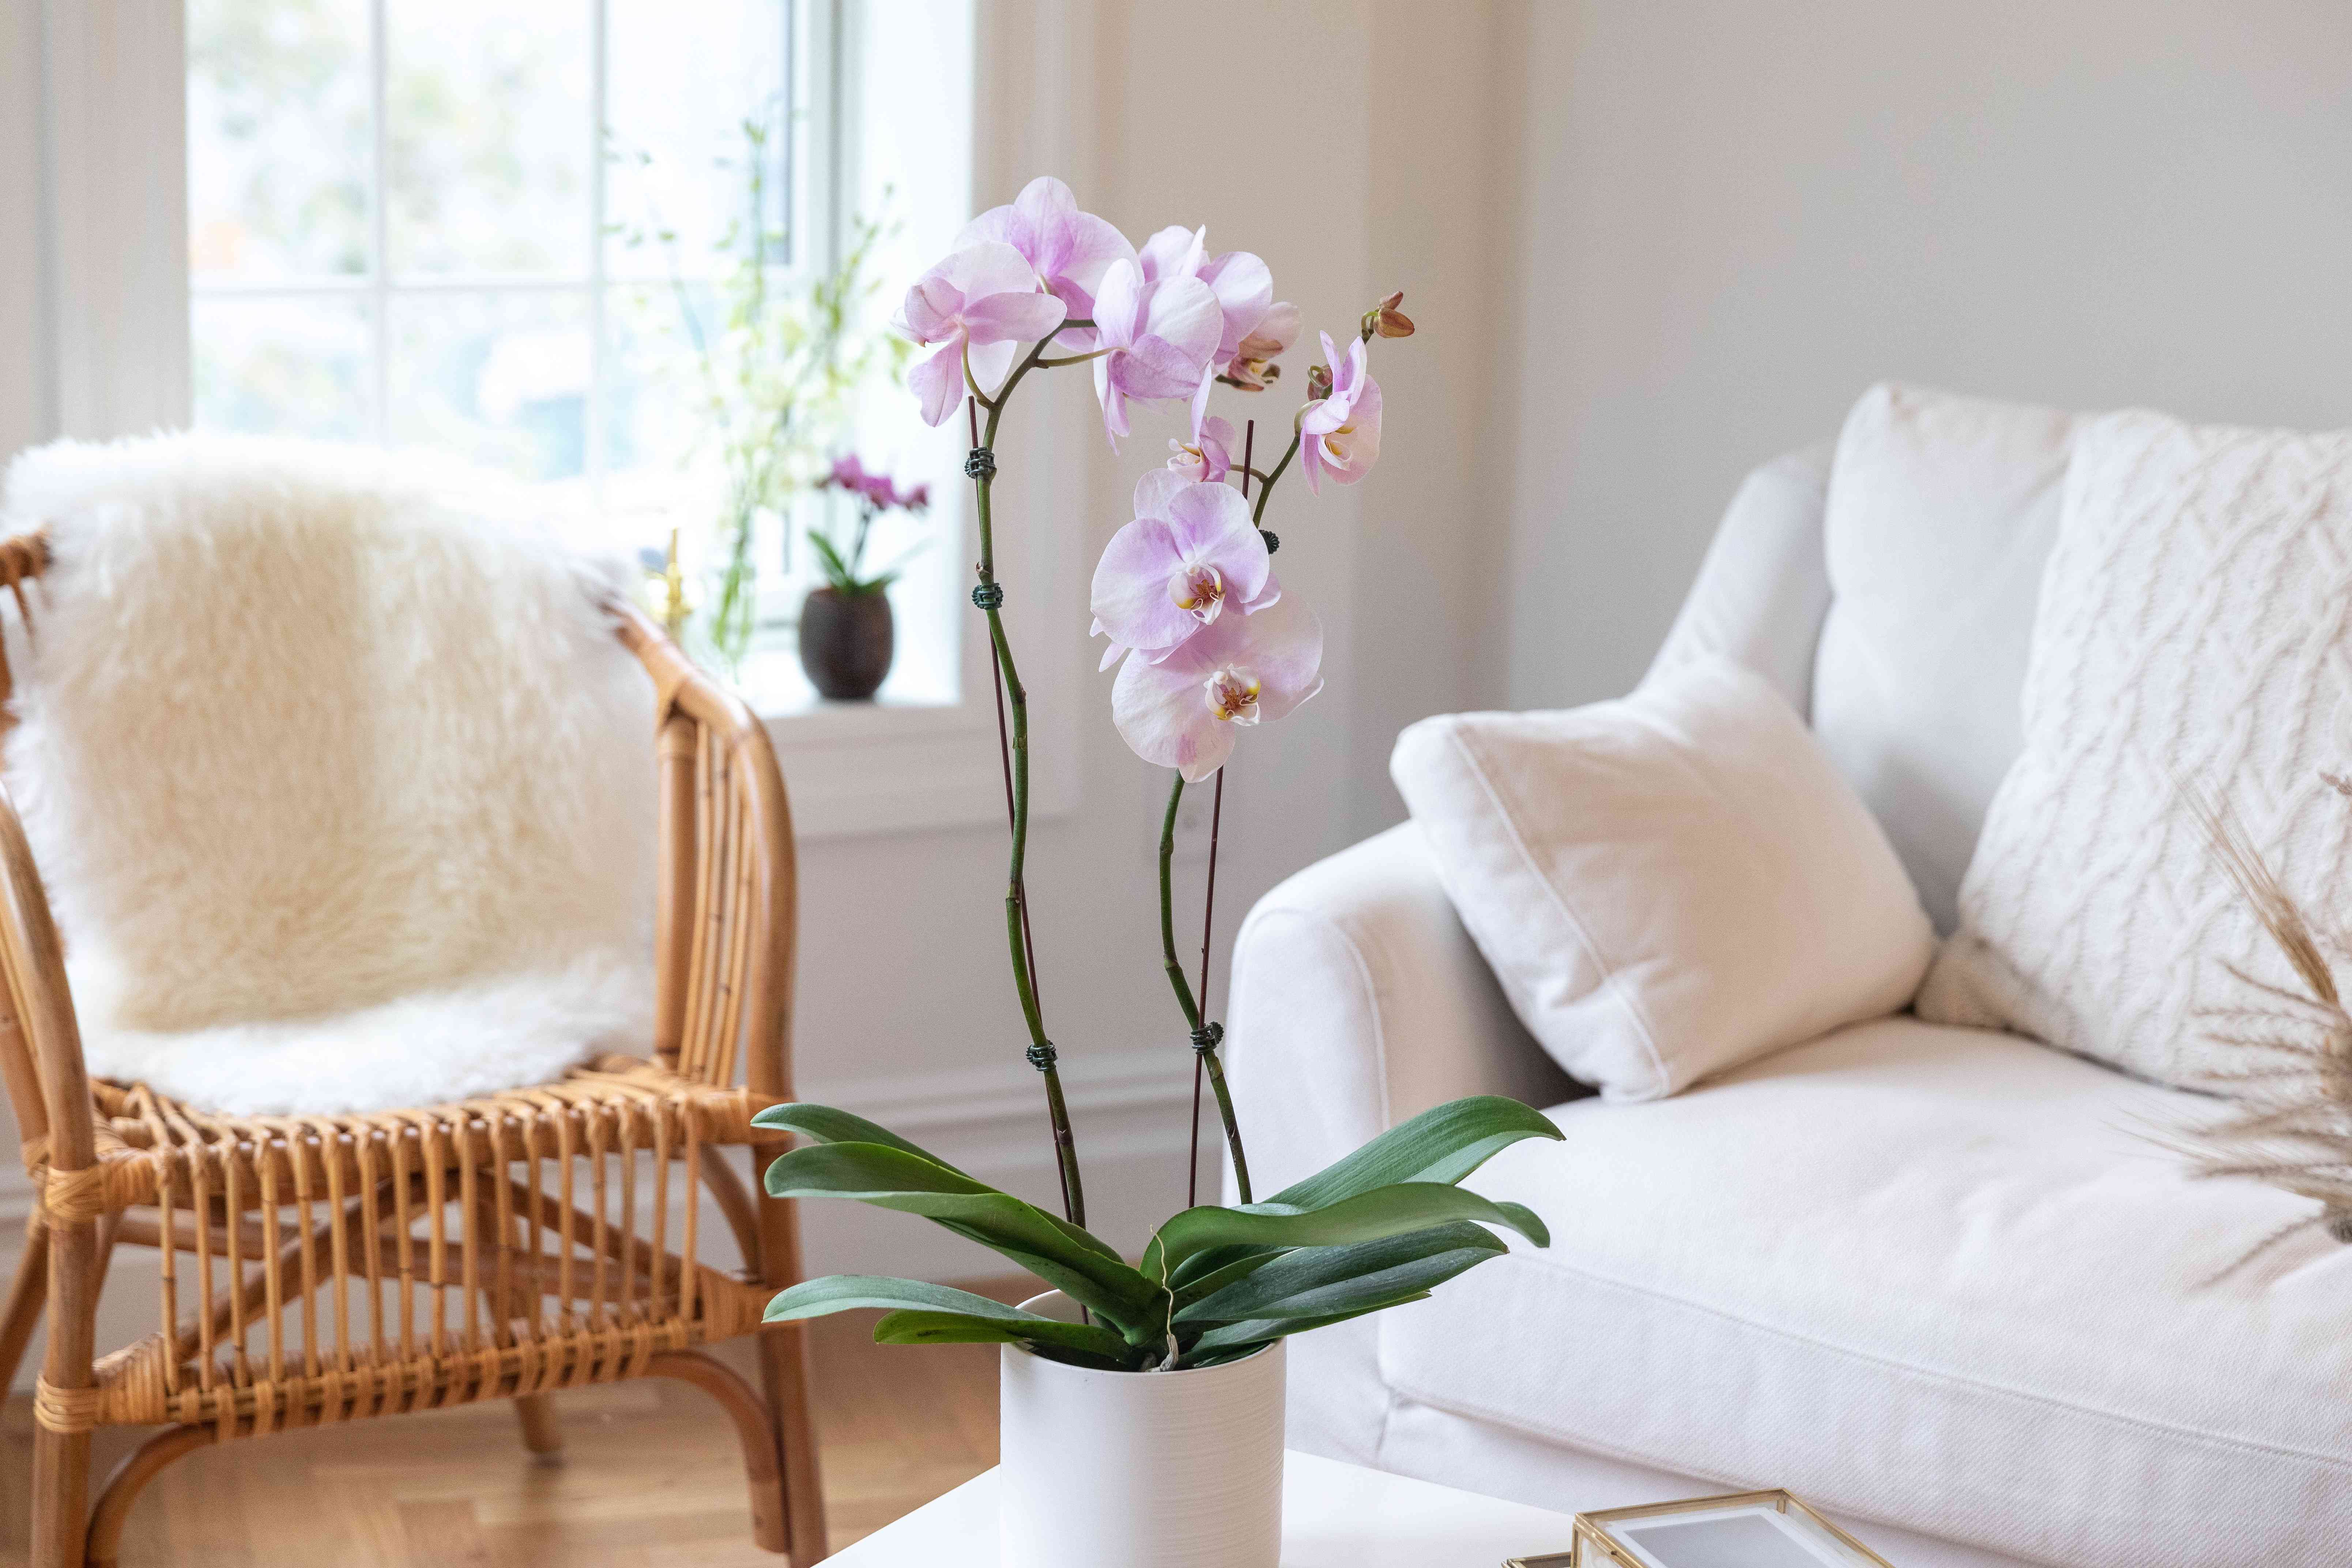
Your orchid is alive. It’s growing leaves. It’s throwing roots like it’s training for a marathon.
And yet… not a single flower. If you’re staring at that stubborn green plant like it owes you rent,
you’re not alone.
Here’s the truth: most orchids don’t “refuse” to bloom out of spite (even if it feels personal).
They bloom when a few very specific needs line uplight, temperature cues, healthy roots, and enough stored energy.
Miss one key piece, and your orchid will keep building itself… but skip the flower show.
This guide breaks down the 8 most common reasons an orchid won’t bloom and gives you
practical, step-by-step fixes you can actually do in a normal home (no greenhouse, no mystical chanting,
no briberyokay, maybe a little pep talk).
Before You Troubleshoot: Is Your Orchid Supposed to Bloom Right Now?
Not all orchids bloom on the same schedule, and even the same type can vary depending on how it was grown and
what it experienced last season. The most common “gift orchid” is Phalaenopsis (moth orchid),
which often blooms once a year indoors, sometimes more with excellent conditions. Some orchids need a more defined
seasonal shift and may bloom on a stricter timetable.
Quick ID clues
- Phalaenopsis (moth orchid): broad, floppy leaves; flower spikes emerge between leaves.
- Cattleya/Oncidium types: have pseudobulbs (swollen “storage” stems) and narrower leaves.
- Dendrobium types: cane-like stems; some need cooler, drier rests to bloom well.
Also: age matters. Some orchids won’t bloom until they’re mature enough to store energy (especially if started from
seed or a young plant). If your plant is newly established, it may be focusing on building roots and leaves first.
Reason #1: Not Enough Light (The #1 Bloom Blocker)
If orchids had a dating profile, light would be listed as “non-negotiable.” Many orchids will survive in low light,
but blooming requires enough energy from photosynthesis to fund the expensive project called “flowers.”
What it looks like
- Dark green leaves (especially on Phalaenopsis) with little to no new spike growth.
- Plant grows leaves slowly but never initiates blooms.
- Orchid lives in a “nice room” that is, unfortunately, a cave.
How to fix it
-
Move it closer to bright, indirect light. An east window is often ideal for many home-grown moth orchids.
South or west can work if filtered (sheer curtain) and you avoid hot direct sun. - Use leaf color as feedback. For many Phalaenopsis, a slightly yellow-green/olive tone can indicate adequate light.
- Add a grow light if windows are limitedespecially in winter or in north-facing apartments.
Quick test
Hold your hand between the plant and the light source. If you get a sharp shadow, that’s bright (and possibly too direct).
A soft shadow is usually the sweet spot for “bright indirect.”
Pro tip: Increase light gradually. Orchids can sunburn if you jump from dim to blazing in one move.
Reason #2: No Temperature Cue (Your Orchid Never Got the “It’s Bloom Season” Memo)
Many orchidsespecially Phalaenopsisuse temperature patterns as their calendar.
In nature, slight seasonal shifts signal when to initiate a flower spike.
Indoors, a perfectly stable temperature can be cozy… and confusing.
What it looks like
- Healthy leaves and roots, but no spike for many months.
- Plant sits near a heat vent or stays warm day and night year-round.
- Orchid looks “fine,” but it’s stuck in vegetative mode.
How to fix it
-
Give a gentle night temperature drop. For many Phalaenopsis, cooler nights for several weeks
can encourage spike initiation (think: comfortable-sweater nights, not arctic survival). - Avoid drafts and sudden swings once buds formrapid changes can cause bud blast (buds drop before opening).
- Keep it away from heaters/AC blasts that create constant stress.
Practical home method
For 2–4 weeks in fall/winter, place the orchid in a room that’s a bit cooler at night than daytime
(like a bedroom that naturally cools down). Keep light bright and watering sensible.
Reason #3: Root Problems from Overwatering (Or Underwatering) Flowers Can’t Happen Without Working Roots
Orchids don’t drink like typical houseplants. Many are epiphytes that cling to trees in airy environments.
Their roots need oxygen as much as they need moisture. When roots rot, the orchid can’t move water and nutrients
efficientlyand blooming becomes the last priority.
What it looks like
- Overwatering/root rot: mushy brown/black roots, sour smell, limp leaves even though the pot seems wet.
- Underwatering: wrinkled leaves, shriveled roots, potting mix bone dry for long stretches.
- Water sitting in the crown (center) of a Phalaenopsis after watering (risk of crown rot).
How to fix it
- Water based on roots, not the calendar. Many orchid roots turn greener when hydrated and look silvery when dry.
- Soak, then drain. Water thoroughly, let it run out completely, and never let the pot sit in water.
- Keep water out of the crown and leaf joints; blot if necessary.
- If rot is present: repot, trim dead roots with sterile scissors, and restart in fresh orchid mix.
About the “ice cube” watering hack
Some people swear by it, others swear at it. The safest, most broadly recommended approach for tropical orchids is
thorough watering with room-temperature water followed by full drainage. If your goal is reblooming, consistency
and healthy roots beat trendy shortcuts.
Reason #4: The Potting Mix Is Old or the Pot Isn’t Orchid-Friendly
Orchid mix breaks down over time. When bark degrades, it holds more water and less airexactly the opposite of what
many orchid roots want. An orchid can look okay above the pot while slowly suffocating below it.
What it looks like
- Mix looks like soil, smells musty, or stays wet for a long time.
- Roots are packed, circling, or climbing out dramatically (some aerial roots are normal, but a “root jailbreak” can signal trouble).
- Pot has few drainage holes (or none), or it’s a decorative cachepot with water trapped inside.
How to fix it
- Repot when the mix is breaking down or roots are cramped (often every 1–2 years, depending on conditions and media).
- Use an orchid mix (chunky bark blends are common for Phalaenopsis) and a pot with lots of drainage and airflow.
- Size matters: orchids typically prefer a snug pot, not a mansion.
- Don’t repot while in full bloom unless the plant is in trouble (repotting can cause stress and bloom drop).
After repotting, it’s normal for the orchid to pause. Think of it as moving housesproductive, but not exactly “throw a party” energy.
Reason #5: Fertilizer Mistakes (Too Much, Too Strong, or Too Nitrogen-Heavy)
Orchids need nutrients, but fertilizing is like hot sauce: a little enhances everything, too much ruins dinner.
Overfertilizing can lead to salt buildup, root stress, and lots of leafy growth with few bloomsespecially if nitrogen is high.
What it looks like
- Great leaf growth, no flowers (classic “gym bro orchid” strong, green, and not interested in accessories).
- White crust on potting media or pot edges (salt buildup).
- Burned root tips or stalled growth after feeding.
How to fix it
- Feed lightly during active growth. Many extension programs recommend diluted fertilizer rather than full strength.
- Choose a balanced fertilizer appropriate for orchids and your media (bark vs. moss can change needs).
- Flush monthly: water thoroughly with plain water to wash out accumulated salts.
- Ease off in low-light seasons if the plant isn’t actively growing.
Simple schedule that works for many home growers
“Weakly, weekly” is a popular approach: a diluted dose more often, rather than a heavy dose occasionally.
If that feels like too much math, aim for a half-strength feeding once or twice a month during growth
and adjust based on your orchid’s response.
Reason #6: Humidity Is Too Low (or Air Is Too Stagnant)
Orchids aren’t asking for a rainforest reenactment in your living room… but many do prefer moderate humidity and gentle airflow.
Low humidity can stress the plant, while stagnant air can invite fungus and pests. Both problems can reduce the plant’s “bloom budget.”
What it looks like
- Buds form but shrivel or drop (bud blast), especially during cold, dry indoor winter air.
- Leaf tips brown, roots dry out quickly, or the plant looks perpetually thirsty.
- Fungal spots or persistent gnats/mold in still, damp conditions.
How to fix it
- Aim for moderate humidity with a pebble tray (water below the pot level) or a small humidifier nearby.
- Improve airflow with a gentle fan across the room (not blasting directly on the plant).
- Group plants to slightly increase local humidityplants are social that way.
Bonus: better airflow also helps the potting mix dry at a healthier pace, reducing root rot risk.
Reason #7: Pests or Disease Are Draining Your Orchid’s Energy
Orchids are tough, but pests are freeloaders with excellent timing. If your plant is fighting mealybugs, scale, mites,
or recurring fungal issues, it may keep itself alive but skip flowering.
What it looks like
- Mealybugs: cottony clusters in leaf joints or along stems.
- Scale: small brown bumps on leaves that don’t brush off easily.
- Spider mites: fine webbing, stippled leaves, dusty look (often worse in dry air).
- Sticky residue or sooty mold.
How to fix it
- Inspect weeklyespecially the underside of leaves and the crown area.
- Isolate the plant so pests don’t spread.
- Spot-treat early: wipe pests with cotton swabs and rubbing alcohol (test a small area first).
- Repeat treatments as needed; pests rarely leave after one polite request.
- If the infestation is heavy, consider an orchid-safe horticultural soap or oil per label directions.
Once pests are controlled and new growth looks clean, the orchid can redirect energy toward spiking and blooming again.
Reason #8: The Plant Never Recharged (or Spike Care Went Sideways)
Flowering takes stored energycarbohydrates built from light and healthy growth. If your orchid didn’t have enough energy,
or if it’s being pushed to perform while stressed (low light, weak roots, constant repotting drama), it may simply not have
the reserves to bloom.
Common “oops” moments
- Cutting spikes at the wrong time: a brown, dried spike should go; a green spike may still have potential depending on the orchid and goals.
- No rest after blooming: continuing heavy feeding or inconsistent watering when growth is slow can stress roots.
- Expecting instant results: orchids often take weeks to months to initiate spikes after conditions improve.
How to fix it
- Prioritize leaf and root health first. Blooms follow strong fundamentals.
- Give stable care for 8–12 weeks (bright indirect light, proper watering, gentle feeding) before judging progress.
- Don’t chase spikes with constant changes. Orchids love consistency more than experimentation.
The patience pep talk
When you correct the problem, you may not see flowers immediately. You might see: new roots, then a new leaf,
then a spike… and finally blooms. That’s not your orchid being slow. That’s your orchid being an orchid.
A Simple 4-Week “Make My Orchid Bloom Again” Reset Plan
Week 1: Diagnose and stabilize
- Move to brighter indirect light (gradually).
- Check roots and drainage; stop any standing-water situations.
- Inspect for pests; isolate and treat if needed.
Week 2: Clean up and correct
- If media is old/soggy, plan a repot (especially if roots look compromised).
- Water thoroughly only when approaching dry; drain completely.
- Begin gentle airflow and moderate humidity support.
Week 3: Feed lightly and flush smart
- Use diluted fertilizer if the orchid is actively growing.
- Flush with plain water to reduce salt buildup.
Week 4: Add the bloom cue (if appropriate)
- If you have a Phalaenopsis and it’s the right season, introduce cooler nights for a few weeks.
- Keep everything else steadyno big changes, no drama, no panic repotting.
If you do all this and still don’t see a spike immediately, you’re not failing. You’re building the conditions that make
blooming possible. Orchids are long-game plants. (Which is also why they feel like a personal growth exercise.)
Conclusion: Your Orchid Isn’t “Not Blooming” It’s Sending You Clues
When an orchid won’t bloom, it’s rarely a mystery and almost never a death sentence. Most of the time, it comes down to
one of a few fixable issues: light that’s too low, temperature cues that never happened,
roots that are stressed, media that’s worn out, or fertilizer that’s
either missing or overdone. Add in humidity, airflow, and pests, and you’ve got the full cast of characters.
Start with the basics: brighter indirect light and healthy roots. Stabilize care. Then add the seasonal cues and gentle feeding.
Do that, and your orchid has an excellent chance of rewarding youoften when you’ve finally stopped staring at it like a disappointed stage parent.
of Experiences Related to Orchid Reblooming (What People Commonly Run Into)
If orchid care had a soundtrack, the rebloom phase would be a slow-build montagelots of “Is anything happening?” moments,
followed by a sudden spike that makes you feel like a botanical genius. Below are a few common, real-to-life experiences
gardeners describe when troubleshooting orchids that won’t bloom, plus what typically turns things around.
Experience #1: “My orchid lives by the window… but apparently not the right kind of window.”
A classic scenario: the orchid sits near a window all day, yet never reblooms. The twist? It’s a north-facing window,
shaded by a porch roof, or set back deep in the room. The plant stays dark green and “fine,” but no spikes appear.
The fix is almost comically simplemove it closer to brighter, filtered light (often an east window), or add a small grow light.
Within a month or two, people often notice stronger root tips and a new leaf, and later in the season a spike emerges.
The big lesson: orchids can survive on “enough to read a book,” but blooming needs “enough to pay the electric bill.”
Experience #2: “I watered it lovingly… into root rot.”
Many orchid owners treat them like typical houseplants: frequent sips, always slightly moist. Orchids often respond with
droopy leaves and stalled growth, which convinces the owner to water more. (A tragic feedback loop.)
Once people pull the plant out and see mushy roots, everything clicks. Repotting into fresh orchid mix, trimming dead roots,
and switching to a soak-and-drain routine frequently produces a noticeable rebound. The first sign isn’t a flowerit’s firm leaves
and active root growth. Blooms come later, after the plant rebuilds its foundation.
Experience #3: “It’s growing leaves like crazy, but flowers? Never heard of her.”
This is often a fertilizer story. People feed a lot (or use a high-nitrogen product), and the orchid turns into a leafy athlete:
robust, green, and not particularly interested in flowering. When growers switch to a lighter, balanced feeding approach and flush
salts regularly, the plant stops “overbuilding” foliage and eventually initiates spikes when the season and temperatures line up.
The emotional journey is real: first frustration, then relief, then a smug “I knew you had it in you” speech to the orchid.
Experience #4: “It bloomed once, then never againuntil I gave it cooler nights.”
For many Phalaenopsis owners, everything looks right, but the plant sits in a steady 74°F environment year-round.
When they finally try a few weeks of slightly cooler nights (while keeping days comfortably warm and light bright),
spikes often appear like the orchid suddenly remembered its job description. The win here is subtle:
you’re not forcing bloomsyou’re recreating the seasonal cue the plant expects.
The most common thread in all these experiences is that success usually comes from one thing:
small, steady improvements that you keep doing long enough for the orchid to respond.
Orchids don’t reward panic. They reward consistencyplus a little humility.