If your kids’ bedroom walls are currently a bland “builder beige,” it’s basically a giant canvas begging for personality. Enter the houndstooth stencil: a classic pattern with a bold, modern twist that looks a little bit like a maze, a little bit like fashion week, and a lot like fun.
This A-MAZE-ing bedroom idea takes a traditional houndstooth pattern, blows it up, and uses it as a graphic accent wall that kids can literally trace with their fingers (or eyes) like a maze. It’s eye-catching without being chaotic, stylish without being stuffy, and kid-friendly without screaming “primary colors only.”
In this guide, you’ll learn how to plan, stencil, and style a houndstooth bedroom wall that works for toddlers, tweens, and everyone in between. We’ll also cover kid-safe paints, clever styling ideas, and real-life lessons from DIYers who’ve tackled this look and lived to recommend it.
Why a Houndstooth Stenciled Wall Is Perfect for a Kids’ Room
Houndstooth might be better known from coats and scarves, but it’s a secret weapon in interior designespecially for kids’ rooms.
- Graphic and playful: The broken check pattern looks almost like a geometric maze, which amps up the “A-MAZE-ing” factor for kids.
- Timeless, not trendy: Unlike cartoon-themed wallpaper that kids outgrow in two summers, houndstooth feels fresh for years.
- Works with almost any style: It can lean sporty, preppy, coastal, modern, or even retro, depending on your colors and accessories.
- Great for shared rooms: It feels gender-neutral and age-flexible, so it’s ideal when siblings share a space.
DIYers have used oversized houndstooth stencils to turn simple kids’ bedrooms and guest rooms into showstopping spaces. When done in blues, grays, or black and white, the look is bold but still surprisingly calmingthink “pattern with a plan” instead of “visual chaos.”
Planning Your A-MAZE-ing Houndstooth Bedroom
A successful stencil project starts long before the paint tray comes out. A little planning saves a lot of touch-ups later.
Choose the Right Wall
For most kids’ rooms, a single houndstooth accent wall is plenty. Good candidates include:
- The wall behind the headboard or beds (instantly frames the sleeping area).
- The wall opposite the door (so you see the big “wow” moment when you walk in).
- A clean wall without too many windows, doors, or vents cutting through the pattern.
If the room is small, consider the wall behind the beds so the pattern feels like a backdrop instead of surrounding your child on all sides. In a larger room, a long, uninterrupted wall is perfect for showing off the full stencil repeat.
Pick a Kid-Friendly Color Palette
Houndstooth is all about contrast, but that doesn’t mean you’re stuck with harsh black-and-white. Some great combos for kids’ rooms include:
- Soft gray base with crisp white houndstooth – calm, cozy, and age-flexible.
- Sky blue base with navy pattern – perfect for ocean, sports, or “big kid” themes.
- Mint or sage green with white pattern – gender-neutral and fresh.
- Two-tone maze: one color for most of the pattern, a second color to pick out a “maze path.”
Think about the rest of the room: if the bedding is busy, go more subtle on the wall (tone-on-tone). If the bedding and furniture are simple, this is your chance to go bolder.
Gather Your Supplies
Here’s what you’ll typically need for a houndstooth stenciled wall:
- One large houndstooth wall stencil (allover or repeating pattern).
- Base coat paint in your wall color (often eggshell or matte).
- Stencil paint in your contrast color (quality interior wall paint).
- Low-VOC or zero-VOC paint formulas for kid-safe air quality.
- Painter’s tape (frog tape or similar) for holding the stencil and masking edges.
- A small foam roller or stencil brush.
- Level (or clip-on stencil level) and measuring tape.
- Drop cloths, step stool or ladder, and a damp cloth for quick cleanups.
Most stencil companies also offer helpful extras like clip-on levels and registration marks built into the stencil design, so you can keep the pattern straight and continuous.
Step-by-Step: How to Create a Houndstooth Stenciled Feature Wall
The basic process is the same whether you’re doing houndstooth, stars, or any other allover stencil. The key is patience and very little paint on your roller.
1. Prep the Wall
Start with a smooth, clean surface:
- Patch nail holes and small dings with spackle, then sand lightly.
- Wipe down the wall to remove dust and fingerprints.
- Paint your base color and let it dry completely according to the canusually overnight.
It’s tempting to rush, but a fully cured base coat helps your stencil edges stay sharp and easier to touch up.
2. Draw a Level Starting Line
To keep your “maze” from slowly drifting downhill, mark a level line on the wall:
- Use a level to draw a faint vertical line in pencil down the center or at the starting edge of your wall.
- This becomes your alignment guide for the first stencil placement.
Once the first stencil is perfectly straight, the rest of the pattern builds off that “anchor.”
3. Position and Tape the Stencil
Hold the stencil against the wall and line it up with your pencil mark. Use painter’s tape on all sides to secure it. If your stencil has registration marks or built-in guidelines, note where they should land so the repeats line up later.
Double-check the level before you start painting. It’s easier to adjust now than after four rows.
4. Load (Then Offload!) Your Roller
This is the secret to crisp edges:
- Pour a small amount of stencil paint into a tray.
- Roll your foam roller into the paint, then roll it several times on the tray’s raised area or a piece of cardboard to remove excess.
- You want the roller to feel almost dryif you see paint glopping, it’s too much.
Apply paint using a light, even pressure. Several thin passes give better results than one heavy, drippy coat.
5. Work Across the Wall in Sections
Once the first repeat is done, gently pull the stencil off, reposition it using the registration marks and previous pattern as your guide, tape it again, and keep going.
- Overlap the stencil slightly so the pattern looks seamless.
- Check level every few repeatswalls and ceilings aren’t always perfectly square.
- Take breaks; you’ll make fewer mistakes if you’re not rushing.
Expect tiny imperfections. Up close you might see a bit of bleed, but from normal viewing distance it almost always looks sharp.
6. Touch Up and Admire
After the wall is fully stenciled and dry:
- Use a small artist brush and base color to touch up any obvious smudges.
- Clean up edges at the ceiling and baseboards if needed.
- Step back, snap too many photos, text your friends, and accept compliments.
Making It Maze-Ing: Turn the Pattern into a Game
The title isn’t just a punhoundstooth really does feel like a maze if you play with color placement. Here are a few ways to turn your wall into interactive fun:
- Highlight a path: After your main stencil color dries, carefully paint a subtle “path” through the pattern with a second accent color. Kids can trace it from one corner of the wall to another.
- Glow-in-the-dark maze: Use glow-in-the-dark or neon paint on a few selected shapes so the pattern becomes a secret maze at night.
- Maze challenges: Create simple “start” and “finish” decals and move them around occasionally so kids can invent new routes.
- Mini mazes on canvas: Use the same stencil on small canvases above a desk or reading nook and let kids decorate their own mini maze artworks.
If your kids are very young, keep the maze concept simplejust highlight a gentle, looping path. Older kids might enjoy more complex linework layered over the houndstooth pattern with paint pens or removable decals.
Styling the Room Around Your Houndstooth Wall
Once the wall is done, it’s time to pull the whole room together. The pattern is the star; everything else is the supporting cast.
Balance Pattern and Solids
- If the wall is high-contrast (like navy and white), choose mostly solid bedding in coordinating colors.
- Introduce one or two small-scale patternsstripes on a throw blanket, dots on a pillowbut avoid layering too many bold prints.
- Repeat the accent color from the wall in small doses: lamps, picture frames, or a rug border.
Think of it like kids’ snacks: a little mix is fun, but too much at once feels chaotic.
Make It Practical for Real Life
Kids’ rooms have to work hard. Combine style with function:
- Add low, labeled bins or baskets along the houndstooth wall to corral toysclear bins or simple solid colors will keep the pattern visible.
- Use a narrow bookshelf or wall shelves to display books and treasures without visually covering the entire wall.
- Create a reading nook with a cozy chair or floor cushions that pick up your accent color.
The goal: the wall feels like a fun backdrop, not a cluttered bulletin board.
Safety First: Kid-Friendly Paint Choices
Because this project happens where your child sleeps and plays, paint safety matters just as much as aesthetics.
- Choose low-VOC or zero-VOC paint: These formulas release fewer chemicals into the air, which is better for kids’ lungs and overall indoor air quality.
- Ventilate well: Open windows, use fans if possible, and avoid sleeping in the freshly painted room until the paint has fully dried and cured.
- Pick durable, washable finishes: Look for scrubbable or wipeable paints so you can clean crayon “art” and scuffs without damaging your masterpiece.
- Store supplies safely: Keep paint, solvents, and tools well out of kids’ reach, even between coats.
Always follow manufacturer instructions on drying time and safety guidelines. And if your home is older, make sure any pre-existing paint is in good condition and free of peeling before you start.
Kid-Approved Variations on the Houndstooth Theme
Love the idea but want to tweak it? Try these variations:
- Soft nursery version: Use tone-on-tone pastels (e.g., pale gray on lighter gray) for a soothing, subtle effect in a baby’s room.
- Sporty teen vibe: Pair bold houndstooth in school colors with framed jerseys, pennants, or sports posters.
- Monochrome modern: Black houndstooth on a white wall, paired with natural wood furniture and simple bedding.
- Renter-friendly: Instead of painting the wall, stencil houndstooth on large canvases or plywood panels and mount them like oversized art, or use removable houndstooth wallpaper or decals.
Because the pattern is so timeless, you can evolve the room’s themedinosaurs today, study lounge tomorrowwithout repainting the entire space.
Maintenance: Keeping Your Stenciled Wall Looking Fresh
Good news: once the project is done, upkeep is pretty minimal.
- Dust the wall occasionally with a dry microfiber cloth.
- Spot-clean fingerprints or smudges with a damp cloth and mild soap, then dry.
- Keep a small labeled jar of each paint color for quick touch-ups when furniture or toys bump the wall.
- Teach kids that the wall is for looking and tracing gently, not for full-contact marker experiments.
With basic care, your houndstooth maze wall will look sharp for yearsand you won’t dread walking into the room after a playdate.
Real-Life Tips and Experiences from A-MAZE-ing Houndstooth Bedrooms
It’s one thing to admire a houndstooth wall on a screen; it’s another to live with the project from tape to touch-ups. Here are some “been there, painted that” lessons inspired by DIY parents and decorators who’ve stenciled kids’ rooms.
Lesson 1: Schedule More Time Than You Think
Most people underestimate how long an allover stencil takes. One mom planned to finish her sons’ shared bedroom accent wall during nap time. Spoiler: she did not. The first hour went into taping, leveling, and figuring out the best amount of paint. Once she found her rhythm, each stencil repeat went fasterbut the whole wall still stretched into the evening.
Takeaway: treat this as a weekend project, not a quick Tuesday-night refresh. Plan to do the base coat one day and stenciling the next. If you finish early, you’ve earned an extra coffee, not an apology to your kids for sleeping in the guest room.
Lesson 2: Practice on a Board First
Several DIYers swear by practicing on a foam board or leftover drywall before touching the real wall. That’s where you figure out:
- How dry your roller should be to avoid bleed-through.
- Whether you prefer rolling or dabbing with a stencil brush.
- How many passes you need for full coverage in your chosen paint.
Once you’re confident, you’ll move more smoothly and fix fewer mistakes later. You can even hang the practice board as art in the room or use it to test new accent colors down the road.
Lesson 3: Let Kids HelpWith Boundaries
Children love feeling ownership over their room, and this project gives them a perfect way to be involved. Parents report the happiest (and least messy) results when kids help with the planning more than the actual painting.
Smart ways to involve kids:
- Let them help choose the color palette from 3–4 parent-approved options.
- Give them paper copies of the houndstooth pattern to color and test “maze” paths.
- Allow older kids to gently roll a few stencil sections under supervision once you’re confident in the technique.
Not-so-smart ways: handing a full paint roller to a preschooler near your freshly painted ceiling. Ask us how we know.
Lesson 4: Protect the Room Like You’re Painting a Gymnasium
DIYers consistently say they wish they’d used more drop cloths. Even careful stenciling can produce drips and splattersespecially when you’re moving the stencil around, stepping up and down a step stool, or answering a kid yelling from down the hall.
Cover the floor wall-to-wall, move furniture out when possible, and wrap anything that can’t move. It’s much easier to peel off tape than scrub paint out of a rug.
Lesson 5: The Pattern Hides Small Imperfections
Several people who’ve done houndstooth or similar geometric stencils worried about tiny bleeds and rough spots while they were painting. But once the whole wall was finished, the overall pattern completely distracted from the minor flaws.
In other words, don’t obsess over every tiny line. Aim for “neat and consistent,” not “microscope-perfect.” Kids will notice the giant maze effect, not the 2-millimeter smudge near the baseboard.
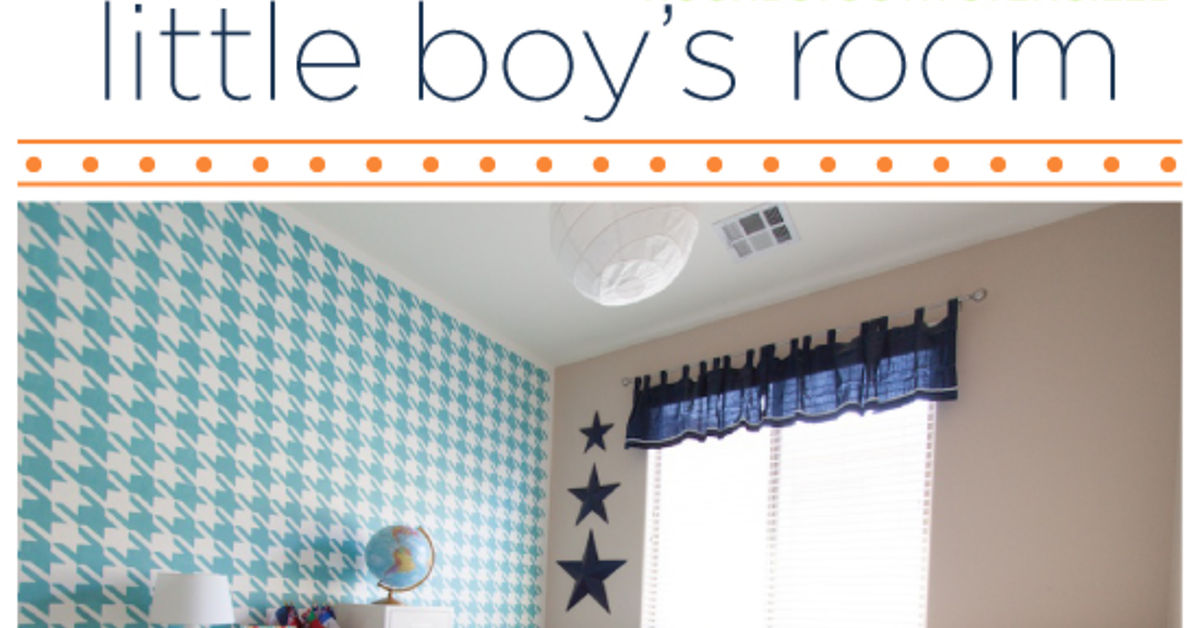
Lesson 6: The Room Grows with Your Child
One of the biggest compliments to this type of design is how long it lasts. Parents who stenciled a “little boy” room with blue houndstooth found it still felt right years later, even as the decor shifted from stuffed animals to skateboards and homework desks.
By choosing a classic pattern and comfortable color palette, you’re effectively future-proofing the room. You can swap out bedding, art, and accessories as your child’s interests change, but the houndstooth maze wall stays cool through multiple phases.
Conclusion: Bring Home an A-MAZE-ing Houndstooth Adventure
A houndstooth stenciled bedroom wall turns a plain kids’ room into a space with personality, pattern, and playful energy. With a well-chosen color palette, kid-safe paints, and a bit of patience, you can create a feature wall that feels like a fashionable mazeone that kids can enjoy tracing, teens can still appreciate, and adults can proudly show off.
Whether you go bold and high-contrast or soft and subtle, the result is the same: a bedroom that feels custom, creative, and anything but ordinary. Roll up your sleeves, tape off your wall, and get ready to amazeliterally.
meta_title: Houndstooth Stenciled Kids’ Bedroom Ideas That Amaze
meta_description: Discover how to create a houndstooth stenciled kids’ bedroom accent wall that looks like a playful maze using kid-safe paint and simple DIY steps.
sapo: Want a kids’ bedroom that looks custom-designed without hiring a designer? A houndstooth stenciled accent wall is a playful, maze-like twist on a classic pattern that totally transforms a plain room. With a simple stencil, kid-safe paints, and beginner-friendly steps, you can create an A-MAZE-ing feature wall that feels stylish enough for adults but fun enough for pillow forts and bedtime stories. From planning your color palette to turning the pattern into a game kids can trace, this guide walks you through everything you need to knowplus real-life lessons from families who’ve already done it.
keywords: houndstooth stenciled bedroom, kids bedroom stencil ideas, houndstooth accent wall, DIY kids room decor, maze wall idea, low VOC paint for kids rooms, stencil wall tutorial