Nothing says “I love fall” quite like filling your yard with pumpkins. But if you’re tired of the same old orange gourds from the grocery store, it’s time to think outside the pumpkin patch. Enter one of the most underrated stars of the upcycling world: the humble roof wind turbine. With a little bit of elbow grease and spray paint, you can turn this metal rooftop relic into adorable, oversized pumpkin decor that steals the show on your porch or lawn.
In this guide, you’ll learn exactly how to repurpose a roof wind turbine into cute pumpkin decor, step by step. We’ll cover how to clean and prep the metal, what kind of paint to use for outdoor durability, how to add stems and curly vines, and fun ways to style your new “pumpkin” for fall. You’ll also find real-world tips and lessons learned from people who’ve tried this project, so you can skip the mistakes and go straight to the “wow, that looks amazing” part.
Why Turn a Roof Wind Turbine into a Pumpkin?
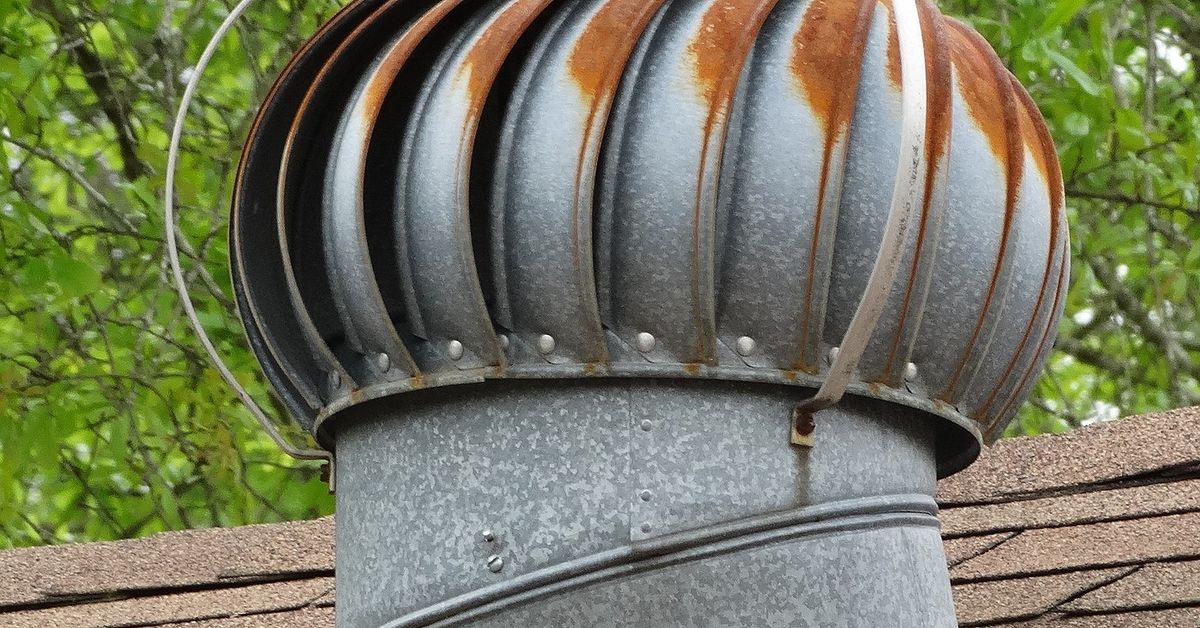
A roof wind turbine (also called a whirlybird, turbine vent, or roof vent) is that round, spinning metal thing you see on older roofs. Once it’s retired from ventilating attics, it’s still made of sturdy metal and has a naturally ribbed, rounded shape that’s surprisingly similar to a pumpkin. That makes it perfect for upcycled fall decor.
Here’s why people love this project:
- Eye-catching size: A full-size roof turbine creates a large, statement pumpkin you’ll never find on a store shelf.
- Eco-friendly upcycling: Instead of sending old vents to the landfill, you’re giving them a second life as seasonal decor.
- Budget-friendly: Many people find old turbines for free or cheap at yard sales, salvage yards, or even curbside trash piles.
- Totally unique: No two wind turbine pumpkins look exactly alike, and you can customize colors and details to match your style.
Think of it as industrial farmhouse meets cozy fall vibesa little bit of metal, a lot of charm.
What You’ll Need for Your Wind Turbine Pumpkin
Before you start painting, gather your supplies. You can adjust this list depending on what you already have in your garage or craft stash.
Core Materials
- 1 roof wind turbine (metal, removed from roof and cleaned)
- Outdoor spray paint in pumpkin-inspired colors (orange, copper, rust, terracotta, or brown)
- Dark spray paint or craft paint for shading (brown or black)
- Green paint for the stem and vines
Stem and Vine Options
- Short wood post, old fence post, or thick wooden dowel for a rustic stem
- Upside-down clay flowerpot or metal fitting for a more industrial look
- Grapevine, jute rope, or wired jute cord for curly vines
- Artificial leaves or faux greenery (optional)
Tools and Prep Supplies
- Wire brush or stiff scrub brush
- Medium-grit sandpaper or sanding sponge
- Metal primer spray (especially for shiny or rusty surfaces)
- Drop cloth or large piece of cardboard
- Work gloves and safety goggles
- Metal file (for smoothing sharp edges)
- Exterior clear sealer (optional, for extra durability)
Gather everything before you begin so you’re not chasing down paint cans with orange fingers later.
Step-by-Step: Turning a Roof Wind Turbine into a Pumpkin
Step 1: Inspect and Clean the Turbine
Old roof vents tend to be dusty, greasy, and occasionally covered in mystery grime. Start by giving your turbine a quick safety check. Look for sharp edges, loose blades, or broken metal pieces. Use a metal file to smooth any dangerously sharp areas, and tighten screws if needed.
Next, scrub the turbine with warm, soapy water and a stiff brush to remove dirt, spiderwebs, and old debris. Rinse thoroughly and let it dry completely. This helps your primer and paint stick properly and prevents peeling later.
Step 2: Sand and Prime for Paint
Many roof wind turbines have a slick, galvanized finish or old, peeling paint. Lightly sand the surface with medium-grit sandpaper to scuff up the metal and knock off any loose paint. You don’t need to remove every speck of the original finish, but you do want a surface that’s not shiny and slick.
Once you’ve sanded, wipe away dust with a clean, dry cloth. Then apply a coat of metal primer spray, following the can’s directions. Use smooth, sweeping motions and several light coats rather than one heavy one. Let the primer dry thoroughly before moving on.
Step 3: Spray Paint the Pumpkin Base Color
Now comes the fun part: color. Place your turbine on a drop cloth in a well-ventilated outdoor area. Shake your spray paint can well, then apply thin, even coats over the entire surface.
Popular pumpkin colors include bright orange, burnt orange, deep copper, or a rich rusty brown. Some DIYers even layer two shadesstarting with a darker rust tone and misting a lighter orange over the top to create depth.
Rotate the turbine between coats to hit all the nooks and crannies. Let each coat dry according to the instructions on the can before adding another.
Step 4: Add Shading and Highlights for Realistic Ridges
The ribs of the turbine already look like pumpkin ridges, so you can take advantage of that. Use a slightly darker spray paint, or even diluted craft paint with a small brush, to shade the valleys between the “ribs.” Lightly mist or brush along those lines to create depth.
You can also use a lighter colorlike a pale orange, gold, or copperon the high points. A quick dusting along the tops of the ridges makes the pumpkin look more dimensional and gives it a sun-kissed effect.
Remember: less is more with shading. Start light, step back, and then build up gradually if you want more drama.
Step 5: Create and Attach the Stem
Without a stem, your turbine still looks like a clever project. With a stem, it instantly reads as a pumpkin. You have a lot of creative freedom here:
- Wooden stem: Cut a short length of a wooden post or dowel, then paint or stain it. Attach it to the top opening of the turbine with outdoor adhesive, screws, or a combination of both.
- Clay pot stem: Flip a small clay flowerpot upside down, paint it green or brown, and secure it to the top. This gives a fun, slightly whimsical shape.
- Found object stem: Old lamp parts, metal fittings, or vintage knobs can create a steampunk or industrial vibe.
Paint the stem in a deep green, brown, or weathered wood finish. Once it’s attached and dry, you’re ready to add vines.
Step 6: Add Curly Vines and Leaves
Real pumpkins have wild, curly vines, and your metal pumpkin should, too. Wrap grapevine, jute rope, or wired jute around the base of the stem. If you want tight curls, wrap the material around a dowel or broom handle, let it sit, then slide it off to keep the spiral shape.
You can attach faux leaves or small greenery stems with hot glue or floral wire. If your pumpkin will live outdoors, use strong outdoor adhesive or zip ties instead of regular hot glue, which can soften in high heat.
Step 7: Optional – Add Lights Inside
If your turbine is open or has gaps between the blades, adding lights turns your pumpkin into a glowing focal point at night. Battery-operated fairy lights or a small outdoor-rated LED puck light work well.
Simply tuck the lights inside the turbine, making sure any battery pack is accessible. At dusk, flip them on and enjoy the soft glow shining through those metal ribs.
Step 8: Seal and Place Your Pumpkin Decor
For outdoor use, consider sealing your pumpkin with a clear, exterior-grade topcoat. This helps protect the paint from rain and UV rays. Choose a matte or satin finish if you want your pumpkin to look more natural, or go with gloss for a sleek, metal look.
Once everything is dry, place your roof turbine pumpkin on your front porch, in a flower bed, by the mailbox, or next to a hay bale display. Group it with real pumpkins, mums, and lanterns for a full-on fall vignette.
Design Ideas and Variations
Once you’ve made one wind turbine pumpkin, it’s very hard not to want a whole pumpkin patch. Here are some fun twists to try:
- Steampunk pumpkin: Keep the metal mostly exposed, add touches of copper or bronze, and glue on old knobs, gears, or hardware for a steampunk-inspired look.
- Neutral farmhouse pumpkin: Paint the turbine a soft white, cream, or light gray, then lightly distress the edges. Pair with natural jute vines and eucalyptus leaves for a calm, neutral palette.
- Jack-o’-lantern face: Use black paint or vinyl to add a classic jack-o’-lantern face. If you add interior lighting, the facial features will glow at night.
- Metal mix patch: Use other metal objectslike bundt pans, jello molds, or dryer ventsto create different sizes of pumpkins and style them together.
- Oversized centerpiece: Use a smaller turbine (or a cut-down section) as a table centerpiece with fairy lights and faux leaves around the base.
The trick is to lean into the industrial texture rather than hide it. That slightly imperfect, weathered metal is part of the charm.
Safety Tips for Working with Old Roof Turbines
Before you dive into your project, keep these safety reminders in mind:
- Watch for sharp edges: Always wear gloves and safety glasses when handling the turbine and sanding or filing metal.
- Use paint safely: Spray paint in a well-ventilated outdoor area, and wear a mask if you’re sensitive to fumes.
- Check for old coatings: Very old metal pieces might have old finishes that aren’t ideal to sand heavily. When in doubt, use a bonding primer and avoid aggressive sanding.
- Secure display: Large metal pumpkins can be top-heavy. If you’re placing them in a windy area, consider anchoring them with bricks or stakes behind the display.
Where to Find Roof Wind Turbines to Upcycle
If you don’t already have a retired turbine vent, you’ve still got options:
- Local roofing contractors: Call and ask if they have old vents they’re removing from roofs. Many are happy to give them away.
- Salvage yards and architectural reuse centers: These often have bins of old roofing vents, sometimes for just a few dollars.
- Yard sales and flea markets: Keep an eye out for metal “junk” piles. That rusty round vent could be your next pumpkin.
- Curbside finds: In some neighborhoods, people set out old building materials for trash pickup. A quick drive the week before bulk trash day can be surprisingly fruitful.
Once you know what you’re looking for, you’ll start spotting potential pumpkins everywhere.
Common Questions About Roof Turbine Pumpkins
Can I leave my turbine pumpkin outside all season?
Yes, as long as you use outdoor-friendly paint and, ideally, a clear sealer. Over time, some natural weathering may occur, but that usually adds to the rustic look. If you live in a very wet or snowy climate, you may want to move your pumpkin to a covered area when storms roll in.
What if my turbine is really rusty?
Light surface rust is fine and can even add character. Just scrub off loose rust with a wire brush, sand lightly, and use a rust-inhibiting primer before painting. If the metal is flaking or structurally weak, it might be better as a decorative piece tucked into a covered porch rather than out in the yard.
Does the turbine need to spin?
Not at all. Some people leave the spinning mechanism in place for fun, especially if they display the pumpkin where a breeze can move it. Others prefer to secure or remove moving parts so the pumpkin sits solidly in one position.
Can I do this project with plastic vents?
Most classic roof turbines used for these pumpkins are made of metal. If you have a plastic vent, you can still try, but you’ll need a spray paint designed for plastic and you’ll need to keep it away from direct heat sources.
Real-Life Experiences: Lessons from the Wind Turbine Pumpkin Patch
Every DIY project teaches you something, and wind turbine pumpkins are no exception. Here are some practical, experience-based tips to make your project smoother and more satisfying:
1. Prep Takes Longer Than You Think (But It’s Worth It)
Most people underestimate how much time it takes to scrub, sand, and prime an old piece of metal. The temptation is to say, “It’s just decor, I’ll skip a step.” The problem is that skipping prep often leads to peeling paint or uneven coverage down the road.
One common experience: the first coat of paint looks blotchy on unprimed metal, and it takes extra coats to compensate. By contrast, a well-primed turbine drinks in that first layer of color and gives you a smooth, even finish much faster. So yes, prep is a little boring, but it’s the difference between “cute for one season” and “I can use this every fall for years.”
2. Test Your Colors Before Committing
Spray paint can look different on metal than it does on the cap. Many crafters have had the experience of buying what they thought was a warm pumpkin orange, only to find it reads neon traffic cone in real life. To avoid this, always test your paint on a small area or scrap piece first.
If you want depth, think in layers: a deeper rust or brown as the base, then a brighter orange on top. You can also add a light mist of gold or copper for a subtle metallic sheen. The extra few minutes of color testing will save you from a complete repaint.
3. Don’t Overthink the “Perfect” Stem
One of the most charming things about wind turbine pumpkins is how quirky their stems can be. People have used everything from fence post scraps and broken lamp parts to thrift-store finials and small clay pots. The key is proportionyour stem should feel substantial compared to the size of the pumpkin, but it doesn’t have to be a precise shape.
If you’re stuck, start simple with a chunk of wood. You can always upgrade later by swapping it out or layering additional decorative elements around it, like knotted rope or extra leaves.
4. Plan Ahead for Where You’ll Display It
Roof turbines are larger and heavier than they look in photos. Before you finish your pumpkin, think about where it’s going to live. If it’s going on a porch step, make sure there’s enough room for people to walk safely. If it will sit in the yard, consider whether it needs a base (like a pallet, stepping stone, or straw bale) to keep it stable on uneven ground.
Some people discover too late that their pumpkin rolls slightly because the bottom is rounded. If that happens, you can wedge small rubber shims or bricks at the back, or you can mount the turbine to a simple wood platform hidden underneath.
5. Add Lights if You Want the “Wow” Factor at Night
During the day, the color and texture of your metal pumpkin do most of the talking. At night, though, lighting turns it into a real showpiece. Battery-operated fairy lights are easy to tuck inside the turbine, and warm white bulbs give a cozy glow that feels candle-like without the fire hazard.
A lot of DIYers report that guests don’t fully “get” the project until they see the pumpkin lit from within. The glow between the metal ribs emphasizes the pumpkin shape and makes your upcycled decor look intentional and magical, not just like a painted vent.
6. Embrace the Imperfections
Old roof vents come with dents, dings, and a bit of personality. Instead of fighting that, lean into it. Small dents catch light in interesting ways once painted, and a little rust or patina can add that “lived-in farmhouse” look that brand-new decor can’t match.
If something goes wronga drip in the paint, a crooked stem, or vines that refuse to curl just rightremember that real pumpkins are also imperfect. Step back and look at the whole display instead of obsessing over one tiny flaw. Most visitors will just see a clever, charming pumpkin, not the tiny mistake you keep staring at.
7. Make It a Group Project
Because roof turbine pumpkins are large, visible, and a little bit quirky, they make a great group project with friends, neighbors, or family. One person can focus on cleaning and sanding, another on painting, and someone else on gathering stems and vines. If you can get your hands on several turbines, you can even host a “pumpkin-making day” and everyone goes home with their own statement piece.
Working together also means you share tips in real timelike which spray nozzle clogs the least, or which combination of colors looks best in the sunlight. The process becomes just as fun and memorable as the finished decor.
Final Thoughts: From Rooftop Scraps to Fall Showpiece
Repurposing a roof wind turbine into cute pumpkin decor is one of those projects that looks impressive but is surprisingly achievable. With basic tools, some spray paint, and a bit of creativity, you can transform a discarded metal vent into a whimsical, oversized pumpkin that anchors your fall decorating.
Whether you keep the look rustic and weathered, go full steampunk with metal accents, or paint a classic bright orange jack-o’-lantern, your wind turbine pumpkin will be a one-of-a-kind piece you bring out every year. And the best part? Every time someone asks, “Where did you buy that?” you get to smile and say, “Actually, it used to be on a roof.”