If you’ve ever looked at a pile of banana peels and thought, “I should compost,” and then immediately
got overwhelmed by the idea of building a whole compost systemgood news: you can make a legit,
effective DIY compost bin faster than it takes to watch a “quick” recipe video with 19 ads.
This guide shows you two ridiculously easy options that work for real-life backyards:
a wire-mesh ring bin (the speed champion) and a vented trash-can bin (the neat freak’s favorite).
Both keep your food scraps and yard waste in one place, help them break down efficiently, and turn “garbage”
into dark, crumbly compost your garden will act smug about.
Why a Simple DIY Compost Bin Beats “Just Make a Pile”
You can compost in an open pile, but a basic bin makes everything easier: it keeps materials contained, helps
retain heat and moisture, discourages uninvited critters, and makes turning (mixing) less of a wild wrestling match.
For beginners especially, a bin is like bumpers in bowlingstill your throw, just fewer gutters.
What compost actually needs
- Air (microbes need oxygen, and your neighbors need you to avoid stink)
- Moisture (not swampy, not bone-dry)
- Balance of “browns” (dry carbon stuff) and “greens” (fresh nitrogen stuff)
- Time (nature doesn’t rush, but we can nudge it along)
Option A: The 5–10 Minute Wire-Mesh Compost Bin (Fastest Build)
This is the classic “hardware cloth ring” compost bin. It’s cheap, sturdy, breathable, and you can build it
with basic tools. It also scales nicelysmall yard? make it smaller. Big garden? go bigger.
Materials (quick shopping list)
- Hardware cloth (galvanized wire mesh), about 3 feet tall
- Wire ties or heavy-duty zip ties (wire is more durable outdoors)
- Work gloves (your hands will thank you)
- Tin snips or heavy wire cutters
- Optional: 3–4 stakes or posts for extra stability
Build steps
-
Pick a spot. Choose a level area with decent drainage. Partial shade is nice so the pile doesn’t dry out
as fast, but full sun can help in cold weather. -
Cut the mesh. Unroll your hardware cloth and cut a length long enough to form a circle wide enough to
hold a decent pile. Bigger circles are easier to manage (more volume = easier to heat up). -
Tame sharp edges. Snip so cut ends are neat, then fold or flatten any pokey bits. This is not a test of
your pain tolerance. - Form a cylinder. Bend the mesh into a circle and overlap the ends.
- Fasten it. Use wire ties every few inches up the seam so it holds firm.
- Stabilize (optional). If wind or dogs are a factor, add stakes around the inside edge.
Why this bin works so well
The open mesh gives excellent airflow, which helps decomposition and reduces odors. And when it’s time to turn or
harvest, you can unfasten one side like a “compost gate,” peel it back, and get to the good stuff.
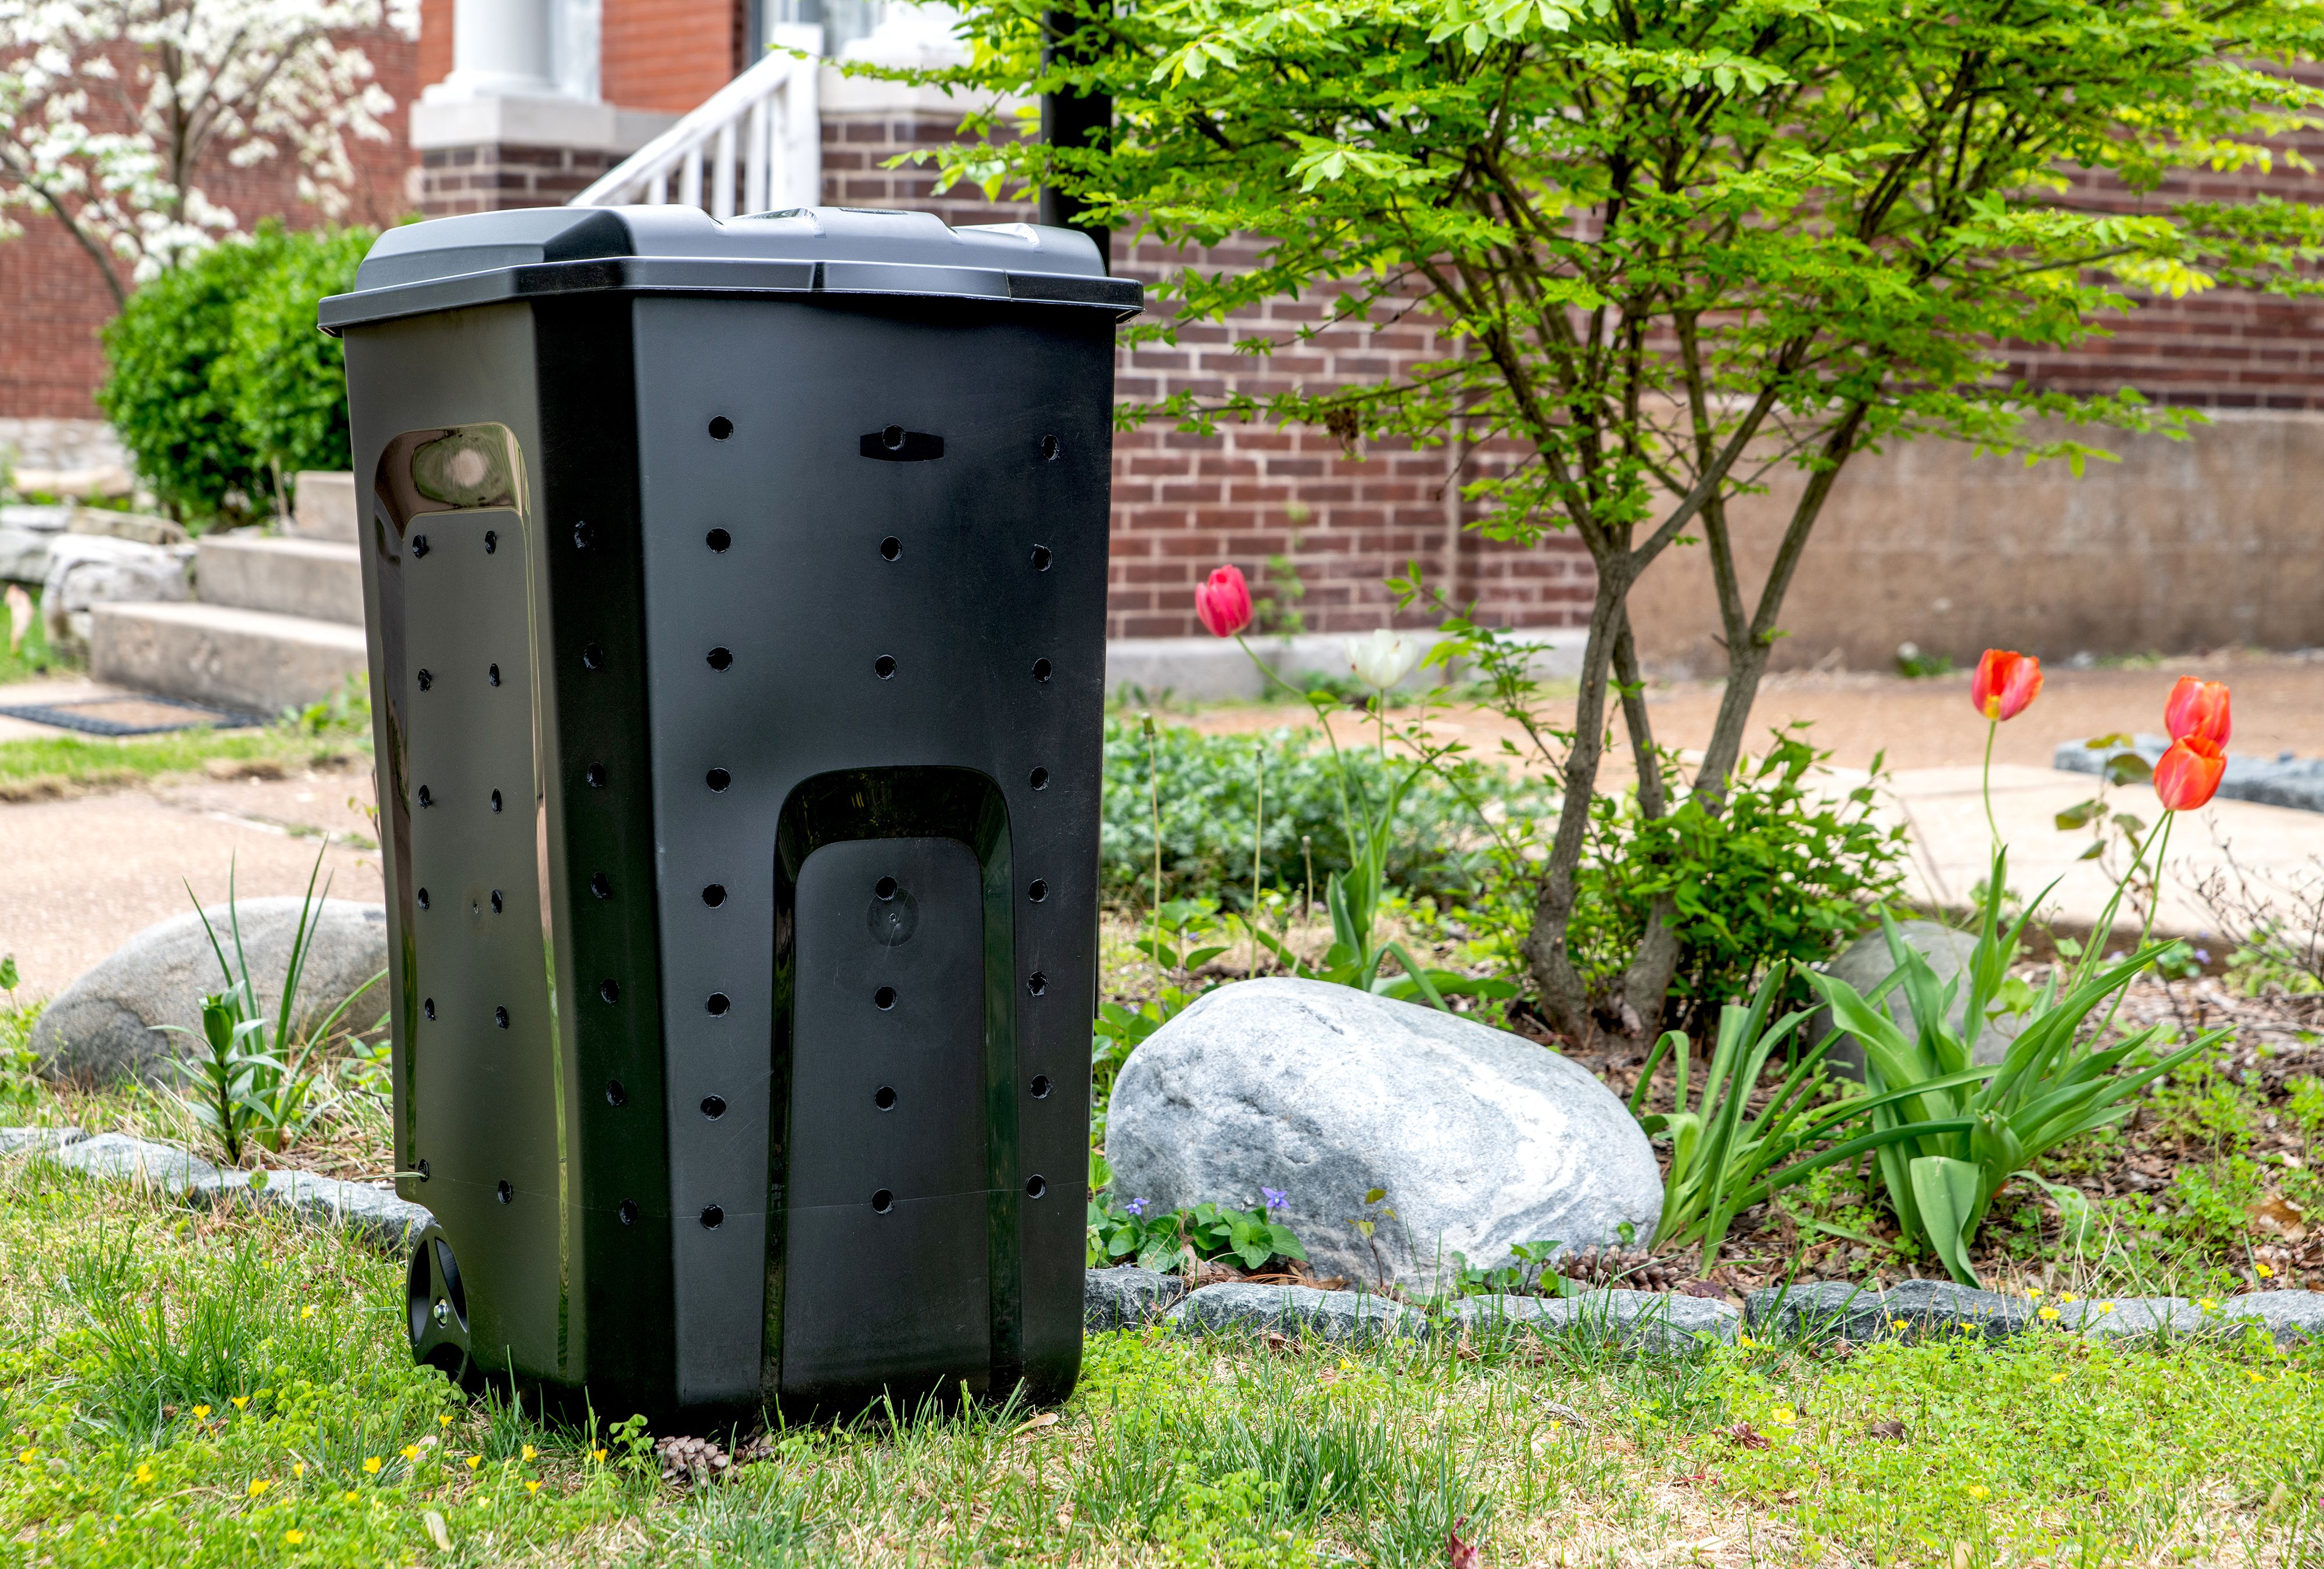
Option B: The “Neat & Tidy” Trash-Can Compost Bin (Still Fast, Less Mess)
If you want composting to look like you have your life together (even if your junk drawer suggests otherwise),
a vented trash-can bin is a solid pick. It contains scraps, helps deter pests, and keeps things visually calm.
Materials
- Plastic trash can with a tight lid (roughly 30–55 gallons is common)
- Drill and drill bits
- Optional: a broomstick or sturdy rod for mixing (turning)
- Optional: a few handfuls of dry leaves or wood chips for a starter layer
Build steps
-
Drill ventilation holes. Add holes around the sides and lid so air can move through the material.
Space them evenly so the can “breathes.” - Keep it stable. Put the can where it won’t wobble when you stirflat ground is your friend.
- Add a dry base layer. Toss in a few inches of dry leaves, straw, or wood chips. This helps manage moisture.
-
Start layering. Add a layer of browns, then a layer of greens, and keep alternating. Think “lasagna,” but
instead of cheese, you’re using yesterday’s salad regrets.
Pro tip: avoid compost “air jail”
Trash cans can compact material if you add a lot of wet scraps without enough dry browns. If things look soggy,
mix in more dry leaves, shredded cardboard, or paper (non-glossy). Air pockets are good. Compost likes to breathe.
What to Put in Your Compost Bin (and What to Skip)
Great “greens” (nitrogen-rich)
- Fruit and veggie scraps
- Coffee grounds and paper filters
- Tea leaves (check tea bags for plastic fibers)
- Fresh grass clippings (in moderation)
- Plant trimmings
Great “browns” (carbon-rich)
- Dry leaves (the MVP of backyard composting)
- Shredded cardboard (no glossy coating)
- Shredded paper (non-glossy, minimal ink)
- Straw or dried plant stalks
- Untreated wood chips (small amounts help with airflow)
Skip these (your future self will be grateful)
- Meat, fish, dairy, grease, and oily foods (odor + pests = bad combo)
- Pet waste (pathogens)
- Coal or charcoal ash
- Plants treated with heavy pesticides, or glossy/foil-lined packaging
- Weeds with mature seeds (unless you’re running a truly hot, managed pile)
How to Start Composting Right (Without Overthinking It)
Composting success is mostly about small habits that keep the pile comfortable for microbes. They’re doing the work;
you’re just managing their workspace like a chill office manager who occasionally brings snacks and stirs things.
1) Aim for “more browns than greens”
If you only add kitchen scraps, the pile can get wet and smelly. Browns absorb moisture, create airflow, and help keep
odors down. A simple approach: every time you add a bowl of food scraps, cover it with a generous layer of dry leaves
or shredded cardboard.
2) Moisture should feel like a wrung-out sponge
Too dry? Decomposition crawls. Too wet? Oxygen drops and odors rise. If it’s dry, sprinkle water and mix. If it’s soggy,
add browns and turn to loosen it.
3) Turn (mix) for speed
Turning adds oxygen and blends materials so decomposition stays active. With a wire-mesh bin, you can loosen and mix with
a garden fork. With a trash-can bin, stir with a stick or roll the can gently (if it’s designed for that).
4) Chop big stuff smaller
Smaller pieces break down faster. You don’t need to mince your banana peel like a celebrity chefjust avoid tossing in
whole cornstalks and expecting miracles.
Troubleshooting: Fix the 5 Most Common Compost Problems
Problem: “It smells bad.”
Usually this means the pile is too wet, too many greens, or not enough airflow. Add browns, mix thoroughly, and keep
food scraps buried under a dry layer.
Problem: “It’s not breaking down.”
Check moisture and mix. If it’s dry, water lightly. If it’s cold and inactive, add more greens and turn. If everything is
huge and chunky, chop future additions smaller.
Problem: “Critters are visiting.”
Keep meat/dairy/oils out. Bury food scraps in the center and cap with browns. If wildlife is persistent, the trash-can bin
(with a secure lid) is often the better setup.
Problem: “It’s too dry.”
Water lightly as you turn. Also consider moving the bin to partial shade or using a simple cover during hot spells to slow
evaporation.
Problem: “It’s too wet or slimy.”
Add dry leaves, shredded cardboard, or straw and mix. Wet piles need both carbon and air to recover.
How Long Until You Get Finished Compost?
It depends on what you add and how actively you manage it. A turned, well-balanced pile can finish much faster than a set-it-and-forget-it pile.
The compost is ready when it looks dark and crumbly, smells earthy (like a forest floor), and you can’t recognize the original ingredients.
If you still see half a lemon with a suspicious grin, give it more time.
How to Use Compost (a.k.a. Garden Gold)
- Mix into garden beds to improve soil texture and nutrient-holding ability
- Top-dress lawns with a thin layer to boost soil life
- Add to potting mixes (screen it first so it’s fine and even)
- Mulch around plants (keep it a few inches away from stems)
Safety and “Don’t Make This Weird” Tips
- Wash hands after handling compost and toolsbasic but important.
- Wear gloves when building with wire mesh (sharp edges are sneaky).
- Skip pet waste in home compost bins to reduce pathogen risk.
- Don’t add chemically treated wood or glossy packaging.
Conclusion: Your 10-Minute Bin Is Future You’s Favorite Gift
Composting doesn’t need to be complicated. Build a wire-mesh bin if you want maximum airflow and the fastest setup.
Choose a vented trash-can bin if you want tidy containment and fewer pest worries. Then keep it simple:
add browns, add greens, keep it lightly moist, and turn when you can.
The best DIY compost bin is the one you’ll actually use. Start small, keep a stash of dry leaves or cardboard nearby,
and let your “waste” turn into something your plants will brag about.
Extra: Real-World Experiences to Help You Compost Like a Normal Human (Not a Compost Robot)
Most people don’t fail at composting because they’re “bad at gardening.” They fail because composting bumps into real life:
busy schedules, rainy weeks, surprise fruit flies, and that one family member who keeps tossing in greasy leftovers like the bin is a magic portal.
Here are experience-based lessons (collected from the common stuff beginners run into) that can save you a lot of trial-and-error.
Experience #1: The “I Only Have Kitchen Scraps” phase
Almost everyone starts here. You toss in veggie peels, coffee grounds, maybe a sad spinach bag that lost the will to live.
Then a week later, you open the bin andboomwet clumps, smells, and a texture that can only be described as “soup adjacent.”
The fix that most people discover: keep browns ridiculously accessible. A paper bag of dry leaves near the bin. A small box of shredded cardboard in the garage.
When browns are easy to grab, you naturally start covering scraps as you go, and the bin stops acting like a swamp.
Experience #2: Wire mesh bins are fast… until the wind teaches you humility
The wire-mesh ring bin is a speed build and it composts beautifullybut it’s also light. In breezy areas, people often learn the hard way that a half-full bin
can shift, bow, or even scoot a bit. The easy upgrade is staking it down (or adding a couple of posts) so it stays put.
Another real-life trick: start with a “leafy base.” Dry leaves and small twigs at the bottom help keep the pile fluffy and stable.
It’s not fancy. It just works.
Experience #3: The “fruit flies invited their cousins” surprise
If fruit flies show up, it doesn’t mean composting is grossit means you’ve created an all-you-can-eat buffet with no lid etiquette.
People who solve this usually do two things: bury food scraps in the center (not right on top) and cap with a thick brown layer.
Some also freeze scraps until compost day, which reduces odor and pests while keeping things simple. The big lesson: compost bins like layers,
and pests hate being blocked from the goods.
Experience #4: The “it’s doing nothing” winter slump
In cold seasons, piles slow down. Beginners sometimes assume they broke composting forever. In reality, decomposition just chills out (literally).
What experienced composters do is keep adding materials, keep browns stocked, and mix occasionally when weather allows. When temperatures rise,
the pile wakes up and gets busy again. If you want to feel extra competent, you can tuck the bin in a spot with a little sun and wind protection.
But even if you do nothing special, spring usually presses the “resume” button.
Experience #5: The moment compost finally looks like compost
There’s a specific day many composters remember: you dig in and find dark, crumbly material that smells earthylike good soil.
It’s weirdly satisfying. People often describe it as “I can’t believe my trash turned into this.”
That first finished batch usually isn’t perfect (maybe a few eggshell bits or woody pieces), but it’s usable.
A common move is to screen out the chunky stuff and toss it back in to keep breaking down, while using the finished compost on beds and containers.
Once you see that transformation, composting stops feeling like a chore and starts feeling like a tiny backyard superpower.
If you take only one “experience-based” tip: make composting convenient. Keep browns nearby. Put the bin where you’ll actually walk.
And don’t chase perfectionchase consistency. A simple bin, used regularly, beats the “ultimate compost system” you build once and never touch again.