There are two kinds of people in this world: the ones who “just want one cookie,” and the ones who accidentally eat four
while standing over the sink like a raccoon guarding treasure. If you’re here, I’m going to assume you’re the second kind.
Welcome. Let’s bake the kind of chocolate chip cookies that make your kitchen smell like a cozy memory and your text
messages sound like: “I made cookies. Do you want some?” (You don’t. You want them to know you made cookies.)
What Makes a Chocolate Chip Cookie “Perfect”?
“Perfect” is personal. Some people want a thin, crispy cookie with lacy edges and a snappy bite. Others want thick,
chewy centers that bend like a warm hug. The good news: you don’t need a culinary degreejust a few smart choices
about fat, sugar, flour, and time.
Pick your cookie personality
- Chewy & gooey: More brown sugar, slightly underbaked, rested dough.
- Crispy edges, soft middle: A balanced sugar mix, proper chilling, pull at “barely done.”
- Thick & bakery-style: Colder dough, a bit more flour structure, bigger scoops.
The Classic (Improved) Chocolate Chip Cookie Base
This recipe is designed to land in the sweet spot: crisp edges, chewy center, rich buttery flavor, and plenty of
chocolate puddles. It borrows time-tested ratios from classic American cookie formulas, then upgrades the process
with modern best practices (like resting/chilling and smart pan setup).
Ingredients (makes about 24 medium cookies)
- 2 1/4 cups (270g) all-purpose flour
- 1 teaspoon baking soda
- 1 teaspoon fine salt (or 3/4 teaspoon if you’re salt-sensitive)
- 1 cup (226g) unsalted butter, divided (see method)
- 3/4 cup (150g) packed brown sugar
- 1/2 cup (100g) granulated sugar
- 2 teaspoons vanilla extract
- 1 large egg + 1 large egg yolk (for chew and richness)
- 2 cups (340g) semi-sweet chocolate chips or chopped chocolate (or a mix)
- Optional: 3/4 cup chopped toasted nuts (walnuts/pecans)
- Optional finishing move: flaky sea salt for the tops
Method
-
Brown half the butter (optional but excellent): Melt 1/2 cup (113g) butter in a small pan over
medium heat. Keep cooking until it smells nutty and you see golden-brown bits. Pour into a mixing bowl and let it cool
until warmnot hot. - Combine dry ingredients: In a separate bowl, whisk flour, baking soda, and salt. Set aside.
-
Cream the remaining butter + sugars: Add the other 1/2 cup (113g) butter (softened) to the bowl with
the cooled brown butter (or use all softened butter if skipping browning). Add brown sugar and granulated sugar.
Beat until the mixture looks lighter and fluffy, about 2–3 minutes. - Add eggs and vanilla: Beat in the egg and yolk, then vanilla. Mix until glossy and well combined.
-
Mix in dry ingredients gently: Add the flour mixture and mix just until no dry flour remains.
Overmixing = tougher cookies. (We want “chewy,” not “jaw workout.”) - Fold in chocolate: Stir in chocolate chips/chunks (and nuts if using).
-
Rest/chill the dough: Cover and refrigerate at least 1 hour. For deeper flavor and better texture,
rest 12–24 hours if you can. (More on why this matters below.) -
Bake: Heat oven to 350°F. Line baking sheets with parchment paper. Scoop dough into 2-tablespoon balls
(about 35–40g each) and space them 2–3 inches apart. Bake 10–12 minutes, until edges look set and lightly golden but
centers still look a bit soft. -
Cool smartly: Let cookies cool on the sheet 2 minutes (they’ll finish setting), then move to a rack.
If using flaky salt, sprinkle immediately after they come out.
The Cookie Science That Actually Helps You Bake Better
Butter: temperature and technique decide texture
Softened butter creamed with sugar traps air, which can help lift and texture. Melted or browned butter boosts flavor and
can make cookies chewierbut it also encourages spread if you bake right away. That’s why chilling is the best “cookie
insurance” you can buy (and it’s free).
Brown sugar vs. white sugar: chew vs. crisp
Brown sugar contains molasses, which brings moisture and chew. Granulated sugar helps cookies spread a bit more and
encourages crisp edges. If your dream cookie is chewy, lean more brown sugar; if you want crisp, lean more white sugar.
Eggs: one whole egg + one yolk = a cheat code for chew
A yolk adds fat and emulsifiers, helping the dough feel richer and the baked cookie stay tender and chewy. This is a
classic “thick and chewy” trick used in many well-tested cookie formulas.
Flour: structure matters (and so does measuring)
Too little flour can make cookies spread thin; too much flour makes them dry and puffy. If you can, use a kitchen scale.
If you’re using cups, spoon flour into the cup and level itdon’t scoop straight from the bag like you’re digging for
hidden treasure.
Baking soda vs. baking powder: not the same thing
Baking soda tends to deepen browning and gives cookies a more rugged, crackly look. Baking powder adds extra lift and can
push cookies toward cakier, smoother tops. Some recipes use both for a balance, but if you’re chasing a classic chewy
chocolate chip cookie, baking soda is usually the star.
The Big Upgrade: Resting (Chilling) Cookie Dough
If you take only one tip from this entire article, take this: chilling your dough improves cookies. Here’s what resting
does in normal-human terms:
- Less spread: Cold fat melts slower, so cookies hold their shape longer in the oven.
- Better texture: Flour hydrates, giving you a more cohesive, chewier bite.
- Deeper flavor: Over time, ingredients meld and you get more caramel-like notes.
How long should you chill?
- 15 minutes: Helpful in a pinch (especially if the dough feels warm).
- 1–2 hours: Noticeably better shape and texture.
- 12–24 hours: “Why do these taste like a bakery?” level.
- Up to 72 hours: Some famous recipes swear by itgreat if you’re planning ahead.
How to Customize Your Cookies (Without Chaos)
1) Make them chewier
- Use more brown sugar than white sugar.
- Add one extra egg yolk (as in the base recipe).
- Chill the dough longer.
- Pull cookies when centers still look slightly underdone; let carryover heat finish them.
2) Make them crispier
- Increase granulated sugar slightly (swap 2–3 tablespoons from brown to white).
- Bake 1–2 minutes longer (watch edges closely).
- Use smaller scoops for more edge-to-center crispness.
3) Make them thicker (bakery-style)
- Chill the dough overnight.
- Scoop larger portions (3 tablespoons), and keep dough cold between trays.
- Use parchment paper and a cool baking sheet for each batch.
Chocolate Choices: Chips vs. Chunks vs. “I Chopped a Bar Like a Hero”
Chocolate chips hold their shape (that’s literally part of their job). Chopped chocolate melts into pools and pockets.
Many top recipes use a mix because it gives you structure and drama. If you want that bakery look, try half
chips, half chopped chocolate.
Troubleshooting: When Cookies Misbehave
“Why are my cookies flat?”
- Your oven runs cool: Use an oven thermometer if possible.
- Butter/dough too warm: Chill longer before baking.
- Old leavening: Expired baking soda/powder can wreck the lift.
- Pan problems: Greased pans or very slick liners can increase spread; parchment is a solid choice.
“Why are they cakey?”
- Too much flour (common with scooping-packed cups).
- Too much baking powder (or both powder + soda when you wanted chewy).
- Overmixing after flour goes in.
“Why are they dry?”
- Overbaked (a minute too long matters).
- Too much flour, not enough sugar/fat, or dough wasn’t properly measured.
- Stored improperly (air is the cookie’s greatest enemy after baking).
Make-Ahead, Storage, and Freezer Strategy
Chocolate chip cookie dough is basically a gift to your future self. Scoop the dough into balls, freeze on a tray, then
store in a freezer bag. Bake from frozen at 350°Fjust add a minute or two.
- Room temp storage: Airtight container 3–4 days (add a slice of bread to help keep them soft).
- Fridge dough: Covered dough can hold for days; many bakers prefer 24–72 hours for flavor.
- Freezer dough: Common guidance is several weeks; label your bag so you’re not playing “mystery dough.”
Quick Food Safety Reality Check (a.k.a. Don’t Eat Raw Dough)
I know. Raw cookie dough tastes like rebellion. But raw flour can carry germs, and raw eggs can too. The safest move is
to bake your doughor if you want “edible cookie dough,” use a recipe designed for that (typically with heat-treated
flour and no raw eggs). If kids are helping, this matters even more: hands go from dough to mouths at lightning speed.
of Real-Life Cookie Energy: The Chocolate Chip Cookie Experience
Baking chocolate chip cookies isn’t just following a recipeit’s a small kitchen ritual that has a funny way of turning
an ordinary day into a “we should probably light a candle” moment. It usually starts with a decision that feels
responsible: “I’ll make a batch and freeze half the dough.” This is the baking equivalent of saying you’ll only scroll
social media for five minutes. The dough gets mixed, the chocolate goes in, and suddenly you’re standing over the bowl
thinking, “That’s not that many chips. I could add more.” You do. You always do.
Then comes the first real test of character: chilling the dough. Waiting is inconvenient. Waiting is also the difference
between cookies that look politely homemade and cookies that look like they belong behind a bakery glass with a price tag
that makes you whisper, “For one cookie?” When dough rests, it firms up, the flavor deepens, and the cookies bake with
better shapemeaning you can pull a tray from the oven and feel like you just won an extremely delicious science fair.
And honestly, that little victory hits different on a Tuesday.
The best part is the sensory parade. Browned butter smells like toasted nuts and warm caramel. Vanilla makes everything
smell more “dessert” even before the oven is on. And when the cookies bake, the kitchen fills with that unmistakable
aroma that makes people “just happen” to wander in and ask what you’re making. If you live with others, cookie smell is
basically a dinner bell. If you live alone, cookie smell is a motivational speaker: “Get up, champion. There are cookies.”
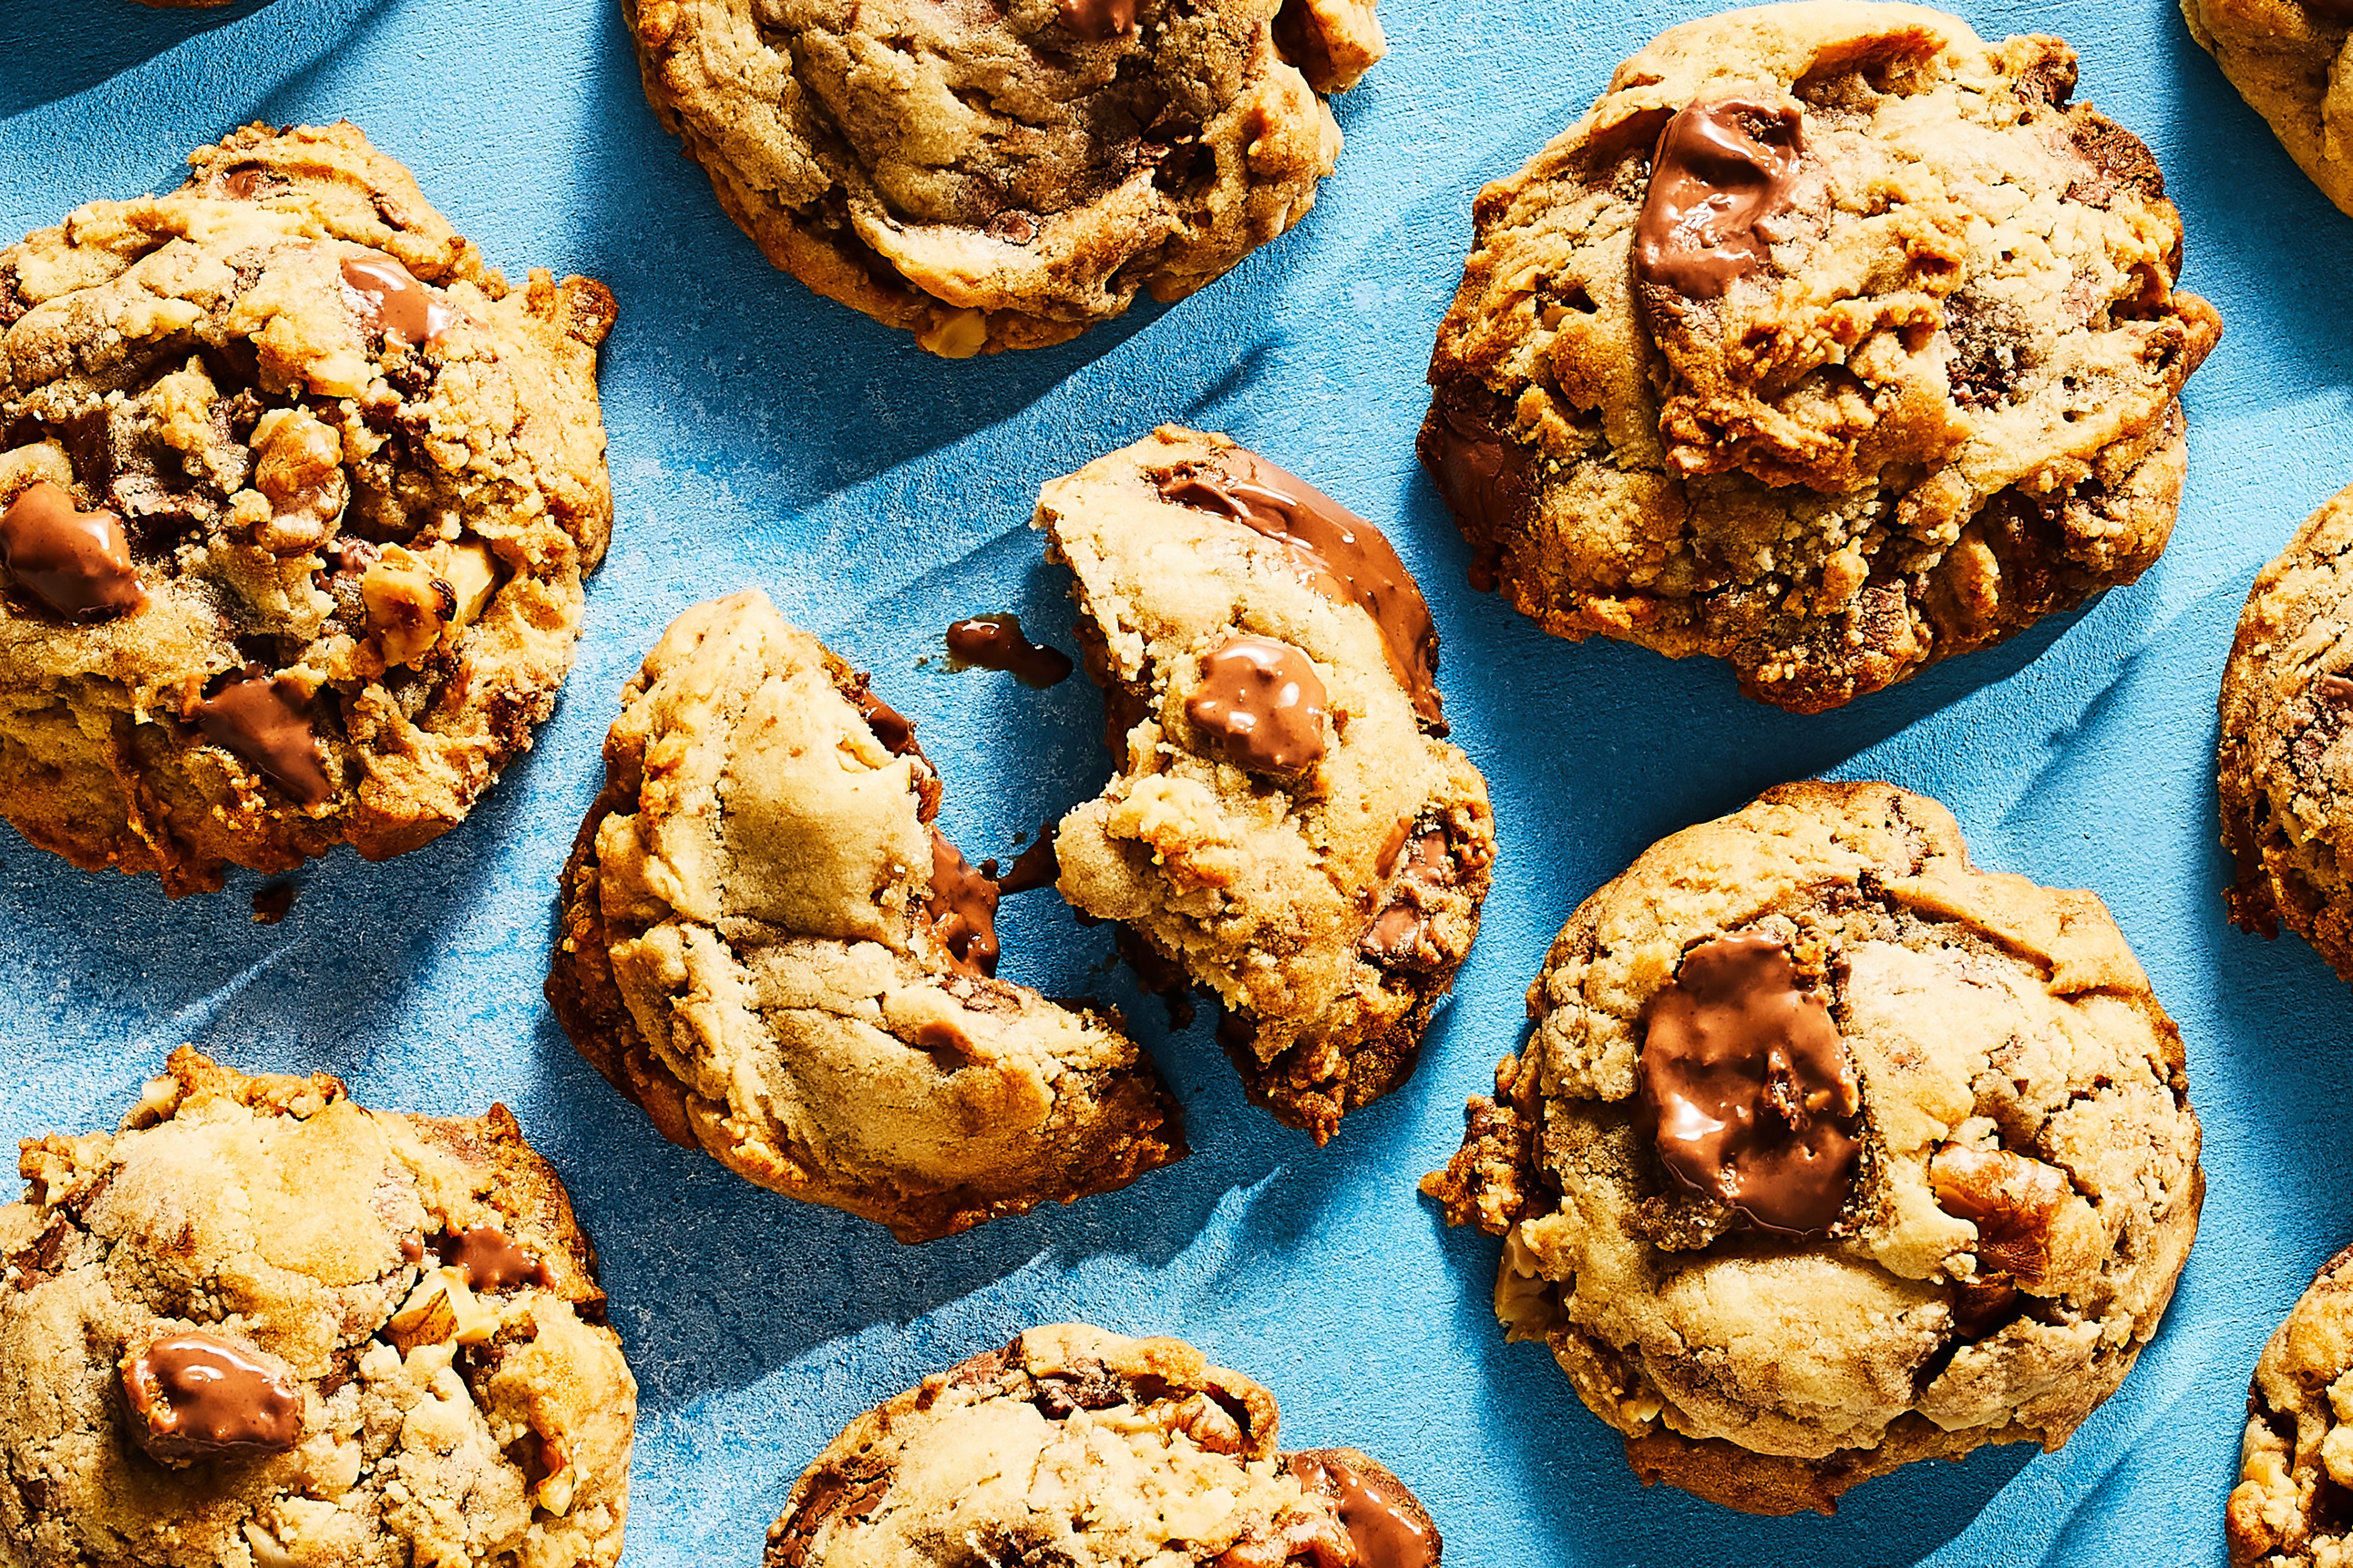
Pulling cookies at the right moment is its own art form. You want set edges and slightly soft centersthe kind of tray
where you briefly panic because they look underdone, and then you remember carryover heat is doing the finishing work.
Two minutes later, the tops crinkle, the middles settle, and the chocolate looks glossy and molten like it’s posing for a
magazine cover. This is also when the “just one” lie begins. Because the first cookie is for “quality control,” and the
second cookie is for “confirming the results,” and the third cookie is because you’re already standing there and you’re
not made of stone.
Chocolate chip cookies also have a magical social side. They travel well, they don’t require forks, and they instantly
make you everyone’s favorite person in the room. Bring them to a gathering and watch how fast “Oh, I’m trying to be
good” turns into “Okay, but I’ll just have half.” (Spoiler: nobody has half.) Even the imperfect batches have charm:
the too-thick ones beg for milk, the thin crispy ones are incredible with coffee, and the slightly overbaked ones become
the MVPs of ice cream sandwiches. Cookies are forgiving like thatthey’ll still love you back.
So if you’re chasing the perfect cookie, don’t stress. Think of each batch as a tiny experiment you get to eat. Adjust
the chill time, tweak the sugar ratio, try chips versus chunks, and notice what makes you happiest when you take
that first bite. Because the real secret to great chocolate chip cookies is simple: you’re allowed to make them the way
you like them. (And you’re also allowed to eat them over the sink like a raccoon. No judgment.)
Final Thoughts
Great chocolate chip cookies aren’t about complicated tricksthey’re about a solid base recipe, accurate measuring,
thoughtful chilling, and pulling the tray at the right time. Once you understand how butter, sugar, flour, and rest time
steer the outcome, you can bake your “perfect” cookie on purpose. And that’s powerful. Slightly dangerous. But powerful.