If you’ve ever looked at a dog bone pillow and thought, “That’s ridiculous… I need three,” welcome.
This project is the perfect mash-up of cute, useful, and stash-busting.
You can make it as a cheeky couch accent for dog lovers, a supportive little neck pillow for travel, or a gift that screams,
“I care about you… and I also have fabric and a sewing machine.”
Below you’ll get a FREE pattern (draft-it-yourself + printable reference), beginner-friendly steps, and the pro tips
that make the finished pillow look less “first sewing project” and more “why is this not sold at Target?”
Why a dog bone pillow is the perfect “cute + useful” sew
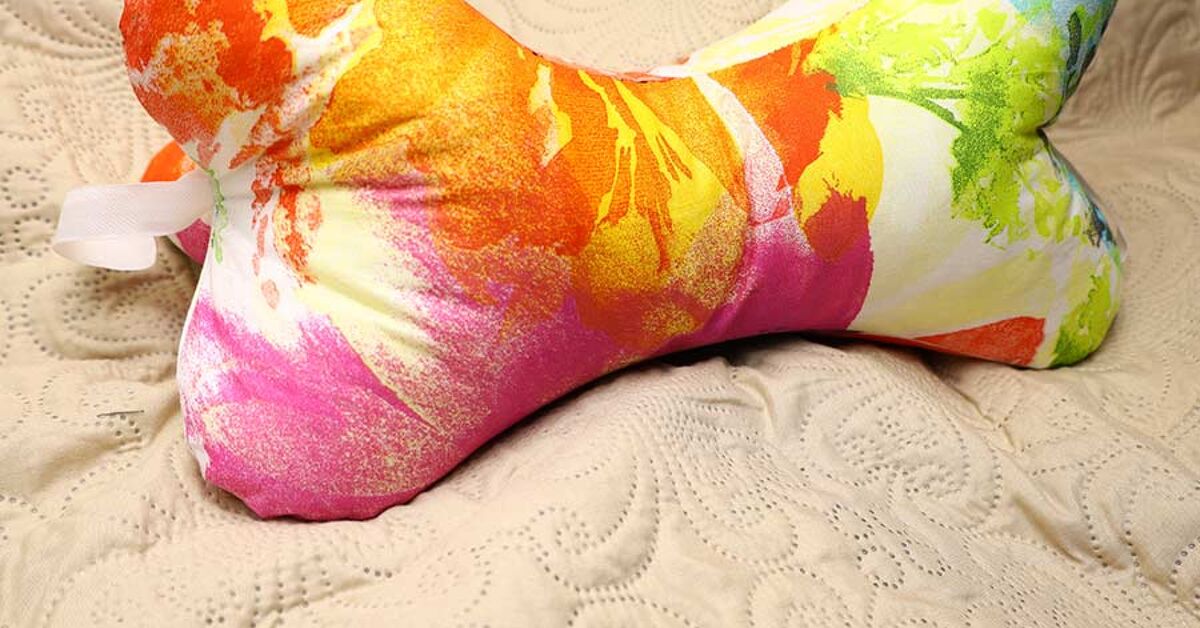
A classic rectangular pillow is fine. Respectable. Predictable. But a DIY dog bone pillow has personality.
The curved “ends” give your head and neck a little extra support, and the shape makes it instantly giftableespecially for:
- Dog lovers who want playful decor without going full “my house is a kennel-themed museum.”
- Travel (car rides, flights, long commutes) when you want support but hate bulky U-shaped pillows.
- Kids and teens who love novelty pillows (and will absolutely name it something dramatic).
- Last-minute gifts because the shape does the “wow” work for you.
Materials and tools
You don’t need fancy equipmentjust the usual sewing suspects. Pick materials based on how you’ll use the pillow:
decorative (cotton), snuggly (fleece/minky), or heavy-duty (canvas/upholstery).
Shopping list
- Fabric: 1/2 yard is plenty for a standard pillow (more if you’re fussy-cutting a big print).
- Stuffing: Polyester fiberfill (or a pillow form you’re willing to sacrifice).
- Thread (all-purpose).
- Paper (printer paper or kraft paper) for the pattern.
- Scissors (or rotary cutter + mat), pins/clips, ruler/tape measure.
- Sewing machine (straight stitch), plus a hand needle for closing.
- Optional: lightweight batting for smoother shape, ribbon “handles,” piping, embroidery, iron-on vinyl.
Fabric picks that work especially well
- Quilting cotton: easy to sew, crisp prints, great for couch decor.
- Fleece: cozy, forgiving, and doesn’t fray much.
- Minky/plush: ultra-soft and ultra-sassy (it shifts; you’ll manage).
- Upholstery/decor weight: sturdy, looks “store-bought,” holds shape nicely.
FREE pattern: choose your size
Here’s the deal: you’re getting a free dog bone pillow pattern in two ways:
(1) a super-easy drafting method that doesn’t require printer gymnastics, and
(2) a printable “reference” template you can scale up or down.
Size chart (finished size)
All sizes below assume a 3/8" seam allowance and “plush but not rock-hard” stuffing.
Add about 3/4"–1" all around for the cut size (seam allowance + loft).
| Size | Best for | Finished Length | Max Width (ends) | Waist Width (center) |
|---|---|---|---|---|
| Mini | Shelf/couch accent, small gift | 10" | 6" | 3.5" |
| Classic | Couch pillow, lumbar-ish support | 14" | 8" | 4.5" |
| Neck | Travel/reading support | 16" | 9" | 5" |
Pattern method #1: draft it yourself (fast, accurate, no printer drama)
This method creates a classic “dog bone” silhouette using circles and gentle curves. You’ll need paper, a ruler, and
something round (bowl, mug, tape roll) to trace.
- Draw a center line equal to your finished length (10", 14", or 16"). Mark the midpoint.
-
Mark the waist width at the midpoint (half above the line, half below). Example (Classic): waist is 4.5" total,
so mark 2.25" up and 2.25" down. -
Build the “bone ends”:
At each end of your center line, draw two circles that overlap slightlyone circle above the center line and one below.
Use a circle diameter close to your max width (Mini 6", Classic 8", Neck 9"), but drawn as two smaller lobes.
A simple approach:- Mini: trace a 3.5"–4" circle twice (top/bottom).
- Classic: trace a 4.5"–5" circle twice (top/bottom).
- Neck: trace a 5"–5.5" circle twice (top/bottom).
-
Connect the curves from the outer edge of the top circle to the waist line with a smooth curve (use a smaller bowl).
Repeat from the bottom circle to the waist. - Mirror the shape on the other side (fold the paper on the center line if you want perfect symmetry).
- Add seam allowance (3/8" is great for curves). If your draft is the “finished” line, trace around it again 3/8" larger.
- Cut the paper pattern. Congratsyou now own a pattern you can reuse forever.
Pattern method #2: printable reference pattern (Mini size) + scaling
Print this page at 100% scale. Use the 1" test square to confirm sizing.
Want Classic or Neck size? Scale up when printing:
Classic ≈ 140%, Neck ≈ 160% (then compare to the size chart and adjust as needed).
1" Test Square:
Square should measure 1" x 1"
Mini Bone Outline (cut on the line):
Bone outline (simple, smooth)
Mini Pattern (scale up for larger sizes)
How to sew a flat dog bone pillow (beginner-friendly)
This version is the easiest: two pieces, stitch around, stuff, close. It’s ideal for couch decor, nurseries,
and anyone who wants the “dog bone” look without advanced construction.
Step 1: Cut and mark
- Cut 2 bone shapes (front and back). If your fabric has nap (fleece/minky), keep both pieces oriented the same way.
- If using a directional print, make sure the pattern isn’t upside down unless you enjoy living dangerously.
- Optional smoother shape: cut 2 matching pieces of lightweight batting and baste them to the wrong side of each fabric piece.
Step 2: Stitch the seam
- Place pieces right sides together. Clip or pin around the edge.
-
Stitch around with a 3/8" seam allowance, leaving a 3"–4" opening along an inner curve
(the “waist”) so it’s easier to hide later. - Slow down on curves. If you’re using minky, consider a walking foot and extra clips.
Step 3: Trim, clip, and turn
- Trim seam allowance a bit where it’s bulky (don’t trim at the opening).
- Clip or notch the curves so the shape turns smoothly. Be careful not to cut through your stitches.
- Turn right side out. Use a blunt tool (chopstick, knitting needle, point turner) to gently push out curves.
Step 4: Stuff like you mean it (but not like you’re packing a suitcase)
- Use small handfuls of fiberfill, fluff them first, and pack the ends before the center.
- Keep checking from the outside to avoid lumps.
- Stop when it feels pleasantly supportivenot like a rock disguised as a pillow.
Step 5: Close the opening (invisible finish)
Fold the raw edges inward, pin/clip, then close with a neat ladder stitch (also called a slip stitch).
Take small stitches so stuffing doesn’t peek out and ruin your pillow’s reputation.
How to sew a plump “three-seam” dog bone neck pillow (more support, still very doable)
If you want a pillow that feels more sculptedespecially for travel or reading supportthis method gives a fuller,
contoured shape without adding a separate side gusset.
The trick is using three matching bone pieces and sewing three seams to form a 3D volume.
Cutting
- Cut 3 identical bone shapes.
- Optional: add ribbon “handles” at the ends (nice for repositioning or hanging on luggage).
-
Mark a tiny V-notch at two opposite “waist” points (these become your start/stop points for seams).
Keep the notch shallow so it stays inside the seam allowance.
Sewing (the three seams)
-
Seam 1: Place two pieces right sides together. Sew from V-notch to V-notch along one long side.
Leave the other side unsewn. -
Seam 2: Add the third piece right sides together to one remaining open edge. Sew V-notch to V-notch.
(If adding ribbon handles, sandwich the raw ends at the V-notch points before stitching.) -
Seam 3: Pin the final open edges together. Sew V-notch to V-notch, but leave a 3"–4" opening
along an inner curve for turning and stuffing. - Turn, shape the curves, stuff evenly, then ladder-stitch the opening closed.
This version tends to feel more “neck pillow” than “flat decor,” and it’s a great option if you want a supportive
bone-shaped pillow that can handle regular use.
Fabric and stuffing tips that make it look store-bought
Stuffing without lumps (the secret is patience and small pieces)
The fastest way to turn a cute DIY pillow into a sad potato is to shove giant clumps of stuffing inside and hope for the best.
Instead:
- Fluff first: pull fiberfill apart before stuffing so it’s airy, not clumpy.
- Start at the ends: fill the “bone bumps” before the center so the shape forms correctly.
- Check the outside constantly: smooth lumps while you still can.
- Use a blunt tool: chopstick or the handle of a wooden spoon helps pack corners without poking holes.
Minky and fleece: cuddle-worthy, slightly chaotic
Plush fabrics are perfect for a cozy dog bone neck pillow, but they can shift while you sew. To keep your seams from wandering:
- Use a walking foot if you have one.
- Clip instead of pin (or pin a lot, and then a little more).
- Mind the nap so your pillow doesn’t look like it has “two different fur personalities.”
- Sew slowly on curves and consider shortening stitch length slightly for smoother arcs.
Want a smoother, more structured pillow?
Add a layer of lightweight batting behind the fabric (or use a sturdier decor-weight fabric). If you’re doing a pillow that needs
to hold a crisp silhouette, a little structure goes a long way.
Customization ideas (make it yours, or make it hilarious)
- Personalize it: embroider a name, initials, or a tiny paw print on one end.
- Color-block it: use different fabrics for front/back, or try a bold contrast at the ends.
- Dog-themed prints: bones, paw prints, silhouettes, or even a fabric that looks like a newspaper (for that “I read the news” vibe).
- Seasonal: plaid for winter, gingham for summer, spooky bones for Halloween.
- Memory pillow twist: use a beloved flannel shirt (washed and stabilized with light interfacing if needed).
- Add a loop handle: ribbon at each end makes it easier to reposition or hang.
Care, cleaning, and safety notes
Washing tips
- Prewash fabric if you expect future laundering (especially cottons).
-
Many fiberfill-stuffed pillows can be washed on cool/gentle and dried on low.
(Always test a scrap if your fabric is delicate.) - For minky/plush: avoid high heatthink “spa day,” not “volcanic blast.”
Important pet safety note
This project is designed as a pillow (decor or neck support). If you plan to let a dog play with it,
skip anything that can be chewed off (buttons, plastic trims, zippers) and supervise.
Heavy chewers can destroy fabric quicklywhen in doubt, choose a purpose-made dog toy.
Maker experiences: what you notice after sewing a few bone pillows (about )
Here’s a funny truth about a DIY dog bone pillow: the first one teaches you the pattern,
and the second one teaches you your personality. Some makers discover they are “measure twice, cut once” people.
Others discover they are “measure once, eyeball it, panic, then somehow succeed” people. Both groups end up with a pillow.
It’s a beautiful system.
One of the most common experiences is realizing how much the fabric choice changes the vibe. Quilting cotton is obedient:
it presses nicely, behaves on the machine, and holds a crisp shape. Fleece is the friendly golden retriever of fabricssoft,
forgiving, and low-maintenance. Minky, meanwhile, is a cat. A luxurious cat. It’s gorgeous, but it will slide around, shed fuzz,
and quietly judge your pin spacing. The good news is that once you accept its personality, you can work with it: use more clips,
sew more slowly, and let the walking foot do its thing.
Then there’s the stuffing journey. Almost everyone stuffs the first pillow with big clumps at least once, because it seems efficient.
It is not. That’s how you get the dreaded “lumpy bone,” which sounds like a medical issue and looks like one, too. The experienced move
is to fluff the filling, push small pieces into the ends first, and constantly check the outside while you go. Makers also learn that
firmness is a balancing act: too soft and it collapses; too firm and it becomes a decorative brick. The “right” firmness depends on the use.
A couch accent can be softer. A travel neck pillow should be supportive but still have give when you press it.
Another shared experience: curves and seam allowances get real, fast. The dog bone shape is basically a parade of curves, and curved seams
punish rushing. When you slow down, keep your seam allowance consistent, and clip/notch where needed, the shape turns out smooth and rounded.
When you don’t, the pillow still existsbut it may look like it’s doing an impression of a melted cartoon bone. (Still charming, just… abstract.)
Many sewists end up making a quick “practice pillow” from scrap fabric the first time, simply to learn where the tricky curves are and where
they want the opening for turning.
Finally, there’s the gift effect. This is one of those projects where people react disproportionately positively, because the shape is unexpected.
A handmade rectangle pillow is lovely, but it reads as “home decor.” A bone-shaped pillow reads as “I made this specifically for you,” even if
you also made one for yourself, your sibling, and your couch. It becomes a running joke“Where’s my bone pillow?”and suddenly you’re the person
who makes The Bone Pillows. It’s a niche. It’s a legacy. Embrace it.
Conclusion
A DIY dog bone pillow is one of those rare sewing projects that’s quick, practical, and guaranteed to get compliments.
You’ve got a free pattern approach, two construction options (flat or plump), and enough customization ideas to make a whole pack of pillowspun intended.
Pick a fabric you love, stuff it smoothly, close it neatly, and enjoy your new favorite weirdly adorable pillow.