Your hydration pack is supposed to deliver crisp, clean water on demand. Instead, sometimes it delivers… “mystery flavor,”
with notes of gym sock and regret. If you’ve ever taken a big trail sip and immediately questioned your life choices,
this guide is for you.
The good news: cleaning a CamelBak (or any hydration reservoir) is not hard. The bad news: it’s only easy if you do it
before your bladder turns into a tiny science fair project. Below is a simple, thorough, and slightly entertaining
step-by-step method to clean your hydration pack’s bladder, tube, and bite valveplus exactly how to dry it so mold
doesn’t move in and start paying rent.
Why Hydration Bladders Get Funky (and Why It Happens So Fast)
Hydration reservoirs are basically the perfect hangout spot for “gunk” to form: dark interior, moisture, and just enough
warmth after a workout or hike. Over time, you can get a slippery film (often called biofilm) that makes water taste off.
If you add electrolyte mix, sports drink, or anything sweet, you’re basically rolling out a welcome mat for odor and
residue. That doesn’t mean you did something “wrong”it means you used your gear like a human.
What You’ll Need (and What You Can Skip)
You do not need a laboratory. You need a few basics and a plan.
Helpful supplies
- Warm water (not boiling-hot)
- Mild dish soap (fragrance-free if you’re sensitive to tastes)
- Soft bottle brush for the inside of the bladder
- Tube brush (highly recommendedhoses are where funk loves to hide)
- Small brush or old toothbrush for the bite valve and connectors
- Drying aid: a reservoir hanger/drying rack, clean whisk, or even paper towels to prop it open
- Optional: reservoir cleaning tablets made for hydration systems
Cleaning ingredients you can use (carefully)
- Baking soda: great for odors and general cleaning
- Lemon juice: helpful for stubborn smells
- Unscented household bleach: only if the brand’s instructions allow it, and only diluted properly
Important safety note: Never mix bleach with vinegar, lemon juice, or anything acidic. That combo can create
dangerous fumes. If you ever use bleach, rinse thoroughly and keep it strictly separate from other cleaners.
The “Two-Minute” Routine That Prevents 90% of Problems
If you do one thing consistently, do this: a quick rinse and dry after use. It’s the hydration-bladder equivalent of brushing
your teethsimple, boring, and wildly effective.
- Empty the reservoir completely.
- Fill about 1/4–1/2 full with warm water, swish, and drain.
- Run clean water through the tube by holding the bladder up and letting water flow out the bite valve.
- Leave everything open to air dry (more on drying like a pro below).
Deep Clean: Step-by-Step (Bladder, Tube, Bite Valve)
Do this deep clean every few weeks if you only use water, and much more often if you use flavored mixes. If you’ve noticed
a smell, film, or weird taste, it’s time.
Step 1: Disassemble Like You Mean It
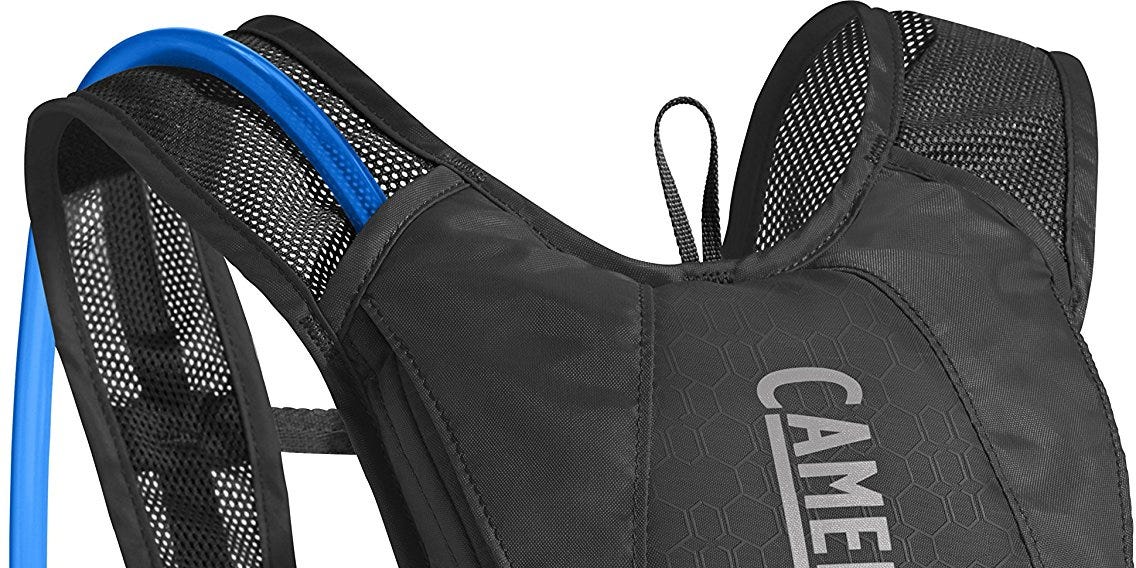
Take the reservoir out of the pack. Remove the drink tube if it disconnects, and remove the bite valve if you can.
If your model has multiple parts (caps, sliders, quick-disconnects), separate what the manufacturer says is removable.
This is where cleaning goes from “I rinsed it once” to “I actually cleaned it.”
Step 2: Soak the Entire System (Yes, the Tube Too)
Start with a cleaning solution soak so the inside of the hose and valve get attentionnot just the big bladder cavity.
A simple approach:
- Fill the reservoir with warm water.
- Add a reservoir cleaning tablet (or use a mild home mix like baking soda in warm water).
- Close, shake gently, and then flush the solution through the tube by pinching the bite valve until you see liquid flowing out.
- Let it sit (tablets often need only a few minutes; home mixes usually need longer).
If you’re cleaning a CamelBak-style reservoir, flushing the cleaning solution through the drink tube is a key step
because the tube and bite valve can trap residue and stale water.
Step 3: Wash With Mild Soap (This Removes Residue the Soak Loosened)
- Drain the cleaning solution.
- Refill with warm water and a small amount of mild dish soap.
- Swish and gently scrub the interior with a soft brush.
- Use a tube brush to scrub the inside of the hose.
- Scrub the bite valve and any small parts separately.
This “soak first, soap second” combo helps remove both the invisible “nasties” and the physical residue that causes taste issues.
Step 4: Rinse Until It’s Boring
Rinse the reservoir thoroughly with clean water. Then rinse again. Then run clean water through the tube and bite valve.
If you ever taste soap later, it’s almost always because the tube didn’t get fully rinsed.
How to Sanitize a Hydration Bladder (When You Actually Need To)
Most of the time, routine cleaning is enough. Sanitizing is for specific situations:
- You stored it for a long time and it smells “off.”
- You used sugary mixes and forgot to clean it promptly.
- You see visible growth you can’t remove with normal washing.
- You want extra caution after illness or questionable water exposure.
Option A: Cleaning tablets made for reservoirs
These are the easiest “measure nothing” approach. Use as directed, flush through the tube, then rinse well.
Option B: Brand-approved diluted bleach method (only if allowed)
Some hydration-system manufacturers provide specific bleach dilution guidance for disinfecting. If you follow a bleach method,
use unscented bleach (no dyes) and measure carefully. Flush it through the tube and bite valve, then rinse thoroughly
and air dry completely.
If your CamelBak model’s instructions don’t mention bleach, stick to tablets or the soap-and-soak method instead.
“Stronger” isn’t always “better” for plastics, valves, and taste.
Odors, Plastic Taste, and “Why Does My Water Taste Like a Pool?”
Taste problems usually come from one of three things: leftover cleaner, leftover drink residue, or storage moisture.
Here’s how to fix each without starting a chemistry club.
If it tastes like soap
- Rinse moreespecially the tube.
- Run a full reservoir of clean water through the hose once or twice.
- Air dry longer with the bladder propped open.
If it smells musty or stale
- Do a baking-soda soak in warm water, then rinse.
- Follow with a mild soap wash and rinse again.
- Dry completely before storing.
If it has that “new plastic” taste
New reservoirs can sometimes taste plasticky at first. A few clean-and-rinse cycles and thorough drying usually help.
Some people find a brief soak with lemon water helps reduce strong odorsjust remember to rinse thoroughly afterward.
Don’t Forget the Tube and Bite Valve (They’re the Usual Suspects)
The tube is narrow, dark, and often stays damp longer than the bladder. Translation: it’s the VIP lounge for buildup.
Cleaning the bladder but ignoring the tube is like washing a coffee mug while leaving the lid unwashed for three weeks.
You’ll still taste it.
Tube-cleaning tips that actually work
- Use a tube brush and run it through slowly, then rinse.
- Flush cleaning solution through the tube during the soak step.
- Drain the tube after rinsing by holding the reservoir high and letting gravity do the work.
Bite valve cleaning (fast and effective)
- Remove it if possible.
- Scrub creases and the opening with a small brush or toothbrush.
- Rinse and let it dry separately in a well-ventilated spot.
Drying: The Step Everyone Rushes (and the Step That Prevents Mold)
Cleaning removes grime. Drying prevents the comeback tour. If you store a reservoir with even a small amount of moisture,
you’re basically sending a “please grow here” invitation to mold and bacteria.
How to dry your hydration bladder properly
- Drain completely.
- Prop it open using a drying rack, whisk, hanger, or clean paper towels.
- Hang it upside down or position it so water drips out and air circulates.
- Hang the tube separately so it can drain and dry.
- Give it time in a non-humid area (a steamy bathroom is not the hero here).
Storage tip: Freezer method (for clean, dry reservoirs)
If you’ve cleaned and dried your hydration bladder, storing it in the freezer is a popular method to help prevent bacterial growth
between uses. Just make sure it’s clean and dry first, and don’t store it overfilled with water (water expands when frozen).
Common Mistakes (So You Don’t Repeat the Same “Why Is This Gross?” Moment)
- Leaving it sealed while wet: If it can’t breathe, it can’t dry. Mold loves that.
- Only rinsing the bladder, not the tube: The tube holds old water and flavor.
- Using water that’s too hot: Very hot water can warp materials or shorten the life of parts.
- Using harsh cleaners “because it’s faster”: It’s often not faster once you’re dealing with lingering taste.
- Storing after sports drink without cleaning: Sugars stick around and create residue and odor quickly.
Quick Troubleshooting Guide
Problem: The bladder looks clean but tastes weird
- Rinse the tube again.
- Soak with a tablet or baking soda, then rinse thoroughly.
- Dry longer with the bladder fully open.
Problem: You see gunk in the bite valve
- Remove the valve and scrub it separately.
- Flush solution through the tube during your next deep clean.
Problem: Persistent odor after cleaning
- Do a longer soak (tablet or baking soda solution), then soap wash, then rinse.
- Make sure the pack and reservoir are drying in a low-humidity area.
- If odor persists and you see visible buildup you can’t remove, replacement may be the safest option.
Conclusion: Clean Water Should Taste Like Water
Cleaning a CamelBak bladder (or any hydration pack reservoir) is mostly about habits: rinse after use, deep clean on a schedule,
flush the tube, and dry like you’re trying to win an argument with mold. Do that, and your hydration pack becomes what it was
meant to be: a simple, reliable way to drink waterwithout surprise flavors or the haunting feeling that you’re sipping from
a forgotten aquarium filter.
Real-World Experiences and Trail Lessons (So You Don’t Learn the Hard Way)
Let’s talk about the stuff that happens in real lifebecause hydration bladder cleaning advice always sounds easy until you’re
tired, hungry, and you just want to throw your pack in a corner and dramatically declare, “I’ll deal with it tomorrow.”
Tomorrow, of course, is a liar.
Scenario one: the “I only put water in it” phase. People start here with pure intentions. Water only. Clean living. Then a hot day
happens, you toss in an electrolyte mix “just once,” and your reservoir becomes a sticky little rumor factory. Even if the bladder
looks fine, the tube quietly holds onto that flavor like it’s collecting souvenirs. The next day, your water tastes faintly like
lemon candy that fell behind a couch in 2019. That’s your sign to deep clean and flush the tubebecause the tube is always guiltier
than it looks.
Scenario two: the “quick rinse, no dry” trap. You do the rinse, you feel virtuous, and then you cap it and stash it because you’re
late or tired. A few days later, you open it and get hit with a smell that can only be described as “damp basement, but sporty.”
The fix is almost always drying. Prop it open. Hang it. Give it air. Think of it like laundry: washing helps, but leaving it wet in
a pile is how you end up with that weird funk that never fully leaves your favorite shirt.
Scenario three: the “cleaned the bladder, forgot the bite valve” mystery. Bite valves have little grooves, and those grooves collect
whatever you’ve been drinkingand also whatever was living rent-free in the tube. If you’ve ever wondered why the first sip tastes
fine but the second sip tastes questionable, that’s often a valve issue. Pop it off (if your model allows), scrub it like you’re
detailing a tiny sports car, rinse it, and let it dry on its own. Bonus: it’s oddly satisfying.
Scenario four: the “stored it for months” surprise. You find the hydration pack, feel excited about the upcoming hike, fill it up,
take a triumphant sip, and immediately taste “attic.” Long storage calls for a deep clean and (if the manufacturer allows it)
a sanitize step. Then dry completely. If you’re a frequent user, freezer storage for a clean, dry reservoir can help between outings.
If you’re an occasional user, the best move is to store it bone-dry and open (or propped) so it doesn’t trap moisture.
Scenario five: the “I can’t believe this is my life now” momentaka buying a cleaning kit. People resist buying a tube brush because it
feels like admitting adulthood has won. But the first time you scrub the tube and rinse out what comes loose, you’ll understand why
everyone who owns a hydration pack eventually becomes a tube-brush evangelist. It’s not about perfection. It’s about making sure your
hydration system isn’t secretly marinating.
The big lesson from all these experiences: the best cleaning routine is the one you’ll actually do. If you can’t deep clean every time,
at least rinse, flush, and dry. Your future self (and your taste buds) will be grateful.