Pot roast is the cozy sweater of dinner: not fancy, not fragile, and absolutely not in a hurry.
If your roast ever turns out tough, it’s almost never because you “did it wrong.”
It’s because you didn’t do it long enoughor you chose a cut that doesn’t like slow dancing.
This guide teaches you the method (not just a single recipe), so you can make a truly great pot roast in a Dutch oven,
a slow cooker, or even an Instant Potplus the little decisions that separate “meh” from “make this again immediately.”
The “Best Pot Roast” Formula in One Sentence
Pick a collagen-rich beef roast (usually chuck), season it well, sear it deeply, braise it gently with aromatics and a flavorful liquid,
add vegetables at the right time, then rest and sauce like you mean it.
Quick Cheat Sheet (Pin This to Your Brain)
- Best cut: Chuck roast (3–5 lb), well-marbled.
- Best pot: Heavy Dutch oven with a tight lid.
- Best oven temp: 300–325°F for steady, gentle braising.
- Best doneness test: A fork twists easily; a knife slides in with almost no resistance.
- Vegetable timing: Add potatoes/carrots in the last 60–90 minutes so they don’t turn to baby food.
- Gravy move: Reduce + thicken at the end; finish with salt, pepper, and a tiny splash of acid.
Step 1: Choose the Right Cut (This Matters More Than Your Playlist)
Pot roast is a braise: a long, gentle cook in a covered pot with some liquid. Braising works best on tougher cuts with
connective tissue (collagen). With time and low heat, collagen melts into gelatin, and gelatin is basically edible velvet.
The Best Choices
- Chuck roast: The classic. Marbling + collagen = tender and flavorful.
- Brisket: Rich and beefy; sliceable when done right. Can take longer.
- Bottom round/arm roast: Leaner; can work, but needs extra care (and usually more sauce help).
Look for good marbling and a roast that’s relatively even in thickness. If it’s shaped like a meteorite, parts will finish
at different times. (Still delicious. Just unevenly delicious.)
Step 2: Season Like You’re Trying to Impress a Roast
Salt is not optional. Big hunks of meat need real seasoning to taste beefy all the way through.
If you have time, salt the roast generously and refrigerate it uncovered overnight. If you don’t, salt it well at least 30 minutes before cooking.
Basic Pot Roast Seasoning
- Kosher salt and black pepper
- Optional: garlic powder, onion powder, paprika, or a pinch of dried thyme
- Optional (but smart): a light dusting of flour before searing for extra browning and easier gravy later
Step 3: Sear Deeply (A.K.A. Build Flavor You Can’t Fake Later)
Searing isn’t just for looks. That browned crust creates hundreds of flavor compounds and leaves fond (those tasty browned bits)
on the bottom of the pot. Fond is basically “future gravy” in its most hopeful form.
How to Sear Without Steaming
- Pat the roast very dry with paper towels.
- Heat oil in a Dutch oven over medium-high until shimmering.
- Sear in a single piece, 4–6 minutes per side, until deeply browned.
- Don’t poke it every 12 seconds. Let it do its thing.
If the pot starts smoking aggressively, lower the heat a bit. You want “dark golden and aromatic,” not “fire alarm audition.”
Step 4: Aromatics + Tomato Paste = “Why Does This Taste Like a Restaurant?”
Remove the seared roast and sauté aromatics in the same pottypically onions, carrots, and celery (classic mirepoix).
Add garlic near the end so it doesn’t burn.
Flavor Boosters That Actually Matter
- Tomato paste: Cook it for 1–2 minutes to caramelize and deepen flavor.
- Herbs: Thyme, rosemary, bay leaffresh or dried.
- Umami helpers: Worcestershire, soy sauce (just a little), or anchovy paste if you’re feeling brave-and-correct.
Step 5: Deglaze (Save the Fond, Save the World)
Pour in a deglazing liquidoften dry red wine, beef broth, or bothand scrape up all the browned bits.
This is where your gravy goes from “fine” to “I should call my mom.”
How Much Liquid?
You’re braising, not boiling. Add enough liquid to come about 1/3 to 1/2 up the sides of the roast.
The meat should sit partly above the liquid so it can braise and not just swim.
Step 6: Braise Gently Until Fork-Tender
Return the roast to the pot. Bring the liquid just to a simmer, then cover tightly and move to the oven.
A steady low oven keeps the heat even and forgiving.
Oven Method (Most Foolproof)
- Temperature: 300–325°F
- Time: About 3–4 hours for a 3–5 lb chuck roast (start checking around 2.5–3 hours)
- Target texture: Knife slides in easily; meat pulls apart with gentle pressure
If it’s tough, it usually needs more time. Collagen doesn’t respond to motivational speechesonly patience.
Slow Cooker Method (Convenient and Cozy)
- Still sear the roast first (yes, even if your slow cooker is giving you side-eye).
- Cook on LOW 8–10 hours or HIGH 4–6 hours depending on size and your appliance.
- Add potatoes and carrots later if your slow cooker runs hot or you hate mushy vegetables.
Instant Pot Method (Fast-ish, Still Tasty)
- Sear using sauté mode, then build your braising liquid.
- Pressure cook roughly 60–80 minutes for a 3–4 lb chuck roast (cut into 2 pieces to speed cooking).
- Natural release helps keep the meat tender.
- Add vegetables after, using a shorter cook, so they don’t dissolve into the sauce.
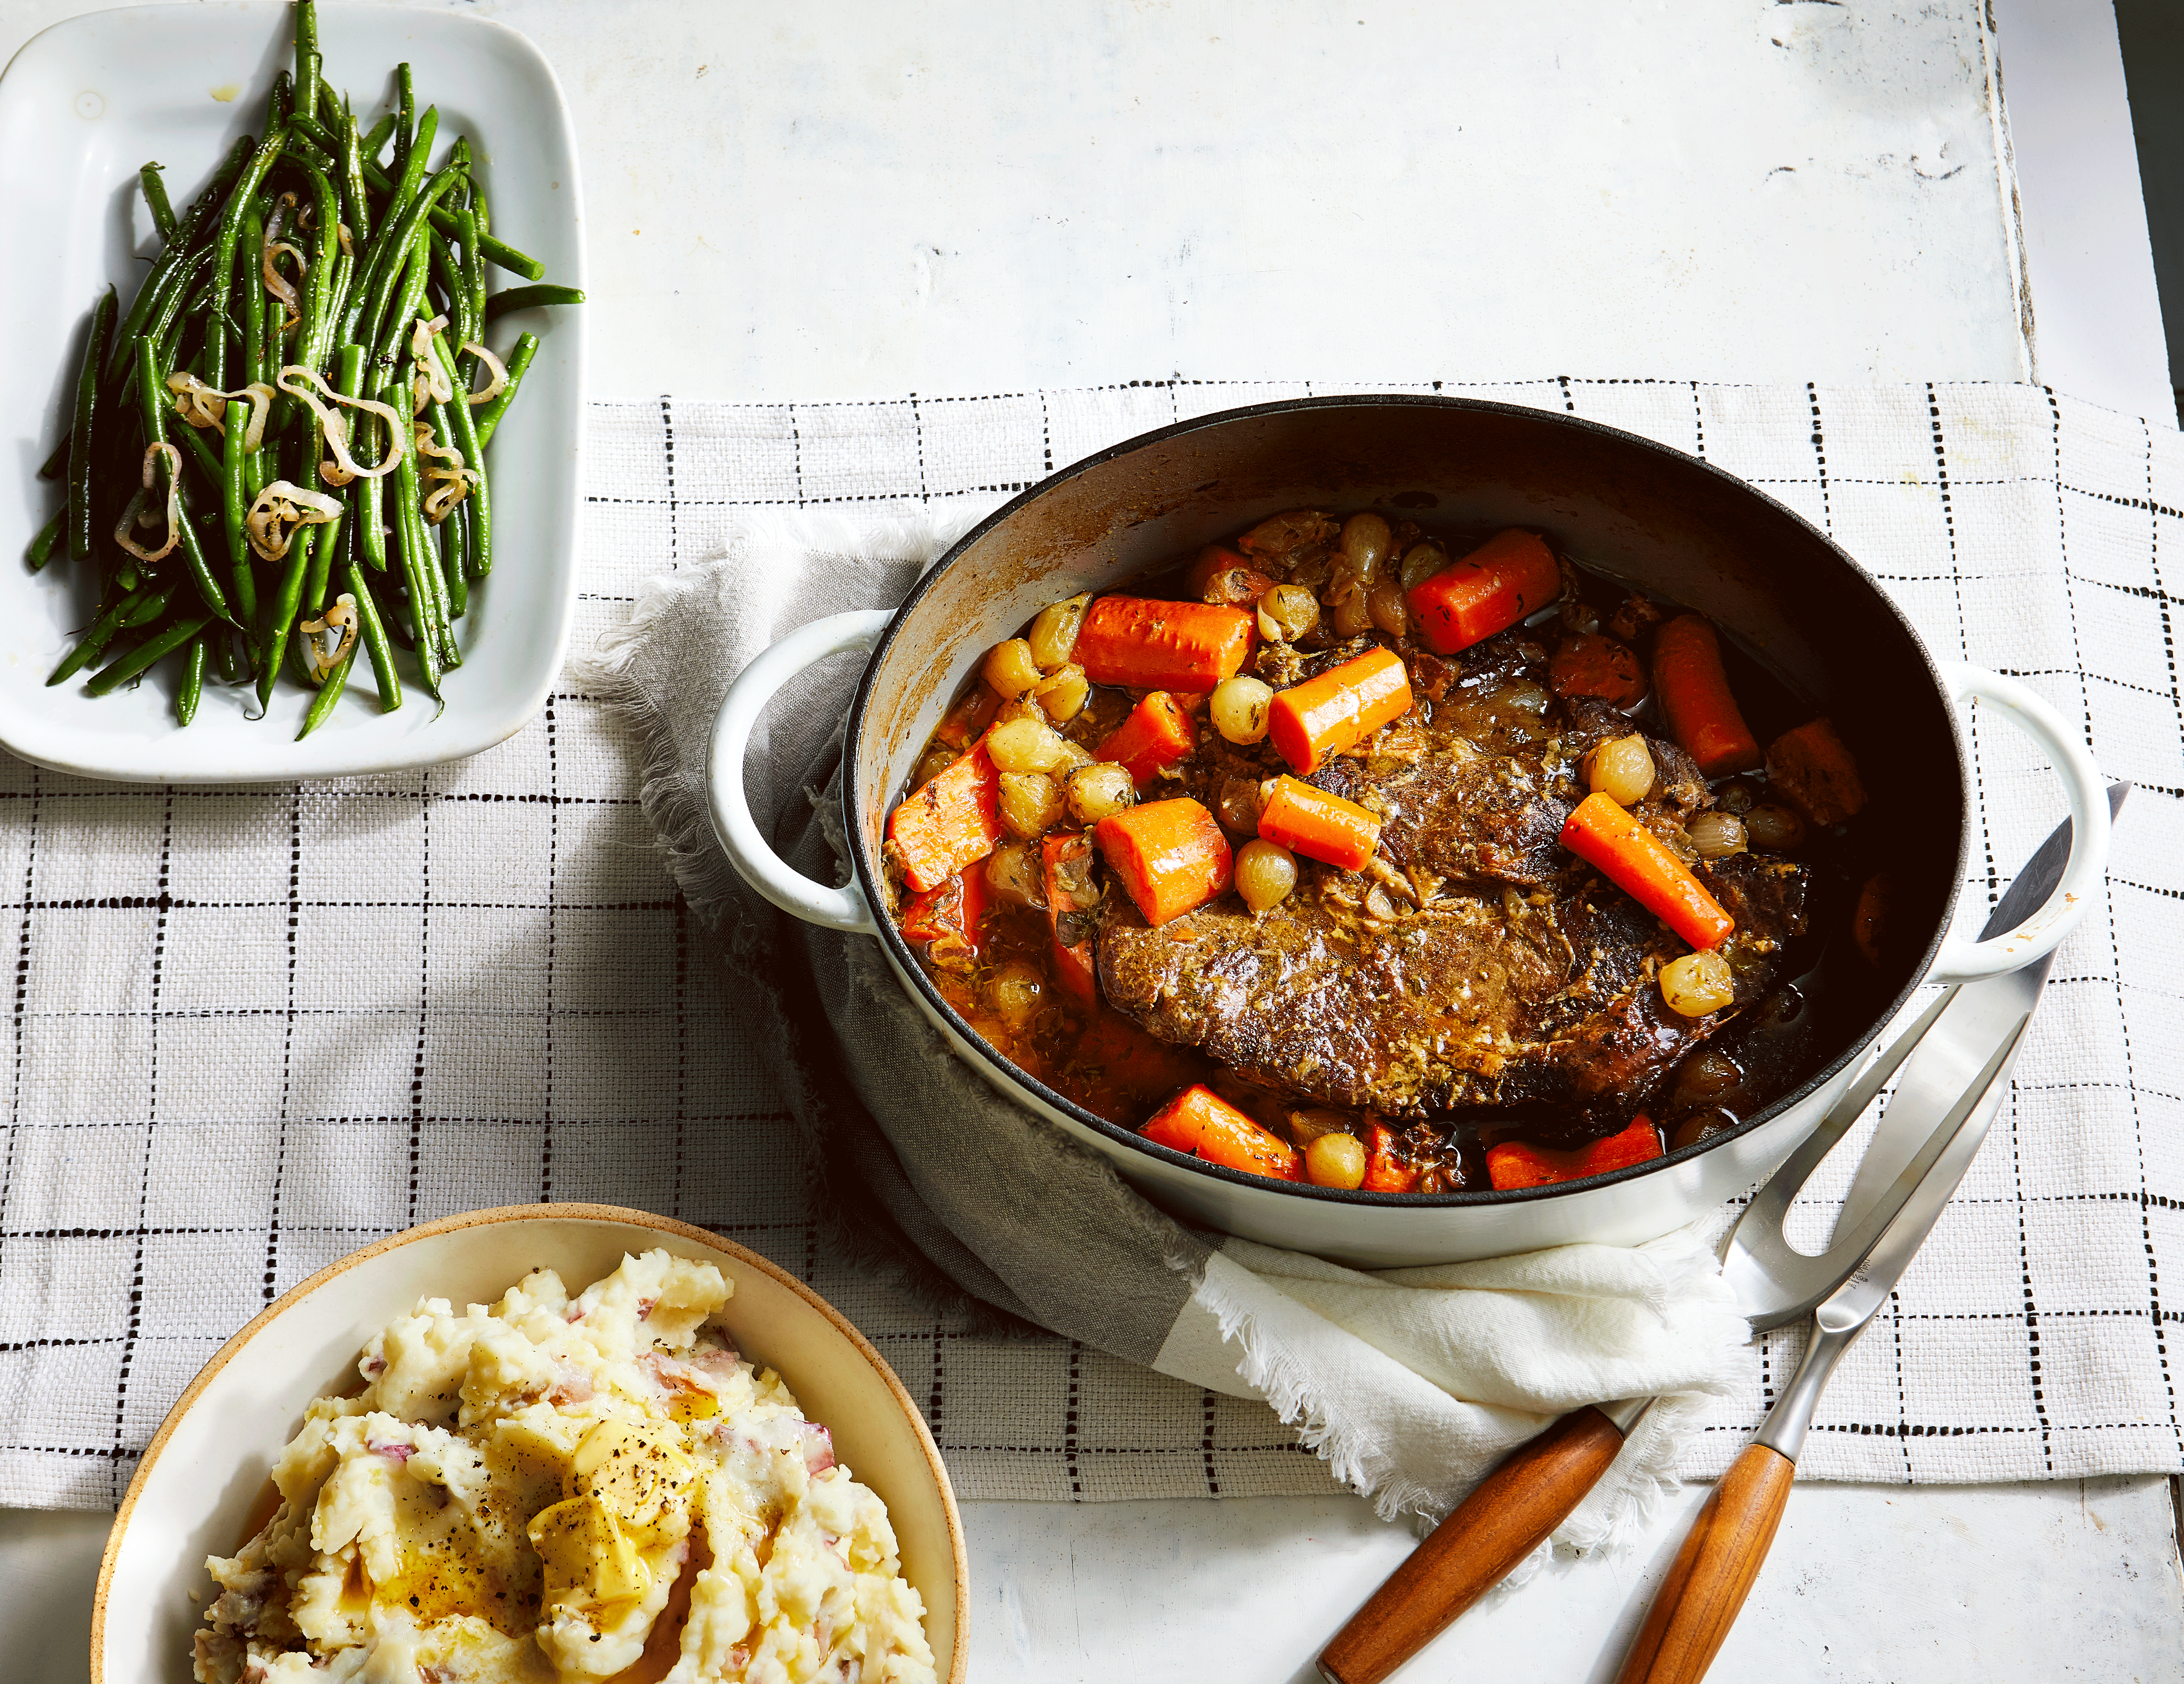
Step 7: Add Vegetables at the Right Time
Carrots and potatoes are classic, but timing matters. If you add them at the start of a long braise, they’ll
soak up flavorand then collapse into a very delicious vegetable situation.
Best Practice
- Add hearty vegetables (carrots, potatoes, parsnips) during the last 60–90 minutes of oven braising.
- Cut vegetables into large chunks so they hold their shape.
- Keep softer vegetables (mushrooms, peas) for the last 20–30 minutes or add at the end.
Step 8: Rest, Slice (or Shred), Then Sauce
When the roast is tender, remove it and let it rest for 15–20 minutes. This helps the juices redistribute
so your cutting board doesn’t turn into a beef-flavored slip-n-slide.
Slice vs. Shred
- Slice: For brisket-like presentation, slice against the grain.
- Shred: For “fall-apart” comfort, pull into chunks with forks.
Step 9: Make a Gravy That Deserves Its Own Applause
Strain or skim excess fat from the braising liquid, then reduce it for concentration. Taste, then adjust.
A great gravy is salty enough to wake up the beef, rich enough to coat a spoon, and balanced enough that it doesn’t taste flat.
Easy Thickening Options
- Slurry: Mix 1 tbsp cornstarch with 1 tbsp cold water; whisk into simmering liquid.
- Roux/butter-flour paste: Mash equal parts soft butter and flour; whisk in a bit at a time.
- Reduction only: Simmer longer for a glossy, lighter-bodied sauce.
Finishing Touches (Small, Powerful)
- A splash of vinegar or a squeeze of lemon for brightness
- Fresh herbs at the end (parsley is a classic)
- Extra black pepperbecause pot roast likes confidence
A Foolproof “Best Pot Roast” Base Recipe (Dutch Oven)
Makes: 6–8 servings | Time: ~4 hours (mostly hands-off)
Ingredients
- 3–5 lb chuck roast
- Kosher salt and black pepper
- 2–3 tbsp neutral oil
- 2 large onions, cut into wedges
- 3 carrots, cut into large chunks (plus more later if you like)
- 2 celery stalks, chopped (optional, but classic)
- 4–6 garlic cloves, smashed
- 2 tbsp tomato paste
- 1 cup dry red wine (optional) + 2–3 cups beef broth
- 1–2 tbsp Worcestershire
- 2–3 sprigs thyme, 1 sprig rosemary, 1–2 bay leaves
- 1.5–2 lb potatoes, chunked (add later)
Method
- Heat oven to 325°F. Pat roast dry; season generously with salt and pepper.
- Sear roast in hot oil in a Dutch oven until deeply browned on all sides. Remove to a plate.
- Sauté onions, carrots, and celery until browned at the edges. Add garlic; cook 30 seconds.
- Stir in tomato paste; cook 1–2 minutes. Deglaze with wine (or broth), scraping up fond.
- Add broth, Worcestershire, and herbs. Return roast. Liquid should come 1/3–1/2 up the roast.
- Cover tightly and bake 2.5–3 hours. Add potatoes (and extra carrots) and bake 60–90 minutes more.
- Rest roast 15–20 minutes. Simmer braising liquid to make gravy; season to taste and serve.
Troubleshooting: Why Your Pot Roast Isn’t Perfect (Yet)
“It’s tough!”
It almost always needs more time. Toughness is collagen mid-transformation. Keep braising until it turns tender.
If the liquid level got too low, add a splash of broth and keep going.
“It’s dry!”
Dry can mean overcooked lean meat, not enough marbling, or a lid that didn’t seal well.
Next time, choose chuck, keep the pot tightly covered, and braise at a gentler oven temperature.
“My vegetables are mush.”
Add them later and cut them bigger. Potatoes the size of dice are basically volunteering to become gravy thickener.
“My gravy tastes flat.”
Add salt first, then a little acidity (vinegar/lemon). Flatness is often “needs seasoning,” not “needs more hours of simmering.”
Serving Ideas (Beyond “Put It in a Bowl and Smile”)
- Classic: ladle over mashed potatoes or buttered egg noodles
- Cozy upgrade: serve with crusty bread to mop up gravy
- Bright balance: add a simple vinegar-dressed salad on the side
- Leftovers: shred into sandwiches, tacos, or a beef-and-veg pot pie filling
Food Safety and Storage
- Cool leftovers promptly and refrigerate in shallow containers.
- Reheat gently (covered) so the meat stays tender and the sauce doesn’t reduce into glue.
- Pot roast often tastes even better the next day after the flavors settle in.
Wrap-Up
The best pot roast is less about a secret ingredient and more about smart choices:
the right cut, a real sear, gentle heat, and patience. Once you nail the method,
you can riff foreverdifferent wines, different herbs, different vegetableswhile staying in that sweet spot of tender beef and rich gravy.
Extra: of Real-World Pot Roast “Experience” (What Home Cooks Learn the Fun Way)
Most people’s relationship with pot roast begins the same way: you smell it cooking and think,
“Wow, I’m basically a responsible adult.” Then you cut into it too early (because you’re excited),
and suddenly it’s not “fall-apart tender,” it’s “jaw workout with gravy.”
That moment is a rite of passage. The good news? Pot roast is one of the most forgiving dishes
once you understand the main rule: tough means keep cooking.
Another common home-kitchen lesson is that “more liquid” doesn’t mean “more moist.”
A roast can sit in a lake of broth and still turn out disappointing if it never gets properly browned first,
or if the flavor base is weak. People who repeat pot roast a few times usually start noticing the real magic is
front-loaded: drying the meat, searing patiently, and scraping up fond like it’s a treasure hunt.
When you do that, the gravy tastes like it’s been working on itself emotionally.
Vegetables are the next plot twist. Early attempts often toss potatoes and carrots in at the beginning,
because it feels efficientone pot, one timeline, dinner solved. Except three hours later,
your potatoes have surrendered their shape and your carrots have become orange confetti.
Cooks who make pot roast often end up converting to the “add veggies later” camp.
It’s not fussy; it’s strategic. Big chunks added near the end come out tender, not tragic.
Then there’s seasoningspecifically, the difference between “seasoned” and “seasoned enough for a 4-pound roast.”
A tiny pinch of salt is basically a love note that never got delivered. In real kitchens, people learn to season in layers:
salt the meat, season the vegetables, and then taste the liquid at the end. The sauce is your control panel.
If the gravy pops, the whole dish pops. If the gravy is bland, the roast tastes like it needs a motivational speaker.
Finally, repeat pot-roast makers discover a sneaky truth: pot roast is often better the next day.
The beef relaxes, the sauce thickens slightly, and the flavors knit together. That’s why so many people intentionally
cook it when they want leftoverssandwiches, tacos, rice bowls, shepherd’s-pie-style mash on topbecause it transforms
into multiple meals without tasting repetitive. If you want to feel like a kitchen wizard, make pot roast on purpose for leftovers.
It’s the closest thing to meal prep that still feels like comfort food.
So if your first (or fifth) pot roast isn’t perfect, you’re in good company. The method rewards practice,
but it also rewards simple fixes: cook longer, sear better, season smarter, and add vegetables later.
Do those four things, and “best pot roast” stops being a mystery and starts being a regular weeknight flex.