If you’ve ever stood in your yard (or on your tiny balcony) clutching a packet of tomato seeds and wondering,
“Okay… but where do you actually go?”this guide is for you. Designing a vegetable garden layout
isn’t just about making straight rows. It’s about squeezing every juicy tomato, crisp cucumber, and fistful of
herbs out of whatever space you have, whether that’s a sprawling backyard, a narrow side yard, or a sunny
windowsill.
The good news: you don’t need farm-level acreage or a landscaping degree. With a few smart layout ideas,
some basic planning, and a tiny bit of math (promise: very tiny), you can design a productive vegetable garden
in almost any space. Let’s turn that blank plotor balcony railinginto your own personal produce aisle.
Step 1: Start with Your Space, Not Your Seed Catalog
Before you fall in love with fifteen kinds of heirloom tomatoes, get to know the space you’re working with.
A well-designed vegetable garden layout starts with three basics: sun, access, and scale.
Check the Sun Like a Weather Detective
Most warm-season vegetables (tomatoes, peppers, eggplants, squash, cucumbers) want at least six to eight
hours of direct sun per day. Cool-season crops like lettuce, spinach, and many herbs are more forgiving and
can handle partial shade.
- Watch the sun. Take note of where the sun hits in the morning, midday, and late afternoon.
- Look for shadows. Trees, fences, sheds, and even neighboring buildings can dramatically change how
much sun a spot gets. - Use the “sunniest first” rule. Put sun-lovers in the brightest spots and tuck leafy greens and herbs
into shadier corners.
Measure What You Really Have
Grab a tape measure (or the measurement app on your phone) and write down the actual dimensions of your potential
garden area: 4×8 feet beside the driveway, 3×10 along the fence, a 3-foot-wide balcony, or a group of containers
on the patio.
Knowing your exact measurements lets you:
- Choose the right size and number of raised beds or containers.
- Use planning methods like square-foot gardening efficiently.
- Avoid the classic mistake of cramming in too many plants.
Consider Access and Water
If you have to do gymnastics to reach your beds, you won’t weed or harvest as often. Include:
- Paths wide enough for you, and maybe a wheelbarrow (18–24 inches is comfortable).
- Water access close enough that you can reach everything with a hose or watering can.
- Safe footingmulch, stepping stones, or pavers so you’re not mud-skiing after a rain.
Step 2: Choose a Layout Style That Fits Your Space
There’s no single “correct” vegetable garden layout. The best design is the one that fits your space, your body,
and your schedule. Here are some popular layout styles and when they shine.
Raised Beds: Neat, Productive, and Beginner-Friendly
Raised beds are like the capsule wardrobe of gardening: simple, organized, and surprisingly flexible. A classic
size is 4×8 feet. Four feet is narrow enough to reach the center from either side, so you never step on the soil
and compact it.
- Best for: Backyards, side yards, rental properties, and less-than-perfect soil.
- Pros: Good drainage, fewer weeds, easier on your back, and you can control the soil mix.
- Tip: Keep beds no wider than 4 feet and at least 18 inches between them for paths.
In-Ground Beds and Blocks Instead of Rows
If you have a decent patch of earth, you can skip lumber and plant directly in the ground. Instead of long farm-style
rows with lots of walking space in between, many home gardeners plant in wide “blocks” or bedssay, 3–4 feet wide
and use narrow paths around them. This maximizes planting area and minimizes wasted path space.
Square-Foot Gardening for Small and Busy Gardeners
Square-foot gardening divides a raised bed into a grid of 1×1-foot squaresbasically a gardening spreadsheet. Each
square gets a specific number of plants based on their mature size. For example:
- 1 large plant (like a tomato or pepper) per square.
- 4 medium plants (like lettuce) per square.
- 9 smaller plants (like beets) per square.
- 16 very small plants (like carrots or radishes) per square.
This method is perfect if you’re short on space or time. It keeps things organized and helps prevent overcrowding
without a lot of guesswork.
Containers and Balcony Layouts
No yard? No problem. Containers, grow bags, and planters can host a very respectable vegetable garden on a balcony,
rooftop, patio, or even a front stoop.
- Use bigger containers than you think you need. A 5-gallon bucket can handle a compact tomato or
pepper; leafy greens and herbs are happy in smaller pots. - Think vertical. Use shelves, plant stands, railing planters, or wall-mounted pockets to make a
mini “green wall.” - Check weight and drainage. Especially on balconies, choose lightweight containers and make sure
excess water can drain safely.
Vertical Gardens for the Truly Space-Challenged
Vertical gardening uses trellises, cages, arches, and stacked containers to grow upward instead of outward. Vining
crops like peas, pole beans, cucumbers, and some squash varieties are naturals for this approach, and they can
create a leafy green privacy screen in the process.
Step 3: Map Your Garden on Paper (or Screen) Before You Dig
Planning on paper is where your vegetable garden layout really comes to lifeand where mistakes are cheap.
Sketch the Basic Shape
Draw a simple outline of your space to scale. Mark:
- Where the sun comes from (usually the south in the U.S.).
- Permanent features like fences, sheds, air conditioners, and trees.
- Existing paths, doors, and gates.
Add Beds, Containers, and Paths
Next, drop in your raised beds, in-ground blocks, or clusters of containers:
- Keep beds roughly rectangular for easy access.
- Align long beds north–south when possible so plants get more even sun.
- Leave comfortable paths between beds; don’t be stingy here, future-you will be grateful.
Place Plants by Height and Sun Needs
Now the fun part: deciding who lives where. To avoid shading out smaller plants:
- Put tall crops (tomatoes on stakes, pole beans, sunflowers, corn) on the north or west side so they
don’t cast shade on everything else. - Plant medium crops (peppers, bush beans, kale) in the middle.
- Use low-growing crops (lettuce, radishes, onions, strawberries) along the southern or front edges.
This “stadium seating” layout lets each plant take a bow in the sunlight instead of hiding in the shadows.
Step 4: Use Companion Planting and Crop Rotation to Work Smarter
A smart vegetable garden layout isn’t just about what fitsit’s about who plays nicely together and which crops
follow each other year to year.
Companion Planting Basics
Companion planting pairs plants that mutually benefit each other. Examples include:
- Tomatoes with basil and marigolds: Basil may help with flavor and growth; marigolds can deter some
pests. - Carrots with onions or leeks: Their scents can help confuse carrot flies and onion pests.
- Beans with corn: Beans fix nitrogen in the soil, while corn provides support.
In your layout, sprinkle in flowers like marigolds, calendula, or nasturtiums at bed corners or along edges. They
attract pollinators and beneficial insects while making your garden look like a tiny farm boutique.
Crop Rotation in Small Gardens
Crop rotation means not planting the same family of vegetables in the same spot year after year. This helps reduce
soil-borne diseases and pests and keeps nutrients more balanced.
For a simple three- or four-year rotation, group crops by families:
- Tomato family (nightshades): Tomatoes, peppers, eggplants, potatoes.
- Cabbage family (brassicas): Broccoli, cabbage, kale, cauliflower.
- Bean and pea family (legumes): Beans, peas.
- Root crops and others: Carrots, beets, onions, garlic, leafy greens, etc.
Each year, move these groups to a different bed or section. Even in a tiny garden, simply not replanting tomatoes
in the exact same container or spot every year can make a difference.
Step 5: Make Room for Watering, Mulching, and Maintenance
This is the part that layout books sometimes gloss over: you need physical space to do garden chores without
trampling your plants.
- Watering: Design your layout so a hose or drip line can reach all beds and containers. In raised
beds, consider running a simple soaker hose or drip system down each bed. - Mulching: Leave room at the front or end of beds for a small mulch pile or easy access with a
cart. Plan to mulch paths with wood chips or straw to suppress weeds and keep mud down. - Tool storage: If possible, keep a small bin, bucket, or hook for your go-to tools near the garden
so you’re not always going back to the garage.
Real-Life Layout Ideas for Any Size Space
Layout Idea 1: 4×8 Beginner Raised Bed
Imagine a single 4×8-foot bed, divided into a 1×1-foot grid:
- Back row (north side): 4 tomato plants on stakes, one per square.
- Middle rows: Alternating peppers, bush beans, and basil.
- Front row: A strip of lettuce, onions, and marigolds.
With just one bed, you get salad greens, herbs, beans, and tomatoes, and it’s easy to reach everything from either
side. Next year, rotate crops by putting leafy greens and roots where your tomatoes were and moving tomatoes to a
different bed or container.
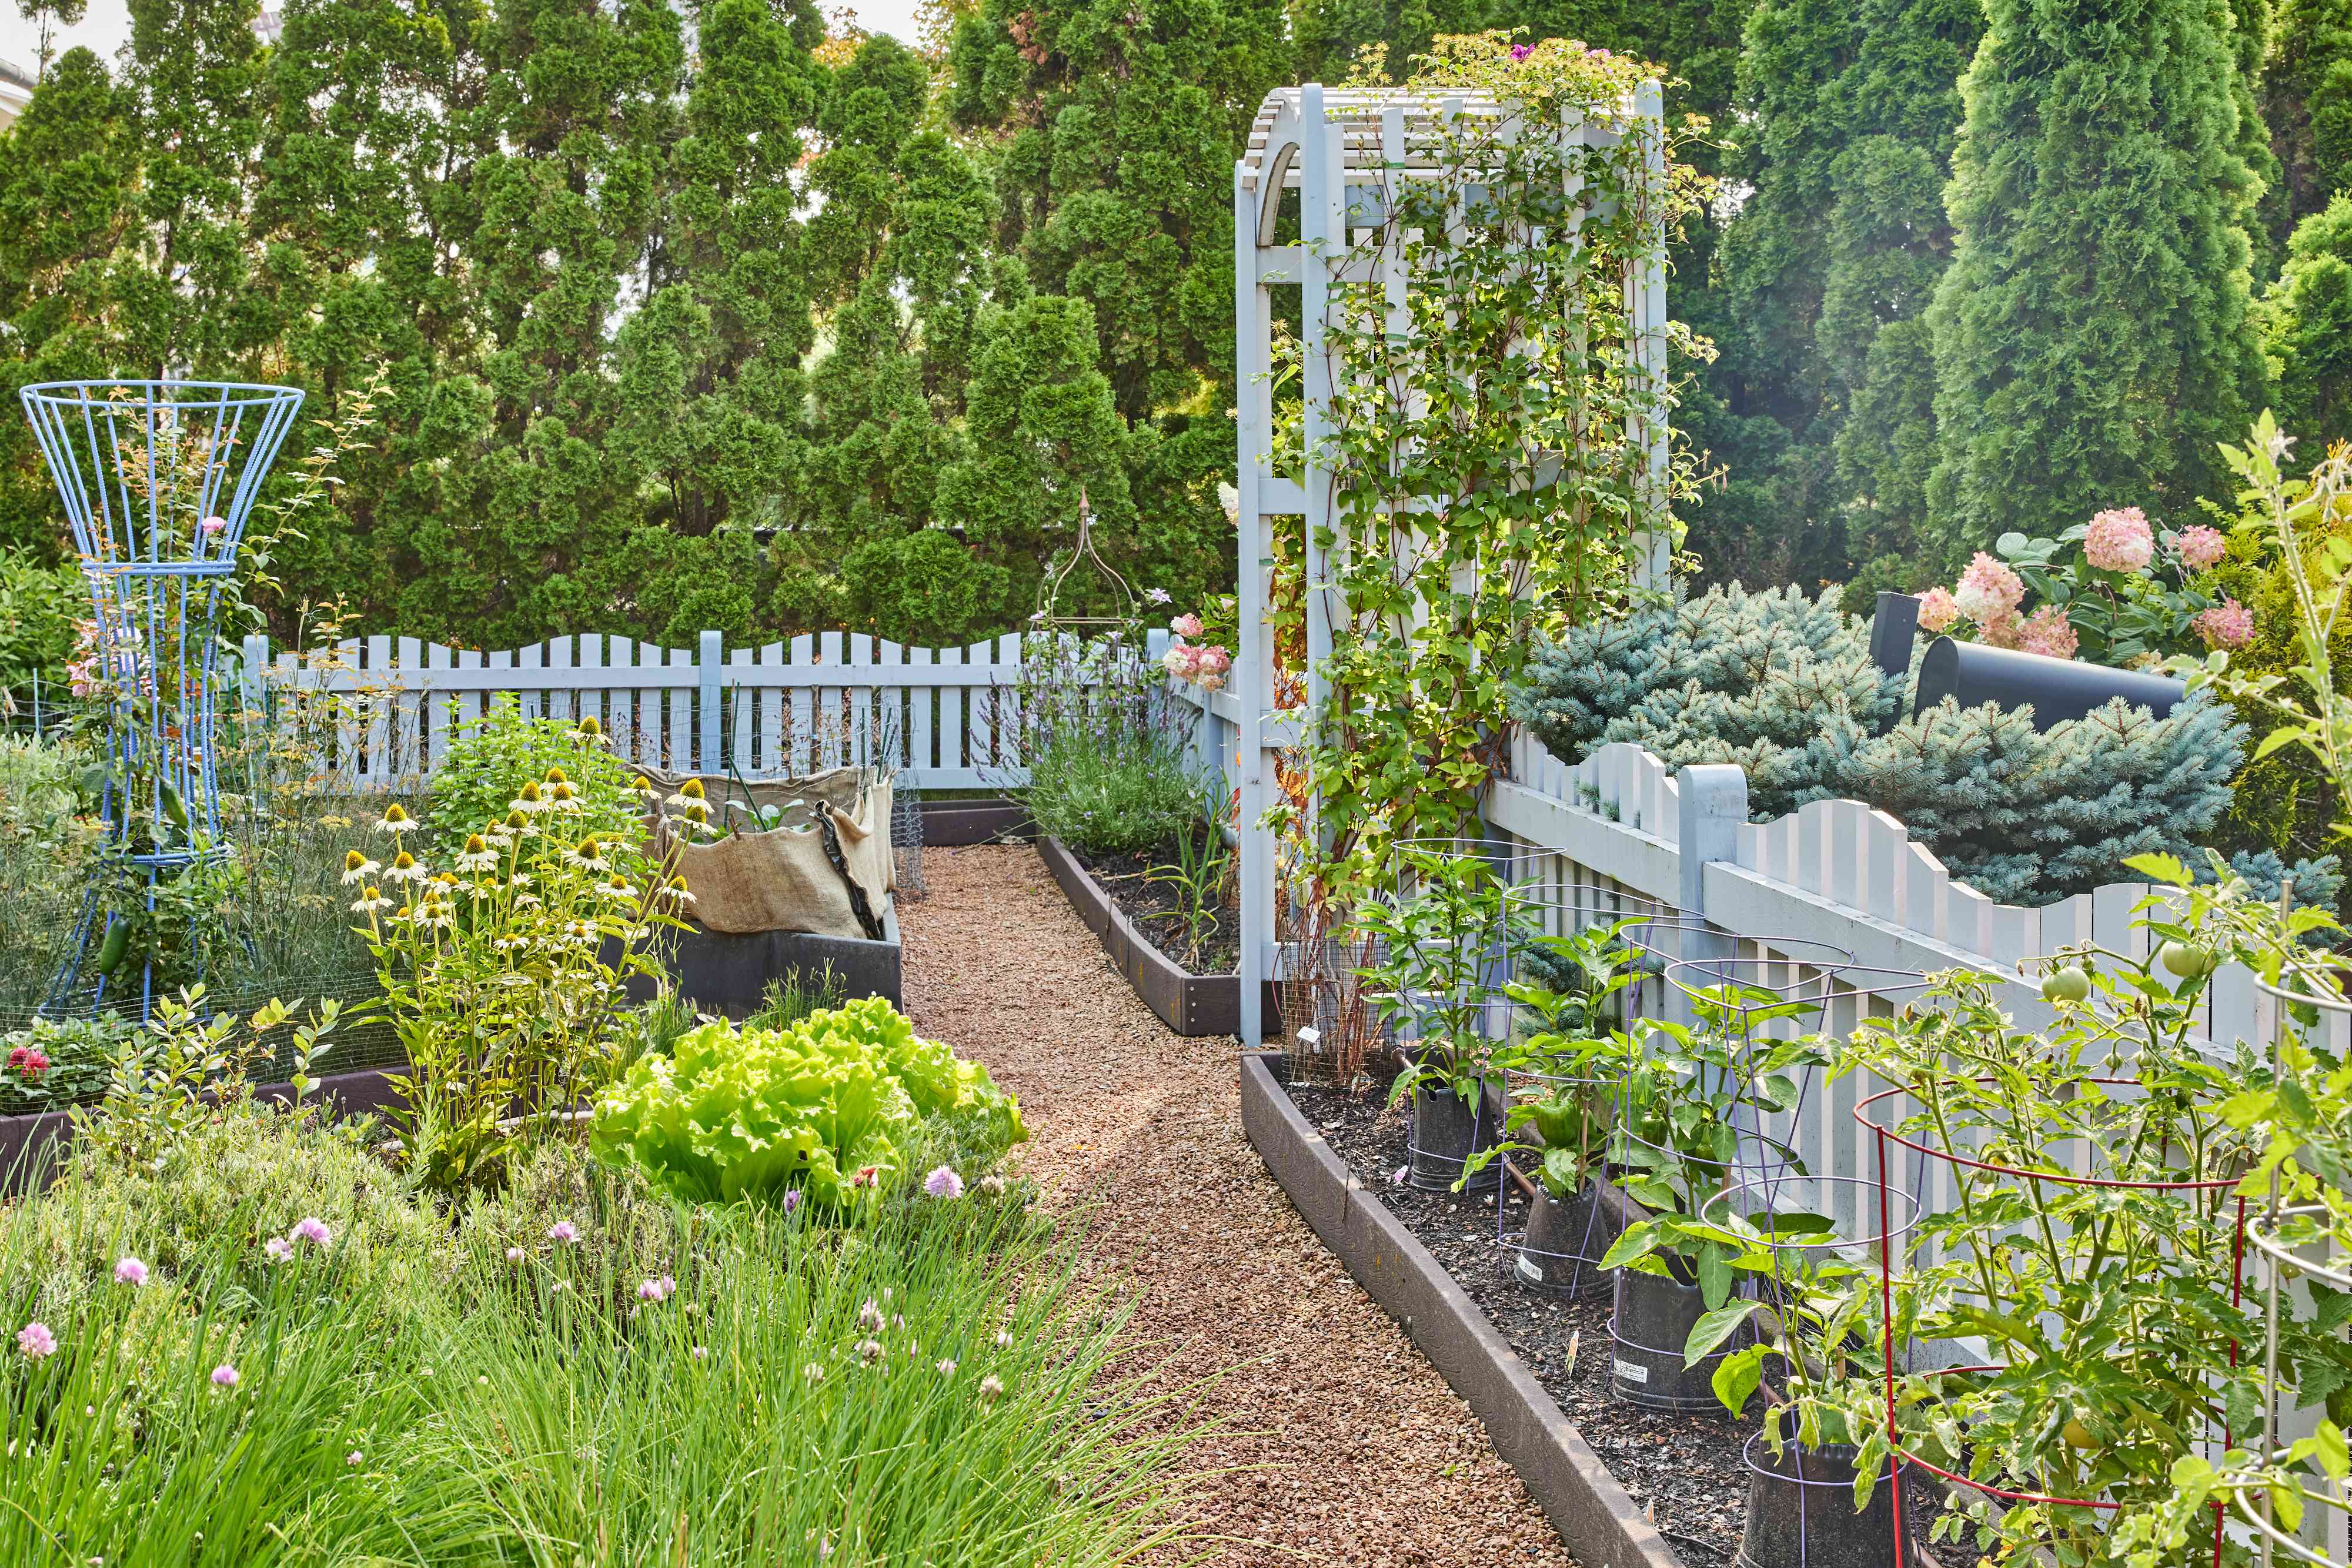
Layout Idea 2: Narrow Side-Yard Garden
If you have a 3–4-foot-wide side yard, you can create a border garden:
- Install a long, narrow raised bed (say 2×10 feet) along one fence.
- Plant trellised cucumbers or beans against the fence side.
- Use the remaining space for peppers, salad greens, and herbs in “waves” down the bed.
You’ll walk down the path beside it to harvest, and the vertical crops will turn a boring fence into a living wall
of snacks.
Layout Idea 3: Balcony Container Garden
On a balcony, think in layers:
- Large containers or grow bags on the floor with tomatoes, peppers, or compact zucchini.
- Medium pots on stands or shelves with lettuce, kale, and herbs.
- Railing planters with trailing cherry tomatoes, strawberries, or basil.
- A vertical trellis or net for peas or pole beans along one side.
Group containers by water needs so you’re not overwatering dry-loving herbs just because they live next to
thirsty lettuce.
Common Layout Mistakes (and Easy Fixes)
- Mistake: Overcrowding the bed. It’s tempting to plant everything everywhere. Solution: follow
spacing guidelines and remember that tiny seedlings turn into big, leafy drama queens. - Mistake: Tall plants shading everything. Solution: always place tall plants on the north or west
side of shorter crops. - Mistake: Forgetting paths. Solution: sketch paths in your plan first, then fit beds around them.
- Mistake: Ignoring future growth. Solution: visualize the mature size of plantsphotos on seed
packets are usually pretty honest about how big things get.
500-Word Experience Section: Lessons from Real Vegetable Garden Layouts
After you’ve read a few guides, vegetable garden layouts can start to look a little too perfectlike the gardening
version of a staged real-estate listing. Real gardens, especially in small or awkward spaces, are a mix of smart
planning, happy accidents, and “well, that didn’t work, let’s not do that again.”
When One Bed Teaches You Everything
Many gardeners start with a single 4×4 or 4×8 bed. At first, it feels tiny. Then everything grows and suddenly it
feels like a jungle gym for zucchinis. That first season teaches you a lot about layout: which plants bolted in
the heat, which ones tried to smother their neighbors, and how far you’re actually willing to walk after dinner to
snip herbs.
A common lesson: less is more. You might plant four tomato varieties in one bed because you want to try everything.
By mid-summer you can’t find the basil you tucked between them, and the lettuce you squeezed in the corner has
vanished under the foliage. The next year, you give tomatoes their own reserved area and put leafy greens where
you’ll actually seeand harvestthem.
The “I Forgot the Hose” Situation
Another classic experience: designing a beautiful layout… halfway across the yard from your water source. Hauling
watering cans in July will make you reconsider all your life choices. Gardeners quickly learn to run a hose or
drip line to the garden and to leave room along the edges of beds for hoses to snake through without mangling
plants. It sounds boring, but in real life, this simple layout tweak is what keeps gardens alive during heatwaves.
Discovering the Power of Vertical Space
If you’ve ever watched a cucumber vine attempt to conquer your entire bed, you know why many gardeners become
vertical-gardening converts. The first time you actually give that cucumber a trellis or an arch, your layout
transforms. The vines go up instead of sideways, and suddenly the bed has room again for lettuce or bush beans
underneath. You also discover how pleasant it is to harvest cucumbers at chest height instead of crawling around
on the ground playing “Where’s Waldo?” with prickly vines.
Small Spaces, Big Payoff
Gardeners with balconies or tiny patios often worry they don’t have “enough space” to make layout planning
worthwhile. In practice, they tend to be some of the most deliberate planners out there. When every container
counts, you think carefully about what you love to eat, how much sun each spot gets, and which plants can share a
pot without staging a turf war.
You quickly learn that a few well-placed containersone with salad greens, one with herbs, one with a cherry tomato
and trailing basilcan deliver a steady stream of harvests. You also notice how micro-layout choices matter:
putting the salad greens in the shadiest corner of the balcony can keep them from bolting, while a heat-loving
tomato basks against a sunny wall.
The Ongoing Experiment
The biggest “experience tip” about vegetable garden layouts is this: treat every season as an experiment, not a
final exam. Take a photo of your garden in mid-summer and again in early fall. Mark up the picture with what
worked (“trellis on the north side = genius”) and what you’d change (“never putting zucchini next to anything
delicate ever again”).
Over a few years, the layout evolves into something that fits your climate, your schedule, and your taste buds.
You’ll know exactly where to tuck in an extra pot of basil, where the early spring spinach thrives, and which bed
is the undisputed “tomato bed.” That’s the quiet magic of layout: you’re not just placing plants; you’re designing
a little system that gets smarter and more productive with every season you grow.
Conclusion: Your Space, Your Layout, Your Harvest
Designing a vegetable garden layout in any spacetiny balcony, narrow side yard, or roomy backyardis less about
perfection and more about intention. When you understand your sun, measure your space, choose a layout style that
fits your life, and place plants thoughtfully, even a modest area can yield impressive harvests.
Start simple, take notes, and adjust as you go. Your garden layout will evolve, and so will your confidence. Before
long, you won’t just be asking “Where do I plant this?”you’ll be saying, “I know exactly where this goes.”