Want to learn how to draw a cute cartoon cat without spiraling into an existential crisis over whisker symmetry?
Same. The good news: cartoon cats are basically the comfort food of drawingsimple shapes, big personality, and
plenty of room for “happy little accidents” (aka “I meant to do that”).
This step-by-step tutorial is built for beginners, kids, busy adults, and anyone who’s ever drawn a cat that looked suspiciously like a potato.
You’ll use easy, repeatable shapes to create a charming cat you can customize with different expressions, patterns, poses, and accessories.
Grab a pencilyour new doodle buddy awaits.
What makes a cartoon cat look “cute”?
“Cute” is not magic. It’s design. Most cute cartoon animals share a few friendly tricks:
- Bigger head, smaller body: Baby-like proportions feel extra adorable.
- Big eyes + simple features: Less detail reads clearer and sweeter.
- Soft curves: Round cheeks, round paws, round everything (cats are basically living parentheses).
- Clean silhouettes: If the outline is clear, the drawing looks good even before details.
Supplies (keep it simple)
You don’t need a studio full of fancy tools. For an easy cat drawing, here’s plenty:
- Pencil (any everyday pencil is fine)
- Eraser (a soft eraser helps with gentle cleanup)
- Paper or sketchbook
- Optional: black pen/marker for outlining
- Optional: colored pencils, markers, or crayons for coloring
Before you start: pick your “cat vibe”
The steps below create a classic cute cartoon cat. But you can steer the style in seconds:
- Kawaii/chibi vibe: Extra-big eyes, tiny mouth, very round head.
- Classic cartoon vibe: Medium eyes, expressive eyebrows, playful pose.
- Simple doodle vibe: Dot eyes, tiny triangle nose, minimal lines.
No wrong choicejust different levels of “this cat is plotting something.”
Step 1: Sketch a big, soft head shape
Lightly draw a large circle or oval near the top half of the page. Don’t press hardthis is your “planning phase,” not your “permanent life choices.”
Think of the head as a marshmallow: round, soft, and forgiving.
Quick check
- Is the shape big enough to fit big eyes and cheeks? Great.
- Is it a little lopsided? Also great. Your cat now has character.
Step 2: Add ears (two triangles… but make them friendly)
On top of the head, draw two ears. They can be simple triangles, but soften them:
round the tips slightly or curve the sides so they don’t look like tiny warning signs.
Angle the ears outward a bit for a relaxed, cute look. Taller ears can look surprised; shorter ears can look calm or sleepy.
Pro tip
Keep both ears roughly the same size and height. If one ear is taller, your cat looks like it just heard the treat bag open. (Not a bad thing.)
Step 3: Place facial guidelines (so your eyes don’t wander off)
Lightly draw a vertical line down the center of the face and a horizontal line slightly below the middle.
That lower horizontal line is a “cute trick”: placing the eyes a bit lower makes the face feel more baby-like.
These guides help keep the face balancedespecially if you want a clean cartoon cat face that looks intentional instead of “oops.”
Common mistake (and the fix)
If your eyes end up too high, your cat may look startled. If they’re too low, your cat may look like it’s melting.
Aim for “friendly and curious.”
Step 4: Draw the eyes (the cuteness engine)
Draw two large circles or ovals on your eye line. Leave a bit of space between themabout one eye-width is a solid starting point.
Bigger eyes = cuter cat. That’s just science (the fun kind).
Inside each eye, add:
- A pupil (circle or oval)
- A highlight (a small circle left unshaded) to make the eyes sparkle
- Optional: a second tiny highlight for extra “awww”
Style options
- Super simple: Dot eyes or tiny ovals (fast and adorable).
- Expressive: Add thick upper eyelids or eyelashes.
- Playful: Make one eye a winkinstant personality.
Step 5: Add the nose, mouth, and cheeks
Draw a small triangle or rounded “button” nose below the eyes, centered on your vertical guide.
Under the nose, add a tiny “W” shape or a simple curved smile.
Now give your cat cheeks: draw two gentle curves on either side of the mouth area (like soft parentheses).
Cheeks make the face feel plush and friendlylike the cat is made of warm socks.
Expression hacks
- Happy: Upward mouth curve + slightly raised cheeks.
- Sleepy: Curved closed eyes + tiny “u” mouth.
- Sassy: One eyebrow up (yes, cats absolutely have eyebrows in cartoons).
Step 6: Draw the body and paws (keep it simple and squishy)
Under the head, sketch a rounded “bean” or oval body. Cute cartoon cats look best with simplified shapesno need to map every rib.
Keep the body smaller than the head for that extra cute proportion.
Add paws using small ovals or rounded rectangles:
- Sitting pose: Two front paws in front, two back paws peeking out to the sides.
- Standing pose: Four simple legs with rounded feetlike tiny marshmallow stilts.
Quick anatomy cheat (cartoon edition)
Think “snowman”: big head, smaller body, tiny feet. Realism can wait; cuteness is on the schedule today.
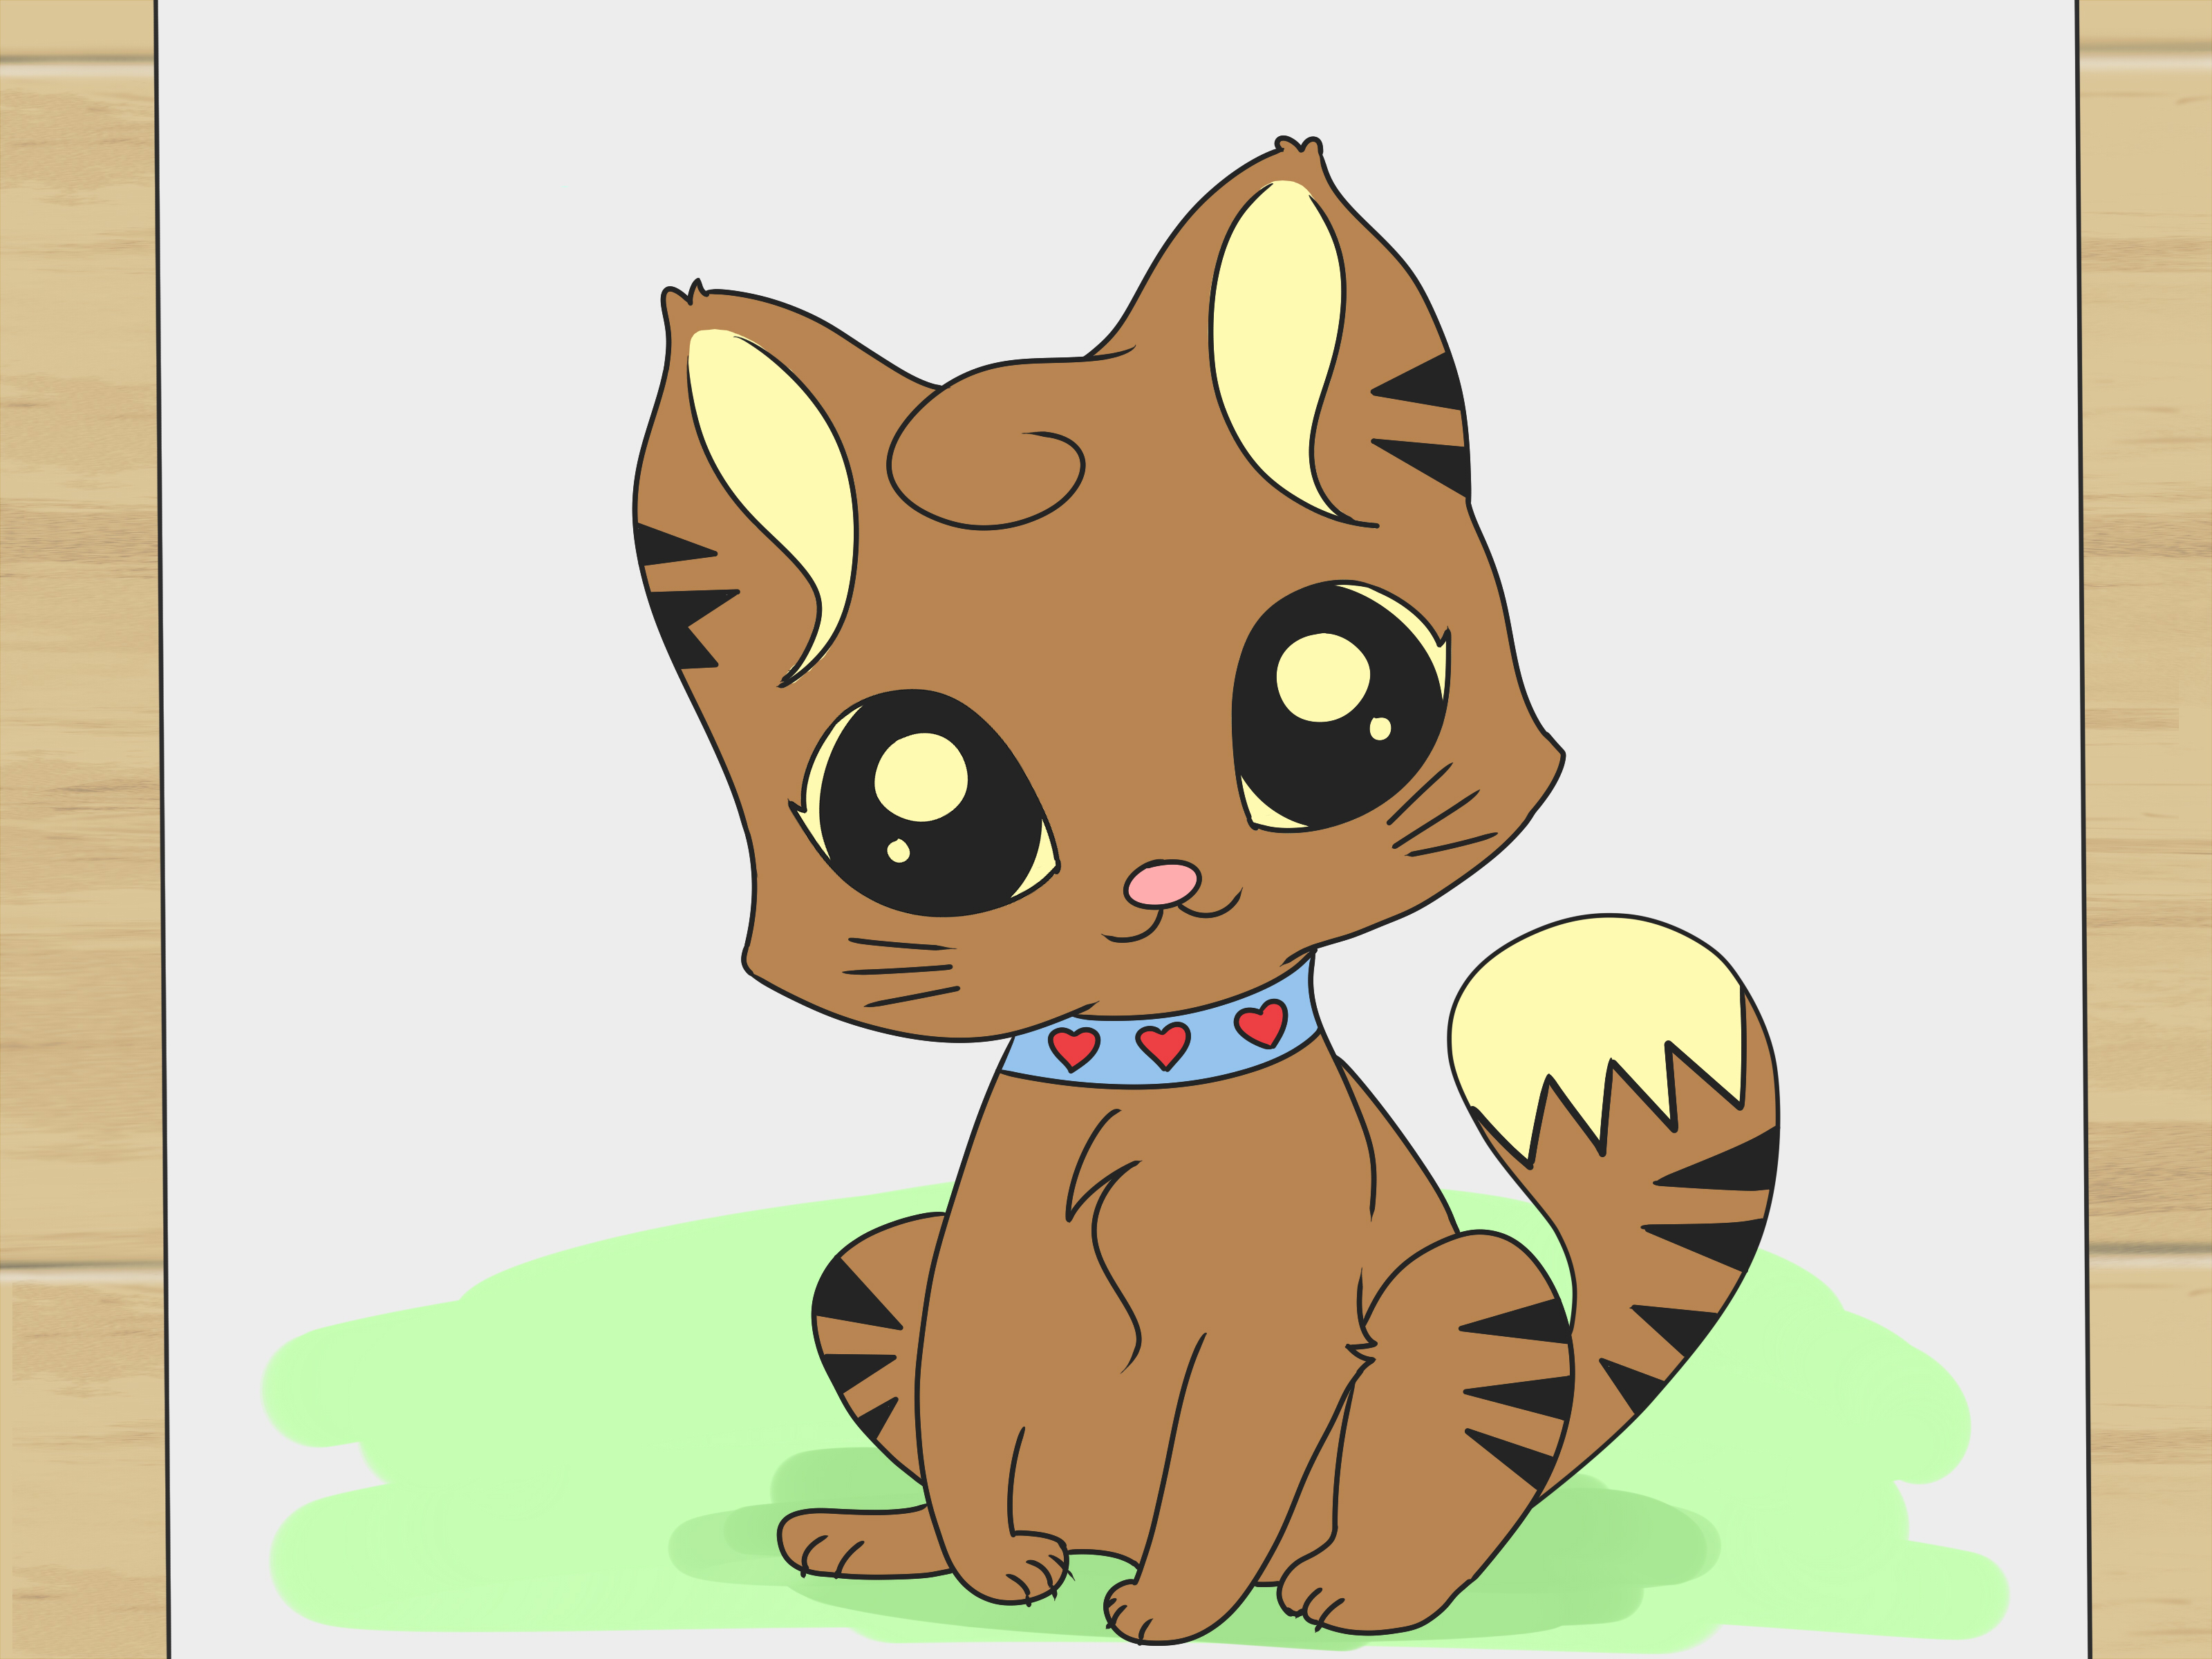
Step 7: Add the tail and details (whiskers, inner ears, patterns)
Draw a tail as a long curvelike a question mark or a soft “S.”
A curled tail feels playful; a straight tail feels alert; a puffier tail feels extra fluffy (and mildly dramatic).
Add details:
- Inner ears: small triangles or curved lines inside each ear
- Whiskers: 2–4 lines on each side (keep them light and clean)
- Fur hints: a few short strokes on cheeks, chest, or tail (don’t overdo it)
Pattern ideas (fast and cute)
- Tabby stripes on forehead and tail
- Calico spots on body
- A heart-shaped patch (because you’re the artist, and laws do not apply here)
Step 8: Outline, erase, and color your cartoon cat
When you like your sketch, outline it with a darker pencil, pen, or marker. Use smooth, confident strokes.
If you’re using pen, do it in sections: head first, then ears, then face, then bodylike assembling a very cute robot.
Once the outline is dry (if using ink), erase the light guidelines.
Coloring tips for beginners
- Pick 2–3 main colors: fur color, accent color (collar/bow), and a shade color.
- Add simple shading: darker under the chin, belly, and behind paws.
- Keep it clean: leave small highlights in the eyes and maybe on the nose.
Troubleshooting: common “my cat looks weird” moments
Problem: The eyes look uneven
Fix: Draw the eyes as simple circles first. Then add pupils and highlights only after both eye shapes match.
If one eye is larger, make the other eye larger toosymmetry through commitment.
Problem: The head looks too pointy
Fix: Round the cheeks and soften the jawline. Cute cats usually avoid sharp angles (unless they’re villain cats, and that’s a different tutorial).
Problem: The body feels stiff
Fix: Add a gentle curve to the spine, tilt the head slightly, or curve the tail into a playful shape. Tiny curves = instant life.
Fun variations to try after you finish
- Sleepy cat: closed eyes, tiny smile, curled tail
- Curious cat: wide eyes, head tilt, tail up
- Kitten mode: bigger head, shorter legs, smaller nose
- Fancy cat: bow tie, collar bell, tiny top hat (do not ask why; just trust the process)
- Cat + prop: add a yarn ball, fish, or a cardboard boxbecause cats love boxes like we love Wi-Fi
Mini practice plan (10 minutes a day)
Want fast improvement without turning your life into a drawing bootcamp? Try this:
- 2 minutes: draw 5 head circles (light and loose)
- 3 minutes: add ears and facial guidelines to 2 of them
- 3 minutes: practice 3 different eye styles (dots, big circles, sleepy curves)
- 2 minutes: draw 3 tails (curled, straight, fluffy)
In a week, your cartoon cat drawing will look cleaner, faster, and more consistentwithout you needing to “be naturally talented.”
Experiences: what practice actually feels like (and why that’s good)
Let’s talk about the real experience of learning how to draw a cute cartoon cat step by step, because no one warns you about the emotional journey
of trying to make two circles match. Here’s what many beginners noticeand how to use it to your advantage.
First, there’s the “confident start” moment. You draw a head circle and think, “Wow. I’m basically an animator now.”
Then you add ears, and suddenly one ear looks like a triangle and the other looks like a slice of pizza that lost a fight. This is normal.
Your brain is learning hand control and spatial consistency at the same time. The fix isn’t talentit’s repetition with light pressure.
When you sketch softly, you give yourself permission to adjust without feeling like you’re erasing your entire identity.
Next comes the eye phase, where you realize eyes are tiny emotional engines. Two slightly different eye sizes can change your cat’s personality from
“sweet kitten” to “I have seen things.” Many people try to solve this by pressing harder (don’t), drawing slower (also don’t), or staring at the paper
until the paper apologizes (it won’t). The best experience-based trick is to draw both eye shapes first as simple ovals, then step backliterally lean back in your chair
and check them at a distance. Your brain catches imbalance faster when you’re not nose-to-paper.
Then you hit the “this doesn’t look like a cat yet” stage. This is the most underrated part of any drawing process.
Early steps often look like random shapes. That doesn’t mean you’re doing it wrongit means you’re building structure.
A cartoon cat becomes a cat when you add the nose, mouth, and whiskers. It’s like cooking: ingredients look weird until they become dinner.
After a few tries, something cool happens: you start developing preferences. Maybe you love big sparkling eyes. Maybe you prefer dot eyes and a tiny “u” smile.
Maybe you always draw a fluffy tail because it feels cozy. That’s your style forming, and it usually shows up before people feel “good enough.”
If you keep going, you’ll notice your lines get smoother, your faces get more consistent, and your cats start looking like they belong in the same
cartoon universe instead of different planets.
Finally, the best part: drawing cute cats becomes a low-stress creative habit. You can doodle them in the corner of notes, on digital tablets, on sticky notes,
or on the back of an envelope while you wait for coffee. The experience is relaxing because the goal isn’t perfectionit’s play.
And ironically, that playful mindset is what makes your drawings improve the fastest.
Conclusion
You just learned how to draw a cute cartoon cat in 8 stepsusing simple shapes, clean lines, and a little creative mischief.
If your first cat looks a bit goofy, congratulations: you made a cartoon. Keep practicing, try a few variations, and don’t be afraid to redraw the same cat
with different expressions. The more cats you draw, the more “easy” this step-by-step cat drawing becomes.