If autumn had an official flower, it would absolutely be the chrysanthemum. Also called mums, these bold, button-like blooms take over porches, patios, and garden beds just as summer flowers start to fizzle out. The good news: growing mums isn’t hard. The better news: with the right care, many chrysanthemums will come back year after year instead of becoming “one-season throwaways.”
In this guide, we’ll walk through how to grow chrysanthemums from the ground upwhere to plant them, how to keep them blooming longer, and what to do so they actually survive winter. We’ll also talk about common mistakes, real-life experiences from seasoned mum lovers, and simple tricks that turn a sad, droopy pot into a fall showstopper.
Chrysanthemum Basics: Annual vs. Perennial Mums
Before you stick any plant in the ground, you need to know one thing: what kind of mum are you dealing with? In garden centers, most mums fall into two big categories:
- Florist mums – Bred mainly for showy flowers and usually sold in decorative pots. They’re often treated as annuals because they’re less cold-hardy.
- Garden mums (hardy mums) – Bred to handle cold weather and come back each year when planted in the ground in USDA zones roughly 5–9, with good care.
Florist mums are perfect if you want instant color on the porch for a few weeks. Garden mums are the better choice if you dream of a perennial mum patch that explodes with color every fall. When in doubt, look for labels that say “hardy mum,” “garden mum,” or mention specific hardiness zones rather than just “decorative” or “florist.”
One more twist: even hardy mums often fail to overwinter when planted late in the fall. Their root systems simply don’t have time to establish before the ground freezes. That’s why, if you want mums to behave like perennials, spring planting is your secret weapon.
Best Time and Place to Plant Chrysanthemums
When to Plant Mums
Technically you can buy mums almost any time big-box stores decide it’s “pumpkin and hay bale season.” But for long-term success, timing matters:
- For perennials: Plant mums in the spring after your last frost date. This gives them the entire growing season to build strong roots.
- For seasonal color: Plant mums in late summer or early fall. Choose plants with lots of tight buds instead of fully open flowers so you get a longer show.
- Overwintering fall mums: If you do plant in fall and hope they come back, make sure they go in the ground at least 6 weeks before your first hard freeze, and mulch them well.
Choosing the Right Location
Chrysanthemums are sun lovers. To bloom well, they need:
- At least 6 hours of direct sun per day. In too much shade, mums become leggy and produce fewer flowers.
- Well-drained soil. They hate “wet feet.” Soggy soil can quickly lead to root rot.
- A spot sheltered from extreme wind. Young or newly planted mums need time to establish, and constant wind can dry them out and stress them.
- Dark nights. Mums use shortening day length to trigger blooming. Avoid planting right under bright security lights or street lamps, which can confuse their flowering cycle.
In short: think sunny, well-drained, and reasonably protectednot a dark corner, waterlogged low spot, or under a stadium floodlight.
Soil Preparation for Healthy Mums
Mums aren’t divas, but they do appreciate good soil. Aim for:
- Texture: Loamy or sandy, not heavy clay. If you have clay, improve it with compost and organic matter.
- Drainage: Water should soak in, not puddle. Raised beds can help in heavy soils.
- Organic matter: Mix in compost, well-rotted manure, or similar before planting to boost fertility and structure.
For containers, use a high-quality potting mix rather than garden soil. Potting mix stays lighter, drains better, and supports healthy root growth in containers.
How to Plant Chrysanthemums
Planting in the Ground
- Dig the hole. Make it about twice as wide as the root ball and roughly the same depth.
- Loosen the roots. Gently tease apart any circling roots at the bottom or sides of the pot. Mums are often root-bound when purchased.
- Set the plant. Position the mum so the top of the root ball is level with the surrounding soil, not buried too deep.
- Backfill and firm. Fill the hole with amended soil, gently firming to eliminate air pockets.
- Water thoroughly. Give the plant a slow, deep soak to help settle the soil and hydrate roots.
- Mulch. Add 2–3 inches of mulch around (but not right against) the stems to help conserve moisture and protect roots.
Planting Mums in Containers
Container mums are perfect for small spaces, balconies, or flanking your front door. To keep them happy:
- Choose a pot with drainage holes. No exceptions.
- Use fresh all-purpose potting mix, not dense garden soil.
- Plant at the same depth as in the nursery pot, and leave an inch or so of space at the top for watering.
- Water until it runs through the bottom of the pot, then let excess water drain fully.
Container mums will need more frequent watering than in-ground plants, especially in sunny or windy locations. Think “evenly moist,” not “swamp in a pot.”
Everyday Chrysanthemum Care
Watering Mums the Right Way
Mums have relatively shallow roots, so their soil can dry out faster than some other perennials. Here’s the sweet spot:
- Keep the soil consistently moist but not soggy.
- Water at the base of the plant to keep foliage dry and reduce disease risk.
- During hot, dry spells, container mums may need water almost daily.
- In cooler fall weather, check soil before wateringif the top inch is dry, it’s time to water.
If your mums wilt, they’ll usually bounce back after a good drink, but repeated drought stress shortens the bloom time and weakens the plant.
Fertilizing Mums for Strong Growth
For mums planted as perennials, fertilizing is more important than for those used as temporary fall décor. General tips:
- In spring, mix a balanced slow-release fertilizer into the soil when new growth appears.
- Side-dress with compost or organic fertilizer during the growing season to maintain vigor.
- Avoid heavy nitrogen feeding in late summer and fall, which can promote soft, tender growth at the expense of strong stems and flowers.
If your mums are in pots only for one season, the fertilizer mixed into high-quality potting mixes is usually plenty. For a really long display, you can add a diluted liquid fertilizer every few weeks while the plants are actively growing.
Pinching and Pruning for Bushy, Bloom-Covered Plants
Here’s the insider trick most plant tags don’t explain: pinching mums. Pinching means removing the soft growing tips to encourage branching and more flower buds.
For hardy, perennial mums in the ground:
- Begin pinching when plants reach about 4–6 inches tall in spring.
- Use your fingers or shears to pinch off the top inch or so of each stem.
- Repeat the process every 3–4 weeks until about early to mid-July. After that, let them grow and form flower buds.
This routine turns tall, spindly plants into compact, dome-shaped mounds absolutely smothered in blooms come fall. No pinching usually means tall, floppy plants with fewer flowers.
Deadheading and General Grooming
Deadheadingremoving spent flowerskeeps mums looking tidy and can encourage more blooms:
- Snip off faded blooms just above a set of healthy leaves.
- Clear out any dead or damaged stems to improve air circulation.
- Clean up fallen leaves and debris around the plant, especially in fall, to help prevent pests and diseases overwintering in the soil.
A few minutes of grooming every week can be the difference between “pretty” and “wow, what are those?” when visitors see your garden.
Overwintering Mums and Long-Term Care
Helping Hardy Mums Survive Winter
If you’ve planted hardy mums in the ground and want them back next year, your mission is to protect their roots:
- After the first hard frost blackens the foliage, cut stems back to about 3–4 inches tall, or wait until early spring to do it.
- Apply a thick mulch layer (3–4 inches) over the root zonestraw, shredded leaves, or bark all work.
- In very cold climates, consider extra protection, like piling leaves over the plants and holding them with a light cage or mesh.
In spring, once danger of severe frost has passed, pull back the mulch and look for fresh green shoots. That’s your sign your mums made it and are ready for a new round of pinching and growing.
Overwintering Container Mums
Overwintering mums in pots can be trickier because roots are more exposed to cold. You have a few options:
- Plant them in the ground in fall if you have space and want to keep them long term.
- Move pots into an unheated but protected space (like a garage) once the top growth is killed by frost. Keep the soil just barely moist over winter.
- In mild climates, group pots together against a house wall, mulch over the soil surface, and protect the sides of pots with leaves or straw.
Even with all that, some potted mums simply won’t return, especially florist types. Treat any survivors as a bonus.
Common Chrysanthemum Problems (and Easy Fixes)
Leggy Plants with Few Blooms
Likely causes: not enough sun, no pinching, or too much nitrogen. Move plants to a sunnier spot next season, pinch regularly in spring and early summer, and avoid over-fertilizing.
Yellowing Leaves and Root Rot
Mums sitting in soggy soil will sulk, then die. Improve drainage, water less often, and never leave container mums in saucers of standing water. If the plant smells sour at the base and pulls up easily, roots may already be rotting.
Powdery Mildew and Leaf Spots
Good air circulation and watering at the base of the plant go a long way. Avoid overhead watering late in the day. Remove affected leaves to slow spread, and clean up debris at season’s end.
Pests: Aphids, Spider Mites, and Friends
Tiny sap-sucking pests love tender mum growth. A strong spray of water can knock them off. For persistent issues, use insecticidal soap or horticultural oil, following label directions. Healthy, well-sited plants are naturally more resistant.
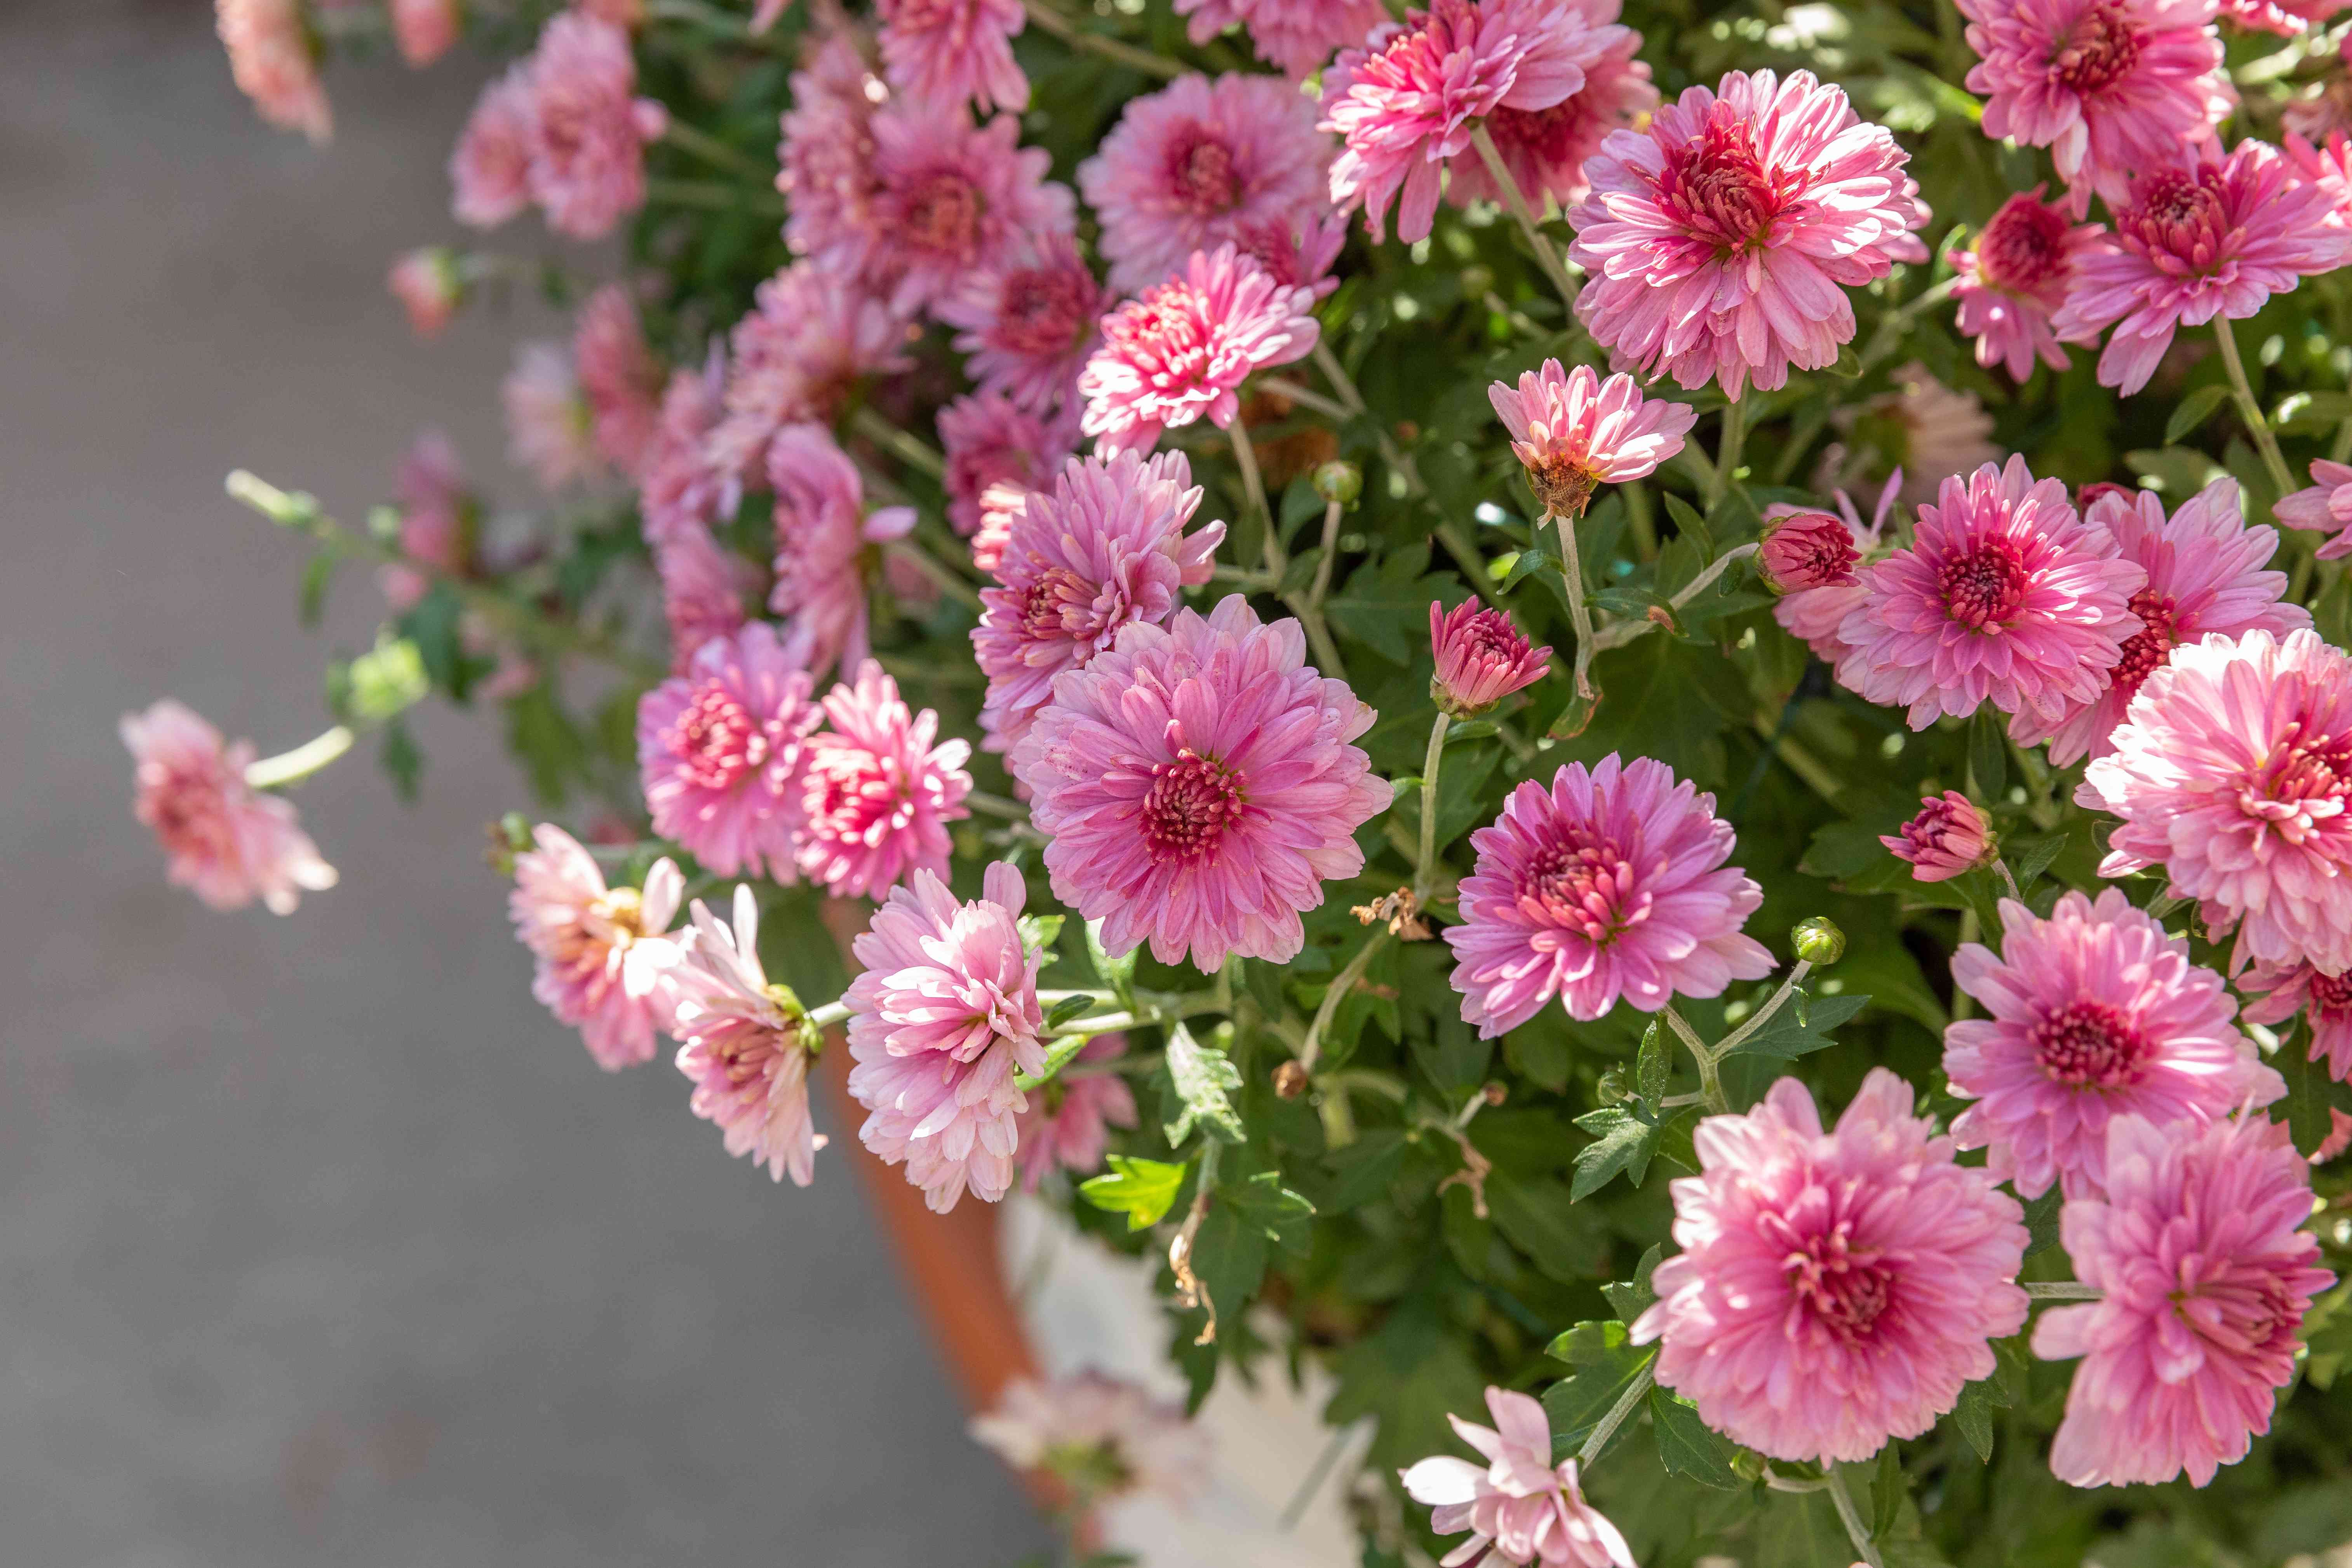
Choosing Chrysanthemum Varieties and Colors
Chrysanthemums come in an almost ridiculous range of shapes and shadeseverything from classic daisy-like blooms to wild spider types with curling petals. Some of the forms you might see include:
- Decorative mums: Full, rounded flowers commonly sold in fall.
- Cushion mums: Low, mounding plants ideal for borders.
- Spider or quill mums: Exotic-looking blooms often used in floral arrangements.
- Daisy mums: Classic yellow or white daisy form with a central disc.
Color choices are nearly endless: bright yellows, oranges, burgundy, purples, pinks, whites, and bicolors. For maximum impact, plant a mix of early-, mid-, and late-season varieties so your garden enjoys a long fall show.
Real-Life Experiences Growing Chrysanthemums
Books and tags are helpful, but gardeners’ real experiences tell you how mums behave in everyday yards, balconies, and front steps. Here are a few lessons that pop up over and over from people who grow mums year after year.
1. The “Cheap Fall Porch Pot” That Turned into a Perennial Star
Imagine this: you buy a big, bargain pot of mums in full bloom at the grocery store in October. You plunk it on the porch, enjoy the color, and thenbecause you’re feeling a little guilty about tossing ityou stick it in the ground before winter hits. The next spring, nothing happens. By summer, you’re sure it’s dead… until late, when a few shoots appear. The following year, that sad little rescue becomes a fat mound of flowers, bigger and better than the original pot.
What happened? Even though that plant probably started life as a florist mum, it managed to develop enough roots and found a spot it liked: decent sun, not too wet, and some winter protection from mulch and nearby plants. The big takeaway is that it’s often worth planting those “disposable” mums instead of tossing them. Some will surprise you.
2. The Difference Bud Stage Makes
Seasoned mum buyers almost always reach past the showiest plant to pick the one with the tightest buds. It feels wrongyou’re literally choosing the plant with fewer open flowersbut it pays off.
Fully open mums often have only a week or two left at peak color. Plants covered in buds will slowly open over several weeks, giving you a much longer display. So if you want your front steps to look magazine-worthy through most of the season, pick mums that are still in the “about to explode” stage, not the ones already shouting.
3. The Balcony Gardener’s Reality Check
Container mums on balconies face two main issues: wind and dehydration. Up high, wind strips moisture from leaves and soil quickly, and pots heat up faster than ground soil. Balcony gardeners who succeed with mums almost always:
- Use larger containers so the soil doesn’t dry out in a few hours.
- Check soil moisture daily, especially on sunny, breezy days.
- Group pots together so they protect each other a bit from wind.
- Rotate pots occasionally so all sides get some sun and fill out evenly.
One balcony grower summed it up perfectly: “Mums in small pots on a windy balcony are like teenagers with bottomless stomachsturn your back for a second and they need more water.”
4. The Gardener Who Finally Started Pinching
Many gardeners admit they ignored the whole “pinch your mums” advice for years. Then one spring, they finally tried it. The result? Shorter, sturdier plants that didn’t flop open in a rainstorm and were so covered in blooms that foliage practically disappeared. Once you see a well-pinched mum next to an unpinched one, it’s hard to go back.
If you’re nervous about “messing up” your plant, start small. Pinch just a few stems and leave others alone. By fall, the difference in branching and flower count will convince you the extra effort is worth it.
5. Learning to Accept (and Replace) the Quitters
Even with perfect care, not every mum will come back. Some are simply bred for short-term display, not survival. Long-time growers have made peace with this. They treat mums as a mix of:
- Reliable perennials they plant in spring and baby through the seasons.
- Seasonal accents they buy each fall purely for color, knowing those may not return.
That mindset makes mums a lot more fun. You can still experiment with overwintering, dividing big clumps in spring, and collecting your favorite hardy varieties, while also enjoying those spontaneous pots of color from the garden center each year.
In the end, growing chrysanthemums is about embracing their role as the grand finale of the gardening season. Give them sun, good soil, some pinching and grooming, and a little winter protection, and they’ll reward you with outrageously cheerful color just when you need it most.