A plain glass plate is basically a blank canvas that also happens to hold cookies. That’s the magic: with a few smart
supplies and a tiny bit of patience, you can turn thrift-store glass into custom tabletop décor and
party-ready pieces that look boutiquewithout boutique prices.
This guide walks you through painting glass plates the right way (so your design actually sticks),
plus design ideas that make entertaining feel effortless: personalized place settings, seasonal dessert plates,
cocktail-party snack trays, and “how is this not from a store?” serving moments.
Why Painted Glass Plates Work So Well for Home Décor
Glass plates have two big advantages: they’re inexpensive and they’re visually light. Unlike heavy stoneware,
painted glass can add color and pattern without making a table feel crowded. They also layer beautifully over
chargers, placemats, and linensso even a small motif (dots, metallic rims, a monogram) can look intentional.
For décor, painted plates can become stand-up display pieces on plate easels, shelf styling accents, or
wall-grouping art. For entertaining, they’re a way to coordinate a theme without buying an entire new
dinnerware set you’ll regret by next Tuesday.
Start With the Right Plate
You don’t need rare vintage glass. You need smooth, non-etched, non-cracked plates that can handle
gentle curing (air-dry or oven setting, depending on the paint). Good choices include:
- Clear glass dinner plates (ideal for reverse painting on the underside)
- Glass salad or dessert plates (quick wins for party sets)
- Glass chargers (best for décor, layering, and big “wow” on a table)
Avoid plates with chips or hairline cracks (they can worsen with heat), and skip anything with a textured
surface where paint can’t lay smoothly. If you’re not sure, hold the plate under bright lightimperfections
show up fast.
Supplies You’ll Actually Use (No “Craft Closet Museum” Required)
Core supplies
- Glass paint or enamel paint made for glass/ceramic (more durable than basic acrylic)
- Paint pens (great for lettering, outlines, dots, and metallic details)
- Soft synthetic brushes (flat + small round)
- Painter’s tape or vinyl tape (for clean lines)
- Stencils (adhesive stencils are the least rage-inducing)
- Rubbing alcohol + lint-free cloth (for prep)
- Paper towels, cotton swabs, toothpicks (for quick fixes)
Nice-to-haves
- Sponge daubers (easy stenciling and soft gradients)
- Palette or paper plate for mixing
- Plate stands/easels (for display)
- Parchment paper (to protect your work surface)
Paint Choices: What to Use (and What to Stop Using on Glass)
The biggest mistake beginners make is treating glass like paper. Regular craft acrylic can look great
initiallythen peel, scratch, or wash off later. If you want a plate that lasts, choose paint designed to
bond to slick surfaces.
Option 1: Enamel-style paints made for glass/ceramic
These are popular for a reason: they’re formulated for non-porous surfaces and often offer curing methods
(air curing or heat setting) that increase durability. They’re ideal for dots, florals, borders, and full
opaque designs.
Option 2: Glass paint (translucent or opaque)
Glass paints can give you stained-glass vibes, especially on clear plates. They work beautifully for
reverse painting because the glass itself adds gloss and depth.
Option 3: Paint pens / paint markers
Paint pens are your shortcut to clean typography, thin borders, and metallic accents. Use them for place
cards (“Emma,” “Aunt Linda,” “Do Not Touch My Brownies”), small icons, and line art.
Important reality check: many glass paints are intended for decorative surfaces, and manufacturers
often advise keeping paint away from direct food contact areas. If you want your plates to function for serving,
design smart: paint the rim, paint the underside, or reserve painted areas for non-food zones.
Food-Contact & Safety: Make It Pretty, Make It Sensible
Painted glassware can be durable, but it’s not automatically “food safe” just because it’s cute. Many craft paint
lines caution that painted areas shouldn’t touch food, and some specify they’re not for direct food contact at all.
The safest strategies for entertaining:
- Rim-only designs: keep paint on the outer rim where food rarely sits.
- Reverse painting: paint the underside of the plate so the food-side remains unpainted glass.
- Use as chargers or display plates: big impact, minimal risk.
- Serve wrapped/contained foods: cupcakes in liners, cookies on parchment, etc.
Also: don’t microwave painted glass pieces unless the paint line explicitly says it’s microwave safe. When in doubt,
treat painted plates like “handmade décor that sometimes holds snacks,” not “indestructible restaurant ware.”
Prep Like You Mean It (This Is the Step That Makes Paint Stick)
Glass looks clean even when it’s secretly coated in fingerprints, soap residue, or oils. Paint hates that.
Prep is simple, fast, and wildly important:
- Wash with warm soapy water, rinse well, and dry completely.
- Wipe the painting area with rubbing alcohol using a lint-free cloth.
- Handle the plate by the edges after prepping (or wear gloves) to avoid re-oiling the surface.
If you only do one “responsible adult” step in this entire craft, let it be the alcohol wipe.
Three Reliable Methods for Painting Glass Plates
Method 1: Rim painting (easy, classy, hard to mess up)
Rim designs are perfect for beginners because the plate still reads as functional even if you keep paint away from
the center. Ideas: metallic band, confetti dots, leafy border, thin double line, or a scalloped edge.
- Use painter’s tape to mark a clean border line (or two lines for a band).
- Brush on thin coats rather than one thick coat (thick coats streak and take forever to cure).
- Peel tape while paint is slightly tacky for the cleanest edge.
- Let dry fully before adding a second detail color.
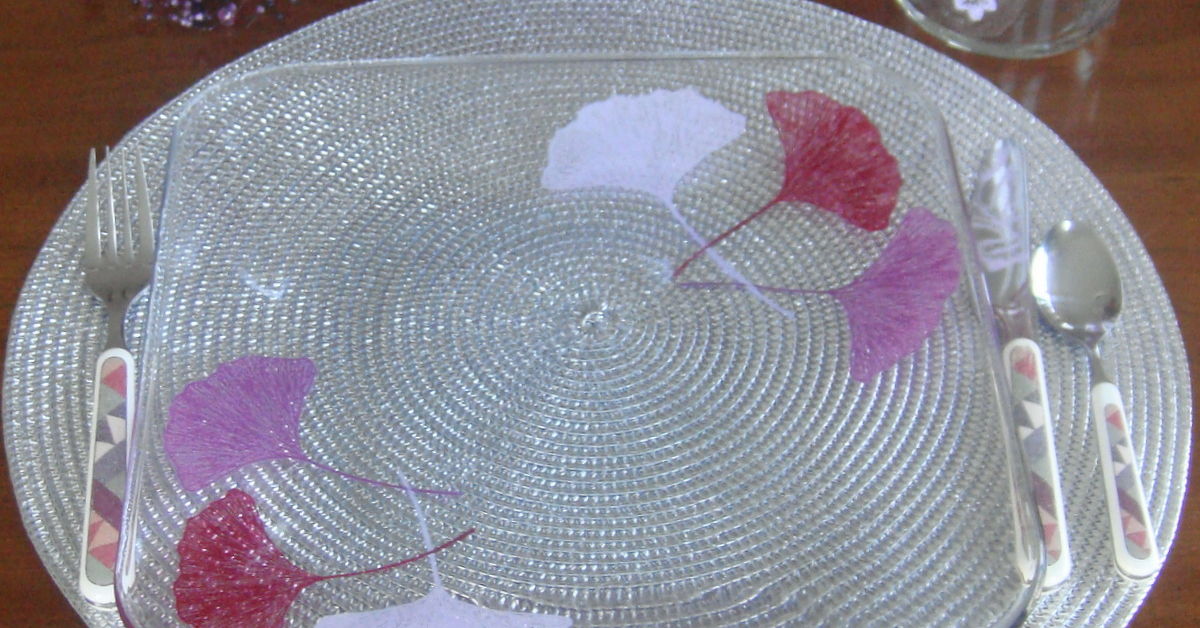
Method 2: Reverse painting on the underside (best for entertaining)
Reverse painting is the “cheat code” for plates: you paint the bottom side, and the front looks glossy, smooth,
and protected by glass. It also keeps the eating surface unpainted.
- Flip the plate upside down (paint on the underside).
- Sketch your design lightly on paper and tape it under the plate as a guide.
- Paint details first (outlines, lettering), then fill larger color areas.
- Check the design by flipping the plate over occasionally (the “front view” matters most).
- Let dry between layers to avoid smearing.
Method 3: Stencil + sponge (fast sets for parties)
If you’re making a set of 6–12 plates for an event, stencils keep everything consistent without requiring
you to become a professional botanical illustrator overnight.
- Place an adhesive stencil on the plate (burnish edges gently to reduce bleed).
- Use a sponge dauber with a small amount of paint (dab off excess first).
- Stipple paint lightly in layers instead of pressing hard.
- Lift stencil carefully and touch up edges with a small brush or cotton swab.
Drying and Curing: Where Great Plates Become Durable Plates
Your paint’s label is the boss here, but many glass/enamel craft paints use one of these paths:
air curing (often weeks) or heat setting (oven curing) to harden the finish.
Some lines suggest placing glass in a cool oven, heating gradually, then cooling in the oven to reduce the risk
of breakage and help the paint set.
Oven-curing tips (gentle and drama-free)
- Put the plate in a cool oven before turning heat on (no preheating surprises).
- Use the temperature/time specified by your paint line.
- When time is up, turn the oven off and let the plate cool inside before removing.
- Give it a “rest period” after curing if instructed (some paints recommend waiting before washing/using).
If you don’t want to use the oven, air curing can workjust accept that it’s a slow-burn relationship, not
a weekend fling.
Design Ideas That Look Like You Planned Ahead (Even If You Didn’t)
1) The “Signature Rim” set
Choose one motif and repeat it: a thin gold line, a dotted border, or a color-blocked rim. This is the easiest way
to make mismatched thrifted plates look like a coordinated collection.
2) Seasonal dessert plates
Make small plates for holidays and keep them stacked for instant hosting points:
snowflakes for winter, citrus slices for summer, leaves for fall, tiny hearts for February.
Guests notice dessert plates. They just do.
3) Personalized place settings (without permanent commitment)
Paint names on the underside edge of each plate, or create small monograms near the rim.
For a party, you can also paint a symbol set: a little lemon, olive branch, star, waveanything that helps people
remember “that’s my plate” without writing a name the size of a billboard.
4) Charcuterie companion plates
Paint tiny labels or icons on the underside: a cheese wedge, a grape cluster, a honey dipper, or a pepper. It’s a
subtle theme that makes snack boards look curated. Bonus: reverse painting keeps the food side unpainted glass.
5) “Cocktail napkin” plates
Make 6-inch snack plates with a playful phrase around the rimshort, clean, and readable. Keep it tasteful and
you’ve got year-round entertaining pieces that feel custom.
Table Styling: How to Make Painted Plates Look Expensive
The easiest styling trick is layering. Painted glass plates shine when you:
- Place them on a neutral charger (rattan, white, matte black).
- Repeat one color from the plate in napkins or flowers.
- Use metallic flatware if your plate has metallic accents.
- Mix patterns intentionally: one “hero” pattern plus a quiet solid works better than chaos-core everything.
And if you’re displaying painted plates as décor, plate stands are your best friend. A single painted plate on a
bookshelf can function like artbecause it is.
Care and Cleaning: Keep the Pretty From Peeling
Even when paints claim better durability after curing, treat painted plates gently for maximum lifespan:
- Hand wash when possible (gentle soap, soft sponge).
- If dishwasher is allowed by your paint line, use top rack and avoid harsh cycles.
- Don’t soak painted items for long periods.
- Avoid abrasive scrubbers (they’re basically tiny sandpaper with ambition).
Troubleshooting: When Your Plate Has Opinions
Paint is beading up
That’s usually oil residue. Re-clean with alcohol, let dry, and try again. Also check that you’re using glass-appropriate paint.
Streaky brush marks
Use thinner coats, a softer brush, and let each coat dry. Some finishes level out as they cure, especially if
you avoid over-brushing.
Stencil bleed
Less paint on the sponge and more dabbing layers. Also, press stencil edges down firmly and peel carefully.
Smudges or mistakes
While paint is wet, a cotton swab with a little alcohol can lift small errors. If paint dries, you can often
scrape tiny mistakes with a toothpick (gently) before curing.
Quick Project “Recipes” for Parties
Brunch Citrus Plates (set of 6)
- Reverse paint simple orange/lemon slice shapes on the underside.
- Add a thin green leaf accent near the rim.
- Keep the center mostly clear for food placement.
- Cure based on paint instructions.
Holiday Confetti Rim Plates
- Use a paint pen to dot the rim in 2–3 colors.
- Add metallic dots sparingly for sparkle.
- Make them dessert-size for instant seasonal flair.
Minimal Monogram Chargers (décor + entertaining)
- Stencil a single letter on the underside near the edge.
- Add a thin border line around the rim.
- Use primarily as chargers or display plates for longest life.
Conclusion: Your Table, But Make It Personal
Painting glass plates is one of those crafts where the payoff feels bigger than the effort. With the right paint,
solid prep, and smart design placement, you can create DIY painted plates that elevate décor,
add personality to entertaining, and make everyday tables feel less “random Tuesday” and more “intentional host energy.”
Start small: a rim design, a few reverse-painted snack plates, or a set of holiday dessert plates. Once you see how
easy it is to customize glass, you’ll start looking at every plain plate like it’s begging for a glow-up.
Experiences & Real-World Lessons from Painting Glass Plates (Extended)
The first time you paint a glass plate, you usually learn one thing immediately: glass is not impressed by your
confidence. It’s slick, it shows every fingerprint, and it will absolutely reveal whether you rushed the prep.
A lot of people go in thinking, “I paint walls / I doodle / I once made a decent poster in schoolhow hard can it be?”
Then the paint beads up like it’s trying to escape. That’s your cue that the alcohol wipe isn’t optional; it’s the
“seatbelt” of glass plate painting.
Once the surface is properly prepped, the process becomes oddly satisfying. You’ll notice that glass paint (and
enamel-style paint) behaves differently depending on how much you load your brush. Too much paint and you get thick
ridges, drips, or uneven gloss. Too little and the brush drags, leaving streaks that look dramatic in the wrong way.
The sweet spot is light, thin coatsespecially if you’re building a solid rim or using a stencil. It feels slower at
first, but it’s actually faster than fixing a gloopy mess later.
Reverse painting on the underside of clear plates is often the moment people get hooked. You paint a simple flower,
flip the plate over, and suddenly the design looks cleaner and shinier than it did two seconds ago. The glass acts
like a built-in topcoat, smoothing out minor brush marks and making colors pop. It’s also a practical win for
entertaining, because the “food side” remains plain glass. That’s why reverse painting tends to be the go-to method
for snack plates, dessert plates, and serving pieces that will see real use.
Another common experience: paint pens feel like cheatingin a good way. If you’ve ever tried to hand-letter with a
brush and ended up with something that resembles a haunted signature, paint pens can be a lifesaver. They’re great
for thin borders, dot patterns, and names on the underside edge of plates for place settings. The trick is to test
the pen on scrap glass first so you know how much pressure gives you a crisp line instead of a paint “blob surprise.”
Curing is where patience gets tested. A lot of crafters love the idea of “dishwasher safe,” but real life tends to
teach a more nuanced lesson: even if the paint line says it can handle washing after curing, gentle care keeps your
work looking new. People often end up choosing hand washing for special piecesespecially anything with metallic
accents or fine detail. For plates meant mainly for décor, curing is still worth doing because it hardens the finish
and reduces the chance of scratches from stacking or displaying.
The best “hosting” experience with painted plates is how they change the vibe of a gathering without announcing
themselves. Guests may not even say “these plates are painted,” but they’ll comment that the table looks cute,
cohesive, or “so put together.” That’s the quiet power of custom tabletop décor: it feels personal. And because
glass plates are easy to find, you can keep experimentingmake a summer set, then a holiday set, then a “just because
I like dots” set. Over time, you end up with a small rotation of plates that makes entertaining feel less like work
and more like play.
If there’s one universal takeaway, it’s this: start with a simple design, learn how your paint behaves, and don’t
be afraid to make “practice plates.” The first set teaches you technique. The second set teaches you style. The third
set is the one your friends ask aboutand that’s when you realize you accidentally became the person who makes
everything look cute on purpose.