Note: This article is written as original, publish-ready web content based on established STEM education principles about potato batteries, electrochemical cells, simple circuits, zinc and copper electrodes, and low-power digital clocks.
Introduction: Yes, a Potato Can Tell TimeSort Of
If you have ever looked at a potato and thought, “You know what this needs? A career in timekeeping,” congratulations: you are ready for one of the most charming science projects ever invented. A potato clock is a simple homemade battery that uses potatoes, two different metals, wires, and a small digital clock to demonstrate how chemical energy can become electrical energy.
To be clear, the potato is not secretly a tiny power plant wearing a brown jacket. The real action happens between two different metalsusually zinc and copper. The potato acts as an electrolyte, helping charged particles move so electrons can travel through the wire and power a low-current clock. In other words, the potato is less “battery hero” and more “very helpful science potato.”
This guide covers 3 ways to make a potato clock: the classic two-potato method, a simple coin-and-nail version, and a stronger science-fair setup that lets you test voltage, troubleshoot problems, and experiment with more potatoes. Along the way, you will learn what materials to use, why the clock works, what to do when it does not work, and how to avoid turning your kitchen table into a tragic salad of wires.
How a Potato Clock Works
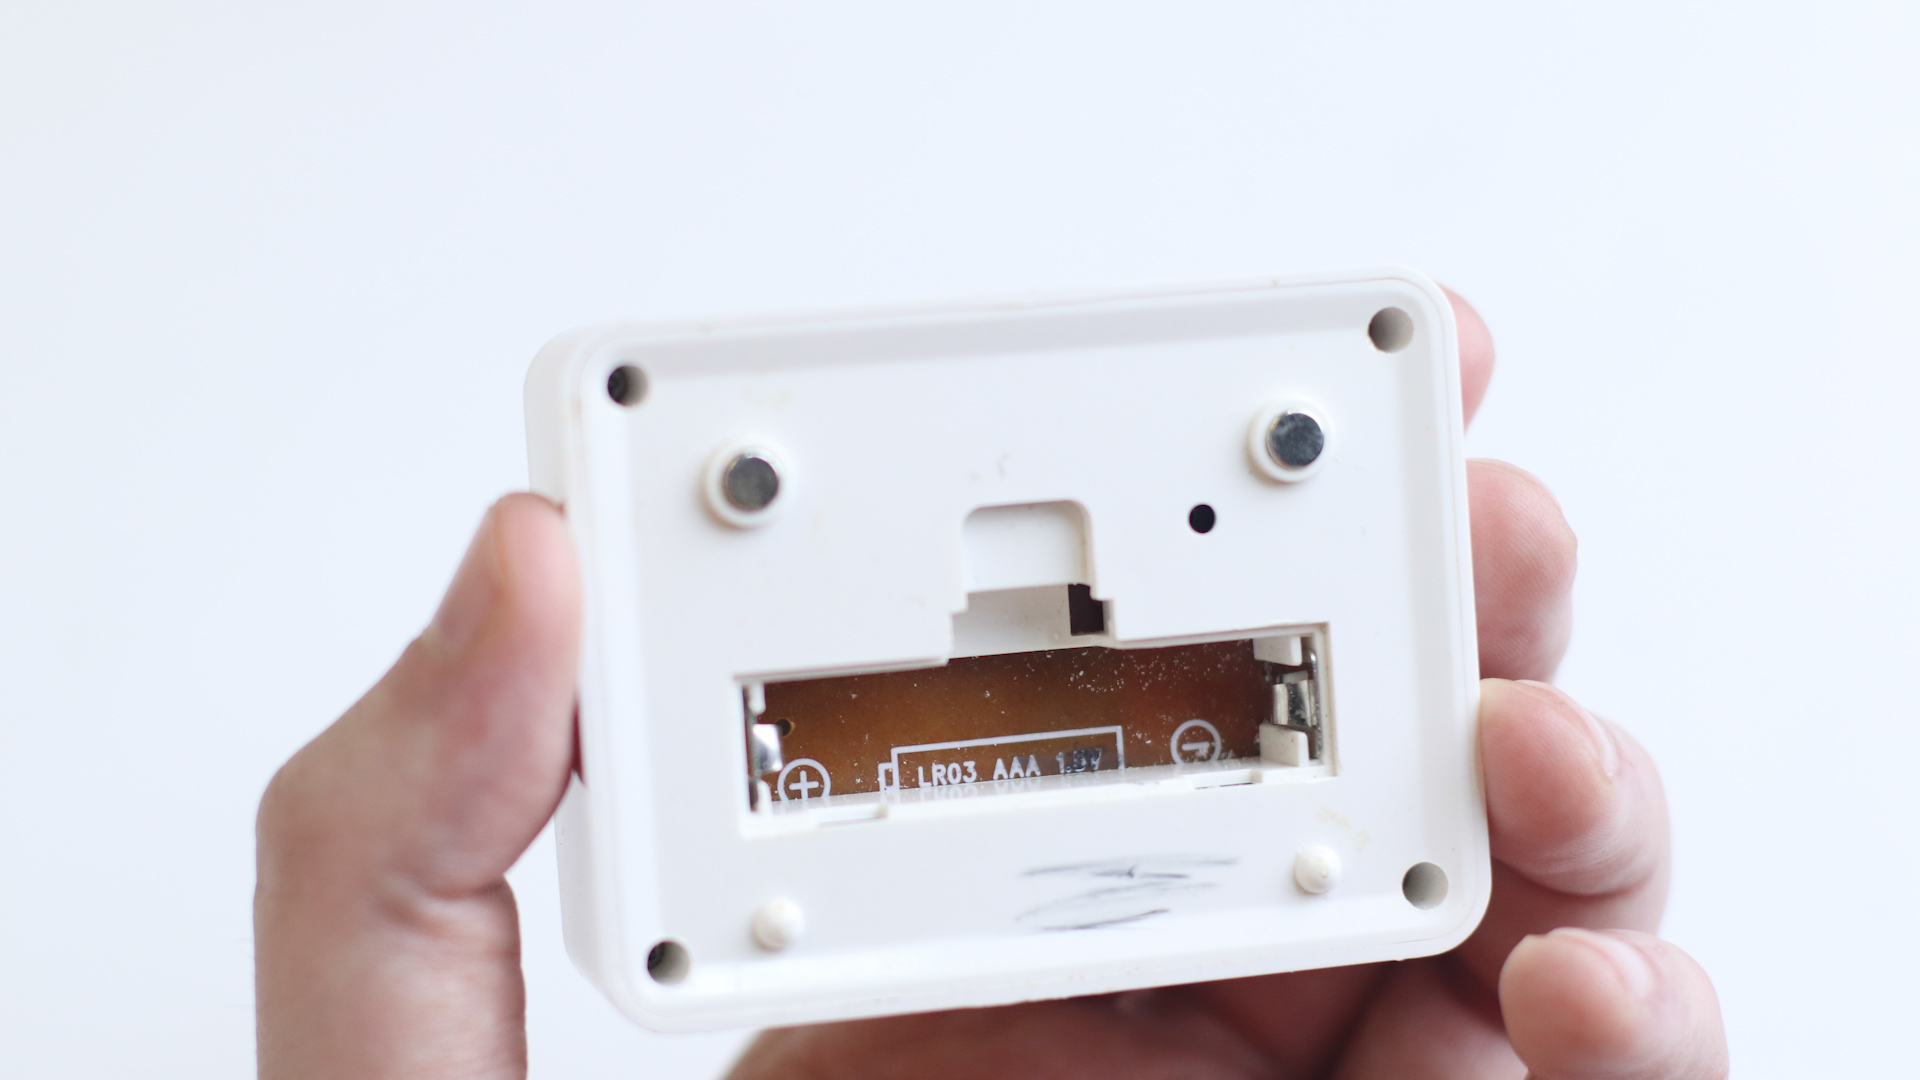
A potato clock is a type of electrochemical cell. That means it uses a chemical reaction to create electrical energy. The basic ingredients are simple:
- Zinc electrode: usually a galvanized nail or zinc strip.
- Copper electrode: usually a copper penny, copper strip, or copper wire.
- Electrolyte: the potato’s moisture, salts, and mild acids.
- External circuit: wires and a low-power digital clock.
When zinc and copper are inserted into the potato without touching each other, the zinc tends to release electrons more readily than copper. Those electrons travel through the wire toward the copper side. The potato helps ions move internally, which keeps the reaction going long enough to power a small device. This is why a potato battery can run a digital clock but will not power your laptop, phone, blender, or your neighbor’s inflatable holiday decorations.
Safety First: Small Voltage, Real Tools
A potato clock is generally safe as a supervised science activity, but it still uses metal pieces, wires, and sometimes a tiny clock module. Keep these safety tips in mind:
- Ask an adult for help when cutting wire, stripping insulation, or using sharp metal pieces.
- Do not eat the potatoes after using them as batteries. They have been poked with metal and are no longer dinner.
- Keep the metal electrodes from touching inside the potato, or the circuit may short out.
- Use only a small, low-power digital clock or LCD clock.
- Wash your hands and clean the workspace after the experiment.
Materials You May Need
The exact supply list depends on which method you choose, but most potato clock experiments use the following:
- 2 or 3 fresh potatoes
- 2 or 3 galvanized nails, zinc screws, or zinc strips
- 2 or 3 copper pennies, copper strips, or thick copper wires
- 3 to 5 alligator clip wires
- 1 small digital clock or LCD clock module
- Optional: multimeter or voltmeter
- Optional: sandpaper for cleaning metal surfaces
- Paper towels for cleanup
Fresh potatoes usually work better because they contain more moisture. If your potato looks like it just survived a desert camping trip, choose a fresher one. The experiment depends on the potato’s internal moisture and dissolved ions, so sad, dry potatoes may produce sad, dry results.
Way 1: Make a Classic Two-Potato Clock
The classic two-potato clock is the version most people picture when they hear “potato battery.” It is simple, visual, and wonderfully weird. This method usually works with a low-power digital clock that needs about 1.5 volts, though results vary depending on the metals, potato freshness, and connections.
What You Need
- 2 fresh potatoes
- 2 galvanized nails or zinc strips
- 2 copper strips, copper wires, or copper pennies
- 3 alligator clip wires
- 1 small LCD clock module
Step-by-Step Instructions
- Place the two potatoes side by side on a dry surface.
- Insert one galvanized nail into each potato.
- Insert one copper piece into each potato, keeping it at least an inch away from the zinc piece.
- Use one alligator clip wire to connect the zinc nail in the first potato to the copper piece in the second potato.
- Connect the remaining free copper piece to the positive terminal of the clock.
- Connect the remaining free zinc nail to the negative terminal of the clock.
- If the display does not turn on, reverse the clock connections and check that every clip touches bare metal.
Why This Method Works
This setup connects two potato cells in series. A single potato cell may not provide enough voltage to run a clock, but two connected in series can increase the total voltage. Think of each potato as a tiny push. One push might not move the clock, but two pushes in the right direction may be enough to wake it up and make it display the time.
The key is correct polarity. The copper end usually connects toward the positive side, and the zinc end usually connects toward the negative side. If your clock remains blank, do not panic. Potato clocks are dramatic little gadgets. Most failures come from loose wires, dirty electrodes, weak potatoes, or the clock needing more voltage than the potatoes provide.
Way 2: Make a Potato Clock with Pennies and Galvanized Nails
This version is great if you want a more homemade feel. Instead of using copper and zinc strips from a science kit, you use common materials: copper pennies and galvanized nails. It is budget-friendly, easy to explain, and perfect for a kitchen-table STEM activity.
What You Need
- 2 potatoes
- 2 galvanized nails
- 2 copper pennies or copper-coated coins
- 3 insulated wires with alligator clips
- 1 low-power digital clock
- Optional: sandpaper
Step-by-Step Instructions
- Clean the pennies and nails. If they look dull, gently rub them with sandpaper.
- Push one galvanized nail into the first potato and one into the second potato.
- Make a small slit in each potato and insert a penny into each slit.
- Connect the nail in potato one to the penny in potato two with an alligator clip wire.
- Connect the free penny to the clock’s positive wire or terminal.
- Connect the free nail to the clock’s negative wire or terminal.
- Wait a moment. Some clocks need a second to start after the connection is made.
Important Penny Tip
Modern U.S. pennies are not pure copper. Since 1982, most pennies have been mostly zinc with a thin copper coating. For the best result, use copper strips, older copper pennies, or exposed copper wire if you have them. A copper-coated penny may still work if the outer copper surface is intact, but a dedicated copper strip is more reliable.
Why Cleaning the Metal Helps
Dirty or oxidized metal can reduce the quality of the connection. If the alligator clip is gripping grime instead of metal, the electrons may refuse to cooperate. They are tiny, but apparently they have standards. Cleaning the electrodes gives the circuit a better chance of working on the first try.
Way 3: Build a Stronger Science-Fair Potato Clock
The third method is for anyone who wants to go beyond “Look, it works!” and into “Let’s measure this thing like a tiny potato engineer.” This version uses three potatoes, a multimeter, and basic comparisons between series and parallel connections. It is ideal for science fairs, classroom demonstrations, and curious students who enjoy turning vegetables into data.
What You Need
- 3 fresh potatoes
- 3 zinc nails, zinc screws, or zinc strips
- 3 copper strips or copper wires
- 5 or more alligator clip wires
- 1 small LCD clock
- 1 multimeter or voltmeter
- Notebook for recording results
Step 1: Build Three Individual Potato Cells
Insert one zinc electrode and one copper electrode into each potato. Keep the metals separated so they do not touch. Label the potatoes A, B, and C. Yes, labeling potatoes feels silly. Do it anyway. Science loves labels.
Step 2: Measure One Potato
Set your multimeter to measure DC voltage. Touch the positive probe to the copper electrode and the negative probe to the zinc electrode. Write down the voltage. It may be less than 1 volt, and that is normal. Potato batteries are educational, not muscular.
Step 3: Connect Potatoes in Series
To connect cells in series, connect the zinc electrode of one potato to the copper electrode of the next potato. Continue the chain. The free copper end becomes the positive connection, and the free zinc end becomes the negative connection. Measure the voltage across the two free ends. You should see the voltage increase compared with one potato.
Step 4: Try the Clock
Connect the free copper end to the clock’s positive terminal and the free zinc end to the clock’s negative terminal. If the clock turns on, celebrate responsibly. If it does not, add another potato cell, check polarity, clean your metal pieces, or make sure the clock is truly a low-power LCD model.
Step 5: Compare with Parallel Connections
In a parallel setup, all copper electrodes connect together and all zinc electrodes connect together. Parallel connections can help increase available current, but they do not increase voltage the same way series connections do. For a clock that needs a certain minimum voltage, series is usually the better first choice.
Potato Clock Troubleshooting Guide
The Clock Does Not Turn On
First, check polarity. Swap the clock wires and see if the display appears. Next, inspect the alligator clips. They must grip bare metal, not insulation, potato skin, or wishful thinking. Also confirm that the zinc and copper pieces are not touching inside the potato.
The Voltage Is Too Low
Add another potato in series. A single potato cell often produces less voltage than a small clock needs. Two or three cells may be required. Also try using larger, cleaner metal surfaces. Bigger electrodes can improve performance because more surface area is available for the reaction.
The Clock Works, Then Fades
The chemical reaction can weaken over time. Move the electrodes to fresh spots in the potato, clean the metal, or replace the potato. A potato clock is not meant to be a permanent household appliance, unless your interior design theme is “science fair chic.”
The Wires Get Confusing
Draw the circuit before connecting everything. Mark copper as “+” and zinc as “–.” For series, connect opposite metals: zinc to copper, zinc to copper, and so on. The two free ends go to the clock.
Best Potatoes for a Potato Clock
Most common potatoes can work, including russet, red, yellow, and white potatoes. The best potato is fresh, firm, and moist. A large potato gives you more room to separate electrodes, but the type of metal and quality of the circuit usually matter more than the potato variety.
Some experimenters test boiled potatoes, potato slices, lemons, apples, or other fruits and vegetables. These comparisons make excellent science fair extensions because they let you ask measurable questions: Which food produces the highest voltage? Does boiling change performance? Does electrode spacing matter? Does a larger electrode create a better current?
What Students Learn from a Potato Clock
A potato clock teaches more than “vegetables are suspiciously powerful.” It introduces several important science and engineering ideas:
- Electrochemistry: chemical reactions can move electrons.
- Circuits: electricity needs a complete path.
- Voltage: cells connected in series can increase total voltage.
- Current: different devices require different amounts of electrical flow.
- Resistance: poor connections and weak materials reduce performance.
- Engineering design: testing, improving, and troubleshooting are part of the process.
The best part is that failure is useful. If the clock does not turn on, that is not the end of the experiment. That is the experiment becoming interesting. Students can test one change at a time, record results, and discover what improves the circuit.
Common Mistakes to Avoid
Using Two of the Same Metal
A potato clock needs two different metals. Copper and zinc are a classic pair because they have different tendencies to give up or accept electrons. Two copper pieces will not create the same useful voltage difference.
Letting the Metals Touch
If the copper and zinc touch each other directly, the reaction can bypass the external circuit. The clock may receive little or no usable power. Keep the electrodes separated inside each potato.
Choosing the Wrong Clock
A potato clock works best with a very small LCD clock that requires little current. A wall clock, alarm clock with a speaker, or anything with lights will probably demand too much power.
Expecting Phone-Charging Power
A potato battery produces a tiny amount of electricity. It is perfect for learning and possibly powering a small clock. It is not a renewable energy plan for your entire house. Your refrigerator remains safe from potato takeover.
Fun Experiment Ideas After Your Clock Works
Once you successfully make a potato clock, try turning the activity into a real investigation. Change only one variable at a time so your results are meaningful.
- Compare russet, red, and yellow potatoes.
- Test potatoes against lemons, apples, or oranges.
- Measure voltage before and after cleaning the electrodes.
- Test whether electrode spacing changes the voltage.
- Compare two potatoes in series with three potatoes in series.
- Measure how long the clock runs before fading.
- Try copper strips versus copper pennies.
For a science fair board, include your question, hypothesis, materials, procedure, data table, graph, and conclusion. A strong project does not just show that the clock worked. It explains why it worked and what evidence supports your conclusion.
Real-World Connection: From Potatoes to Batteries
A potato clock is a tiny model of a much bigger idea. Commercial batteries also use electrodes, electrolytes, and chemical reactions to move electrons through a circuit. The materials are much more carefully engineered than a potato, of course, because nobody wants an electric car powered by mashed potatoes under the hood.
Still, the basic lesson is powerful: electricity is not magic. It follows rules. A battery needs chemical potential, conductive materials, and a complete circuit. When students build a potato clock, they can see those ideas with their own hands. That hands-on experience makes abstract words like “electrode,” “electrolyte,” and “voltage” feel much less intimidating.
Experiences and Practical Lessons from Making a Potato Clock
The first thing you learn from making a potato clock is humility. The second thing you learn is that potatoes are surprisingly picky coworkers. On paper, the project sounds simple: stick in copper, stick in zinc, connect wires, and watch the clock glow with the power of lunch. In real life, the clock may stare back blankly, as if judging your entire understanding of electricity.
One useful experience is to prepare more potatoes than you think you need. If the instructions say two potatoes, have three or four nearby. Not every potato produces the same result, and not every clock has the same power requirement. A fresh, moist potato with clean electrodes may work quickly, while an older potato may produce a weaker output. Having extras turns frustration into experimentation.
Another lesson is that connection quality matters more than beginners expect. A loose alligator clip can ruin the whole circuit. So can a clip attached to a dirty penny or a wire touching insulation instead of exposed metal. When students troubleshoot, they often want to blame the potato first. Sometimes the potato is innocent. The real villain is a bad connection wearing a tiny metal disguise.
It also helps to use a multimeter if one is available. Without a meter, the clock is the only judge. It either works or it does not. With a multimeter, students can see partial success. Maybe one potato produces a small voltage. Maybe two in series produce more. Maybe cleaning the zinc nail improves the reading. Those numbers make the invisible visible, and that is when the project becomes more than a neat trick.
In a classroom or family setting, the potato clock works especially well when treated like a challenge instead of a recipe. Ask questions before giving answers. What do you think will happen if we add a third potato? What if the metals touch? Which side should connect to the positive terminal? Why does a lemon sometimes work better than a potato? These questions invite students to reason instead of merely follow directions.
The funniest part is usually the moment the clock finally turns on. Everyone leans closer, someone says, “No way,” and the humble potato receives a level of respect normally reserved for astronauts and grandmothers who can fix anything with tape. That little blinking display is memorable because it proves that science is not trapped inside textbooks. It is sitting on the table, slightly muddy, connected to a wire.
For best results, set realistic expectations. The clock may not run forever. The display may be faint. The setup may need adjusting. That is perfectly fine. The goal is not to build a practical battery; the goal is to understand how batteries work. A potato clock is successful when it creates curiosity, encourages testing, and makes someone say, “Wait, can we try it with an apple?”
And that is the real win. The potato clock is not just a project about time. It is a project about asking better questions, making careful observations, and learning that even ordinary objects can reveal extraordinary science. Also, it gives the potato a brief but glorious promotion from side dish to laboratory equipment.
Conclusion: The Potato Clock Is Small Science with Big “Whoa” Energy
Making a potato clock is one of the easiest ways to explore electrochemistry, circuits, voltage, and engineering design with everyday materials. Whether you use the classic two-potato method, the penny-and-nail version, or a stronger science-fair setup with a multimeter, the core idea stays the same: zinc and copper create an electrochemical reaction, the potato acts as the electrolyte, and the wires carry electrons through a complete circuit to power a tiny clock.
The project is fun because it feels impossible at first. A potato should not look like it belongs in the same sentence as “electrical energy,” yet there it is, helping a digital clock tell time like a starchy little overachiever. More importantly, the potato clock helps students learn by doing. It rewards curiosity, troubleshooting, and careful observationall the good habits of real science.
If your clock works immediately, enjoy the victory. If it does not, enjoy the investigation. Clean the metals, check the polarity, add another potato, measure the voltage, and try again. The best experiments do not always work perfectly the first time. Sometimes they make you earn the “aha!” moment. And when that tiny screen finally appears, you will never look at a potato the same way again.