If you have ever looked at a party backdrop online and thought, “That is adorable, but it probably costs more than the cake,” I bring good news. A birthday backdrop made from dollar store tablecloths is one of the easiest ways to fake a fancy party look without sending your wallet into emotional distress. It is colorful, lightweight, customizable, surprisingly photogenic, and budget-friendly enough that you can still afford balloons, cupcakes, and that last-minute pack of candles you forgot to buy.
Even better, this is not one of those DIY projects that requires a hot glue gun, a crafting degree, and the patience of a saint. Plastic tablecloth backdrops are beginner-friendly. You can keep the design simple, go full extra with layers and fringe, or create a braided backdrop that looks way more complicated than it really is. Whether you are decorating for a toddler birthday, a teen party, or an adult celebration with strong “I still want cute photos” energy, this idea works.
In this guide, you will learn how to create a birthday backdrop from dollar store tablecloths, what supplies to buy, how to hang it safely, and how to make it look polished instead of like your party store bag exploded on the wall. We will also cover design ideas, common mistakes, and practical setup tips so your backdrop looks great in photos and not just from six feet away while squinting.
Why a Dollar Store Tablecloth Backdrop Works So Well
The beauty of this party decoration is that it solves several problems at once. First, it fills a blank wall quickly. Second, it creates a focal point behind a cake table, gift table, or DIY photo booth. Third, it gives your birthday party a custom color palette without custom pricing. That is the decorating equivalent of finding fries at the bottom of the bag. Pure joy.
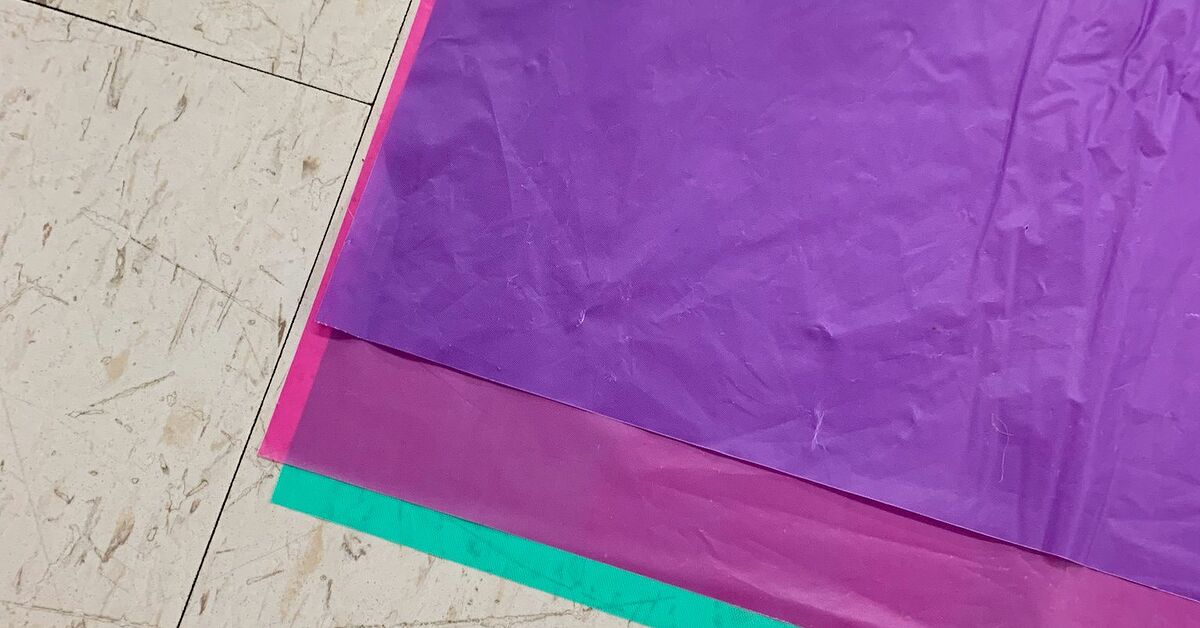
Plastic tablecloths are especially useful because they are lightweight, flexible, and easy to cut. Many standard rectangular plastic table covers are around 54 by 108 inches, which gives you enough material to create long fringe, layered panels, or twisted streamers without buying specialty fabric. Because they come in solid colors, metallic versions, and seasonal shades, they also make it easy to match a birthday theme. Think pastel rainbow for a child’s party, black and gold for a milestone birthday, or hot pink and orange for a summer celebration that refuses to be boring.
Another major win is flexibility. You can hang the backdrop vertically, horizontally, in stripes, in ombré layers, or in braided sections. You can keep it flat against the wall for a clean photo booth look, or you can fluff and layer it to add texture. In other words, the same cheap material can give you several different backdrop styles depending on how much effort and drama you want.
What You Need to Make a Birthday Backdrop From Dollar Store Tablecloths
You do not need much, which is part of the charm. Here is the basic supply list:
- Plastic tablecloths in 2 to 4 colors
- Sharp scissors
- Painter’s tape, wall-safe adhesive strips, or removable hooks and clips
- A stapler, if you want to build sections before hanging
- String, ribbon, or a backdrop stand if you do not want to attach anything directly to the wall
- Optional extras such as balloons, a birthday banner, paper fans, tissue pom-poms, or faux flowers
A small backdrop behind a dessert table may need only 3 to 6 tablecloths. A larger photo wall may need 8 to 12, depending on the width, the fullness you want, and whether you are layering colors. If you are making a braided or fringed design, buy an extra tablecloth or two. Running out halfway through is a special kind of party-planning annoyance.
How to Plan the Size and Layout
Measure Before You Buy
Before throwing random colors into your basket, measure the wall or the space behind your table. A backdrop that is too narrow can look skimpy in photos, while one that is way too large may swallow the rest of your decor. As a rule, your backdrop should be at least as wide as the table under it and ideally a little wider, especially if it will appear in photos.
If your dessert table is 6 feet wide, aim for a backdrop width of roughly 7 to 8 feet. Height depends on the room, but 6 to 7 feet usually works well for most party setups and pictures. If guests will stand in front of it for photos, make sure the backdrop is tall enough to frame heads, signs, and hair bows without awkward cropping.
Choose a Style First
The biggest mistake people make is buying materials before deciding on a look. Pick the design first, then calculate the number of tablecloths. Here are the most popular options:
- Fringe backdrop: Cut long strips, leaving the top intact, then layer sections for texture.
- Braided backdrop: Use three colors together and braid lightly for a fuller, woven look.
- Twisted panels: Twist strips gently for a draped, streamer-style effect.
- Layered curtain: Hang full panels and overlap colors for a simpler, faster design.
- Tablecloth plus balloons: Use the plastic backdrop as the base and add a balloon garland for dimension.
Step-by-Step: How to Make the Backdrop
1. Unfold and Smooth the Tablecloths
Plastic tablecloths love wrinkles almost as much as party guests love free cake. Open them ahead of time so the folds can relax. You do not need perfection, because texture actually helps this kind of backdrop look fuller, but flattening the worst creases will make the finished design look cleaner in photos.
2. Stack Colors if You Want a Braided or Fringe Look
For a braided backdrop, stack three tablecloths in different colors on top of each other. Keep them aligned at the top. Then cut long vertical strips upward from the bottom, stopping before you reach the top edge. That uncut top section keeps everything attached. Once all strips are cut, group one strip from each color and braid lightly down part of the length. Repeat across the panel.
For a fringe backdrop, fold the tablecloth if needed to speed up cutting, then create long vertical slits. Layer the finished panels one over another so the colors alternate or blend. This method is fast, forgiving, and great for beginners.
3. Build in Sections
If possible, assemble the backdrop in sections on the floor or a large table. This is easier than wrestling with floppy plastic while standing on a chair and questioning your life choices. You can staple the top edges together, or secure them onto a strip of ribbon or string so the section is easier to hang in one piece.
4. Hang It Carefully
If you are attaching the backdrop to a wall, use products suitable for the surface. Delicate-surface painter’s tape can be a safer option for painted drywall and similar indoor surfaces. Removable hooks, poster strips, or decorating clips can also work well when used according to package directions. If you are renting a venue or decorating at someone else’s house, test your method in a small area first. That is not paranoia. That is wisdom.
If you do not want anything on the wall, hang the backdrop from a freestanding stand, curtain rod, pipe frame, or a taut piece of string between two sturdy points. This is also the better option for outdoor parties, where wall adhesives may be less dependable depending on the surface and weather.
5. Add the Finishing Layer
Once the tablecloth backdrop is up, add the details that make it look intentional. A “Happy Birthday” sign, a number balloon, paper fans, tissue pom-poms, or a balloon garland can instantly take the setup from simple to photo-ready. The plastic backdrop is the base, not necessarily the whole performance.
Best Color Combinations for Birthday Backdrops
The right colors can make a cheap DIY backdrop look surprisingly elevated. Some combinations are almost impossible to mess up:
- Pink, lavender, and white: Soft, playful, and great for kids or pastel themes
- Black, gold, and white: Clean and stylish for adult birthdays or milestone parties
- Blue, teal, and silver: Fresh and bright without looking too loud
- Red, orange, and yellow: Perfect for high-energy summer birthdays
- Rainbow shades: Fun, cheerful, and excellent for photo booth setups
- Two-tone ombré: One color family in light and dark shades for a more polished look
If you are unsure, use one bold color, one soft neutral, and one metallic accent. That formula gives you contrast without chaos. Chaos should be reserved for children chasing each other with frosting.
How to Make It Look More Expensive
Cheap materials do not have to look cheap. What matters is how you style them. The fastest way to improve the final result is layering. One flat tablecloth hung on a wall looks like a tablecloth on a wall. Shocking, I know. But multiple layers with cuts, fringe, or braids create depth, movement, and better light reflection for photos.
Another smart upgrade is to limit your color palette. Too many colors can make the backdrop look messy. Sticking to two or three coordinated shades makes the setup feel more intentional. Add one statement detail, such as a balloon arch, oversized paper flowers, or a custom birthday sign, so the eye has a clear focal point.
Lighting matters too. If the photo area is dim, even a beautiful backdrop can look flat. Position the setup where it gets soft natural light, or use extra lamps or a ring light if the party is indoors at night. A great backdrop with bad lighting is like a fancy cake in a dark room. The potential is there, but the camera is not impressed.
Common Mistakes to Avoid
Using Too Few Tablecloths
Sparse backdrops rarely photograph well. Always assume you need a little more fullness than you think. Thin gaps become much more obvious on camera.
Skipping the Wall Prep
If you use removable hooks or adhesive products, follow the instructions. Rushing the prep step can lead to slipping, peeling, or a dramatic backdrop collapse right as guests start singing happy birthday. That is not the kind of party entertainment you want.
Making It Too Busy
If the tablecloths are metallic, the balloons are patterned, the banner has glitter, and the cake table is loaded with every color in existence, the backdrop may compete with everything else. Let one part of the design be the star and keep the rest supportive.
Ignoring Photo Framing
Always step back and check the setup through your phone camera. Something that looks centered in person may look crooked in photos. This quick test can save you from a whole album of slightly tilted birthday memories.
Where to Use This Birthday Backdrop
This idea is flexible enough to work in several spots. Behind the cake table is the classic choice, because it frames the centerpiece of the party and gives you great photos during candle time. A separate photo booth corner is another smart option, especially if you want guests to take pictures throughout the party. You can also use a smaller version behind a gift table, a welcome sign, or even a chair for a first birthday photo setup.
If you are hosting outdoors, secure the backdrop well and choose a less windy location. Plastic is lightweight, which is great for your budget and terrible for dramatic gusts. If the weather is unpredictable, attach the backdrop to a frame rather than directly to a flimsy fence or tree branch.
Is a Dollar Store Tablecloth Backdrop Actually Worth It?
Absolutely, especially if you want maximum visual impact for minimal cost. It is one of the smartest low-budget birthday party decorations because it fills space, creates a photo moment, and adapts to nearly any theme. It is also much easier to customize than a pre-printed backdrop, which often locks you into one design, one size, and one style.
The key is not just buying cheap supplies. It is using them with intention. Measure the space, choose a clear color plan, build enough fullness, and hang everything carefully. Do that, and people will assume you either hired someone or secretly became very crafty overnight.
And honestly, even if they do realize it is made from dollar store tablecloths, that can work in your favor. There is something deeply satisfying about saying, “Thanks, it cost less than the pizza.”
Real-Life Lessons From Making a Birthday Backdrop From Dollar Store Tablecloths
The first time I made a birthday backdrop from dollar store tablecloths, I had extremely high confidence and extremely low respect for measuring. That combination is how people end up cutting four tablecloths beautifully and then discovering the wall is much wider than their optimism suggested. I learned very quickly that this project rewards planning. Not complicated planning, not spreadsheet planning, just basic “maybe use a tape measure before grabbing scissors” planning.
What surprised me most was how forgiving the material was. Plastic tablecloths are not fancy, but that is exactly why they are so useful. If a strip tears unevenly, it usually blends right in. If one braid is chunkier than the others, nobody notices once the full backdrop is hung. In fact, a little irregularity often makes the backdrop look fluffier and more textured. That was reassuring, because I do not craft like a person in a magazine. I craft like a real human who also has to answer texts, check the oven, and stop someone from poking the cake icing.
I also learned that color matters more than perfection. A simple combination like pink, white, and gold instantly looks intentional, even if the cuts are not mathematically exact. On the other hand, too many random colors can make the whole setup feel noisy. The best backdrops I have seen always look like someone made one clear decision and stuck with it. That is good decorating advice in general, honestly. Pick a lane and decorate in it.
Another big lesson was that the backdrop becomes part of the party experience, not just part of the decor. Guests naturally gather near it. Kids pose in front of it. Adults use it as a selfie station even if they pretend they are “just helping.” The cake looks better in front of it, gifts look better under it, and last-minute photos suddenly have a background that does not include a laundry basket or a sad blank wall. It gives the party a center of gravity.
The most practical takeaway, though, was to build the backdrop before party day whenever possible. Doing it the day before turns the project into a fun prep task. Doing it an hour before guests arrive turns it into a sweaty sport. Once I started assembling sections ahead of time, hanging them became much easier and the whole setup felt less rushed. That one change made the project feel doable instead of chaotic.
In the end, what I like most about a dollar store tablecloth backdrop is that it delivers more joy than stress when done simply. It does not ask you to be a professional event stylist. It just asks you to be a little creative, a little practical, and willing to believe that party magic can come from the seasonal aisle. And honestly, that is kind of the best part. A good birthday setup does not need to be expensive. It just needs to feel festive, thoughtful, and ready for pictures people will actually want to keep.
Conclusion
A birthday backdrop from dollar store tablecloths is one of those rare party ideas that checks every box: affordable, customizable, easy to assemble, and genuinely cute in photos. With a few plastic tablecloths, smart color choices, and a little patience, you can transform a plain wall into a cheerful party feature that looks far more expensive than it is. Whether you go for braided strips, layered fringe, or a simple curtain-style setup with balloons, this DIY works because it is practical, playful, and flexible enough for nearly any birthday theme.
If your goal is to create a memorable party space without blowing the budget, this is a decoration worth trying. It is proof that sometimes the best birthday decor ideas are not hiding in a fancy boutique. They are waiting in aisle seven, next to paper plates and questionable plastic tiaras.