If you’ve ever looked at a tiny balcony, a sad concrete patio, or that one sunny patch by the front door and thought,
“Welp, guess I’m not a gardening person,” container gardens are here to politely disagree.
Container gardening is basically the cheat code of growing: you get flowers, herbs, and even vegetables
without committing to a full-blown backyard excavation (or a lifelong relationship with a rototiller).
Done right, container gardens can be ridiculously productive and surprisingly stylish. Done wrong, they can
turn into a dramatic soap opera starring “Why Is My Basil Crying?” and “The Mystery of the Yellow Tomato Leaves.”
This guide is your no-nonsense, good-humored roadmap to growing in pots like you actually meant to.
Why Container Gardens Are the Ultimate “Any-Size” Garden
A container garden is exactly what it sounds like: plants growing in a container instead of in the ground.
The magic is in the flexibility. You can move pots to chase sunlight, dodge storms, or hide that one plant you
accidentally neglected (no judgment). Containers also let you garden where in-ground growing is toughpoor soil,
limited space, or physical mobility concerns.
The tradeoff? Pots dry out faster and nutrients wash out faster. In other words, container gardens are like pets:
adorable, rewarding, and they will absolutely let you know when dinner is late.
Step 1: Pick a Container That Won’t Sabotage You
1) Size matters (and bigger is usually easier)
Small pots are cute. Small pots are also thirsty little chaos goblins. More soil volume means steadier moisture,
more room for roots, and fewer emergency watering sprints.
Practical examples:
tomatoes and other fruiting vegetables typically need larger containers (often in the 5-gallon range or more),
while lettuce and herbs can thrive in smaller potsif you keep up with watering.
Root crops need depth more than width; carrots, for instance, appreciate a deeper container than leafy greens.
2) Drainage: the most unglamorous, most important feature
Your container should have drainage holes so excess water can escape. When roots sit in soggy soil, they can’t breathe,
and plants respond by… not thriving. If your dream pot has no holes, you have three options:
- Drill holes (if the material allows it).
- Use the “two-pot” method: plant in a nursery pot with holes, then place it inside the decorative pot and remove it to water/drain.
- Choose a different container and save the hole-less one for holding umbrellas, not petunias.
One more pro move: if a pot sits on a flat surface, the drain hole can get blocked. Lift it slightly with pot feet,
a plant caddy, or even small spacers so water can flow out.
3) Material and color: not just an aesthetic decision
Terra cotta looks classic, but it “breathes,” which means moisture evaporates fasterexpect more frequent watering.
Plastic holds moisture longer and is lightweight, but can heat up. Dark containers in full sun can warm the root zone
to uncomfortable levels (plants don’t love having their roots slow-cooked).
4) Mobility: plan for your future self
A container filled with wet potting mix is basically a boulder with better branding. If you’re going big, consider
wheeled caddies or planters designed to move. Also: place the container where it will live before you fill it.
This is gardening wisdom that saves backs and friendships.
Step 2: Potting Mix Is the Secret Sauce (and Garden Soil Is the Villain)
Here’s the headline: don’t use garden soil in containers. In pots, garden soil compacts, drains poorly,
and can bring weeds and diseases along for the ride. Container plants do best in a lightweight potting mix that holds
moisture but still drains well and leaves air space for roots.
What you want is a balance: water should soak in, excess should drain out, and roots should still get oxygen.
Many quality potting mixes already include components like peat or coir (for moisture), plus perlite or vermiculite
(for aeration). You can also blend in a modest amount of compost for microbial life and slow nutritionjust don’t
overdo it and turn the pot into a dense, soggy brick.
The “rocks at the bottom” myth (please let it go)
You’ve probably heard the tip: “Put rocks or gravel in the bottom for drainage.” It sounds logical.
Unfortunately, it usually doesn’t help and can even create a waterlogged zone in the container.
Better solution: use a well-structured potting mix and a container with proper drainage holes.
If you’re worried about soil washing out, cover holes with mesh, a coffee filter, or a small piece of screen.
Step 3: Choose Plants That Actually Like Living in Pots
Start with your light
Before you buy plants, figure out how much direct sun your spot really gets. Many vegetables and flowering annuals
prefer “full sun” (often around 6+ hours of direct light). Leafy greens and many herbs can tolerate less.
If your balcony is mostly shade, don’t fight itgrow shade-friendly plants and enjoy being smugly successful.
Container-friendly edibles (a.k.a. your future snacks)
Some of the easiest edible wins in containers:
lettuce, spinach, radishes, green onions,
peppers, and patio tomatoes (look for labels like “bush,” “dwarf,” “compact,” or “patio”).
Herbs like basil, parsley, thyme, and chives are classic
small-space champions.
If you want a simple “first container garden” that feels instantly rewarding, combine:
a compact tomato or pepper (the main event), basil (supporting actor), and a trailing herb like thyme (the scene-stealer).
It’s productive, it looks good, and it makes you feel like the kind of person who owns a mortar and pestle.
Ornamentals: make it look intentional (even if you’re winging it)
For flowers and foliage, designers love the “thriller–filler–spiller” approach:
- Thriller: a taller focal plant (ornamental grass, dracaena spike, canna, etc.).
- Filler: mounding plants that add volume (petunias, coleus, begonias, calibrachoa, etc.).
- Spiller: trailing plants that cascade (sweet potato vine, creeping jenny, bacopa, etc.).
Bonus: you can apply the same idea to edible containersupright kale or chard as the thriller, basil and parsley as fillers,
and trailing thyme as the spiller.
Step 4: Planting DayA Simple Routine That Works
- Pre-moisten the potting mix so it hydrates evenly (dry mixes can repel water at first).
- Ensure drainage is ready (holes uncovered; mesh if needed).
- Fill to about 1 inch below the rim to leave room for watering without spillover.
- Loosen circling roots on nursery plants so they don’t keep growing in a tight spiral.
- Plant at the same depth the plant was growing before (unless the plant has special rules).
- Water thoroughly until water runs from the bottomthis settles the mix and removes air pockets.
- Add support early (stakes, cages, trellises) so you don’t impale roots later.
Step 5: Watering Without Becoming a Full-Time Lifeguard
Container gardens dry out faster than in-ground bedsespecially in heat, wind, and full sun. A reliable method:
check moisture with your finger. If the top inch or two is dry, water. Then water deeply enough that it runs out
the bottom. Shallow sips encourage shallow roots and constant thirst.
In hot weather, daily watering is common, and some containers in full sun may need water twice a day.
The goal is even moisturemoist, not swampy. If you use saucers, empty standing water so roots don’t sit in it.
Make watering easier (because you have a life)
- Mulch the surface with straw, shredded leaves, or coir to reduce evaporation.
- Group containers so they shade each other’s soil and reduce wind exposure.
- Try self-watering planters for thirsty crops like tomatoes or cucumbers.
- Use drip irrigation on patios if you’re managing many pots (your future self will write you a thank-you note).
Step 6: FertilizingBecause Pots Are Basically Nutrient Leaks
Water moves through containers and carries nutrients with it. Even mixes that start with slow-release fertilizer
can run low as the season goes on. That’s why container plants often need regular feeding.
Two easy approaches
- Controlled/slow-release fertilizer mixed in at planting, plus a light supplement later if plants fade.
- Water-soluble fertilizer applied on a schedule (often every 1–3 weeks, depending on product and plant growth).
A general-purpose fertilizer is a fine place to start. If you’re growing flowering or fruiting plants,
a formula with relatively more phosphorus or potassium can support blooms and fruiting.
Whatever you choose, follow the labelover-fertilizing can burn roots, and “more” is not the same as “better.”
Salt buildup: the sneaky container garden villain
If you fertilize regularly, mineral salts can accumulate in potting mix over time. One prevention tactic:
occasionally water deeply enough to flush the container (and let it drain freely). If leaves look crispy on the edges
and growth stalls despite watering, a gentle flush can helpassuming drainage is working.
Step 7: Troubleshooting Like a Pro (or at Least Like Someone With Wi-Fi)
Wilting at noon
Midday wilting can happen even when soil is moistplants sometimes droop in heat and perk back up later.
Check the soil before panic-watering. If it’s dry, water. If it’s wet, give it shade and check drainage.
Yellow leaves
Common causes include inconsistent watering, nutrient deficiency (especially nitrogen), or roots sitting in soggy soil.
Look at the pattern: older leaves yellowing can signal nutrition issues; widespread limp yellowness can signal overwatering.
Top-heavy plants tipping over
Use a deeper or heavier pot, add a cage/trellis, and place tall containers where they’re protected from wind.
Sometimes the simplest fix is relocating the container to a calmer spot.
Pests
Containers don’t eliminate pests, but they make inspection easier. Check leaves weekly (especially undersides),
hand-pick what you can, and remove heavily infested foliage. Healthy, well-watered plants bounce back faster.
Winter worries
If you live where it freezes, know that some containers (especially porous clay) can crack, and roots in pots are more exposed.
Move tender plants to shelter, cluster containers for insulation, and consider larger, frost-resistant pots for perennials.
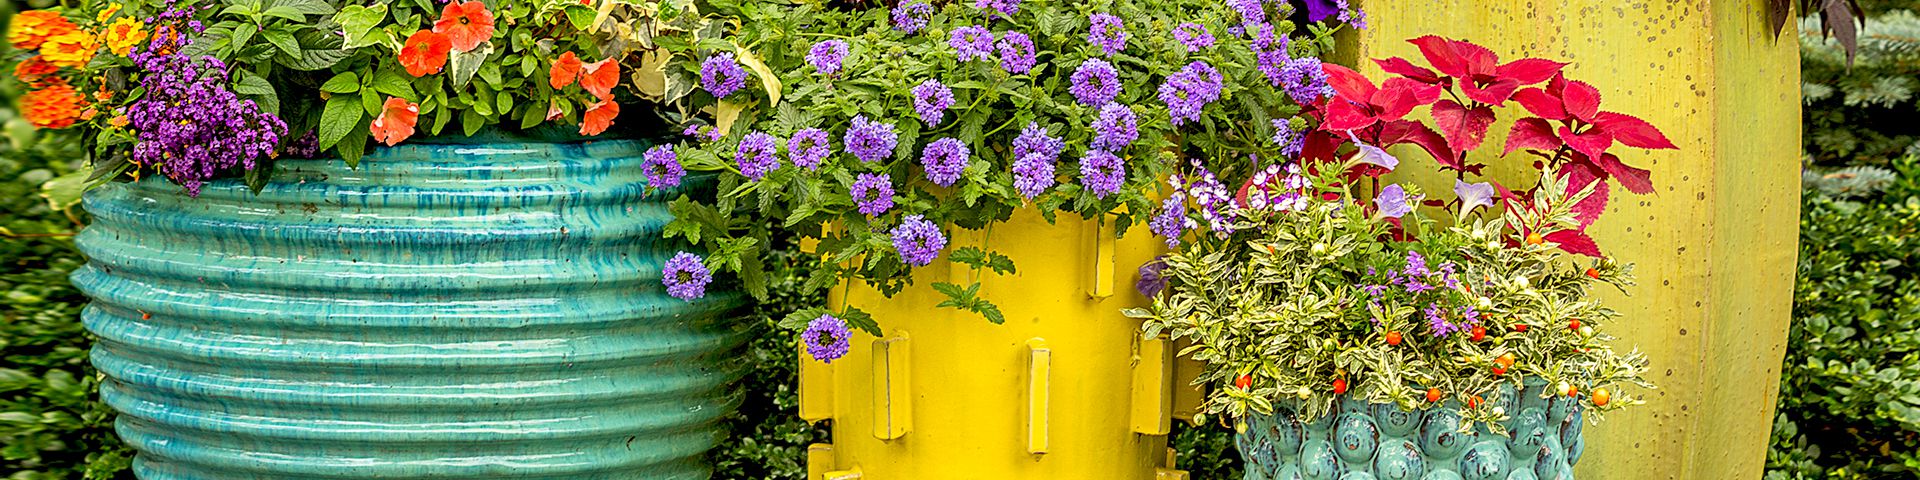
Design Ideas for Container Gardens That Don’t Look Like “Random Plant Garage Sale”
Theme containers (fun + functional)
- Pizza garden: dwarf tomato, basil, oregano, and a compact pepper.
- Salsa pot: patio tomato, jalapeño, cilantro (in cooler weather), and green onions.
- Pollinator party: zinnias, salvia, lantana, plus a trailing nectar plant.
- Shade patio: coleus, impatiens, and ferns for lush “jungle in a pot” vibes.
Color and texture rules (simple, not fussy)
Pick one “hero color” (purple, coral, or white), one leafy texture (fine grass-like foliage or big tropical leaves),
and one trailing element. Repeat that recipe in multiple containers for a cohesive lookeven if each pot has different plants.
Go vertical when you’re short on floor space
Add a trellis to containers for cucumbers, peas, or flowering vines. You’ll save space, improve airflow,
and keep fruit cleaner. Vertical gardening is basically the mullet of container gardens: business up top, party down below.
Quick FAQ
Do I need special “container garden soil”?
You need a quality potting mix formulated for containerslightweight, well-draining, and able to hold moisture.
Avoid straight garden soil in pots because it compacts and drains poorly.
How often should I water container plants?
Check often and water when the top inch or two is dry. In hot, sunny weather, daily watering is common,
and some pots may need water twice a day.
Can I reuse last year’s potting mix?
Often, yeswith upgrades. Remove old roots, refresh with new potting mix and compost, and plan on fertilizing since
last season’s nutrients are likely depleted.
What’s the #1 beginner mistake?
Underestimating how fast containers dry out. The #2 mistake is overcompensating and waterlogging plants with poor drainage.
The sweet spot is even moisture plus good drainage.
What vegetables are best for beginners in pots?
Lettuce, radishes, herbs, peppers, and compact tomatoes are reliable starters. Choose varieties labeled “patio,” “bush,” or “compact.”
Should I put rocks in the bottom for drainage?
In most cases, no. Focus on a pot with drainage holes and a well-structured potting mix. Rocks can create a saturated zone
rather than improving drainage.
Conclusion
Container gardens are proof that you don’t need acreage to grow something wonderful. You need the right pot,
the right mix, a realistic watering routine, and plants that match your light.
Start small, learn fast, and don’t be afraid to adjustcontainers are forgiving because you can move and tweak everything.
That’s the whole point: control the environment, and the plants will do the rest.
Experience Addendum: 500+ Words of Container Garden Reality (and What It Teaches You)
Every container gardener has a “first-season highlight reel,” and it usually includes at least one of the following:
a tomato plant that turns into a leafy skyscraper, a basil plant that behaves like it’s training for a marathon,
and a mysterious moment where you swear you watered yesterday… but the pot feels like it’s full of desert sand today.
That’s not you failing. That’s containers being containers.
One very common experience: the sunshine illusion. A balcony can look bright all day, yet only get two hours
of true direct sun. The result is a pepper plant that refuses to fruit and stares at you like you’re the problem.
The fix is simple (and mildly annoying): observe the space. Notice where the sun lands in the morning and afternoon.
Once you match plants to realitygreens and herbs for lower light, fruiting crops for bigger suneverything gets easier.
Next up: the watering plot twist. In a heat wave, a small pot can go from “moist” to “crispy” in the time it
takes to answer one email. Then you overreact, drench it at night, and the roots spend hours sitting in cold, wet mix.
The lesson isn’t “water more” or “water less.” It’s “water smarter.” Deep watering in the morning, good drainage,
and a mulch layer can turn “daily panic” into “quick check and done.” Self-watering containers are also a sanity-saver
for thirsty vegetablesespecially if you’re juggling more than three pots and a full-time life.
There’s also the classic “my container is too small” discovery, usually triggered when a plant tips over in a gust
of wind like it’s auditioning for slapstick comedy. Tall crops need stability: deeper containers, support structures,
and placement where wind won’t turn your patio into a leaf tornado. People often learn this the hard way with tomatoes:
the plant grows, the cage wobbles, and suddenly you’re holding a vine in one hand while searching for twine with the other.
It’s not a disasterit’s a rite of passage.
Then there’s the nutrition chapter: the moment you realize pots are basically nutrient colanders.
You water, the plant eats, the extras leach out. Mid-season, leaves fade, flowering slows, and you wonder if the plant is
“just done.” Usually it’s hungry. A light, regular feeding schedule (and not overdoing it) brings the color and growth back.
Many gardeners also learn to occasionally flush the pot with plain water to reduce fertilizer salt buildupespecially when
leaf edges start looking crispy for no obvious reason.
Finally, the funniest experience is the one you can’t plan: the unexpected success. The pot you threw together
with lettuce, chives, and a “bonus” marigold becomes the most joyful thing on your patio. Or the one herb you assumed would
be “fine” becomes a weekly harvest machine. Container gardens reward attention, but they also reward curiosity.
Try things. Adjust. Keep notes like a slightly chaotic scientist. And remember: if a container garden looks beautiful and
feeds you even once, it’s already doing its job.