Marigolds are the garden equivalent of that friend who shows up early, brings snacks, and still looks great in photos. They bloom like crazy, shrug off mediocre conditions, andbest of allmake tons of seeds. With a little timing and some basic storage know-how, you can turn one season of flowers into years of free marigolds.
Marigold Seeds 101: What You’re Looking For
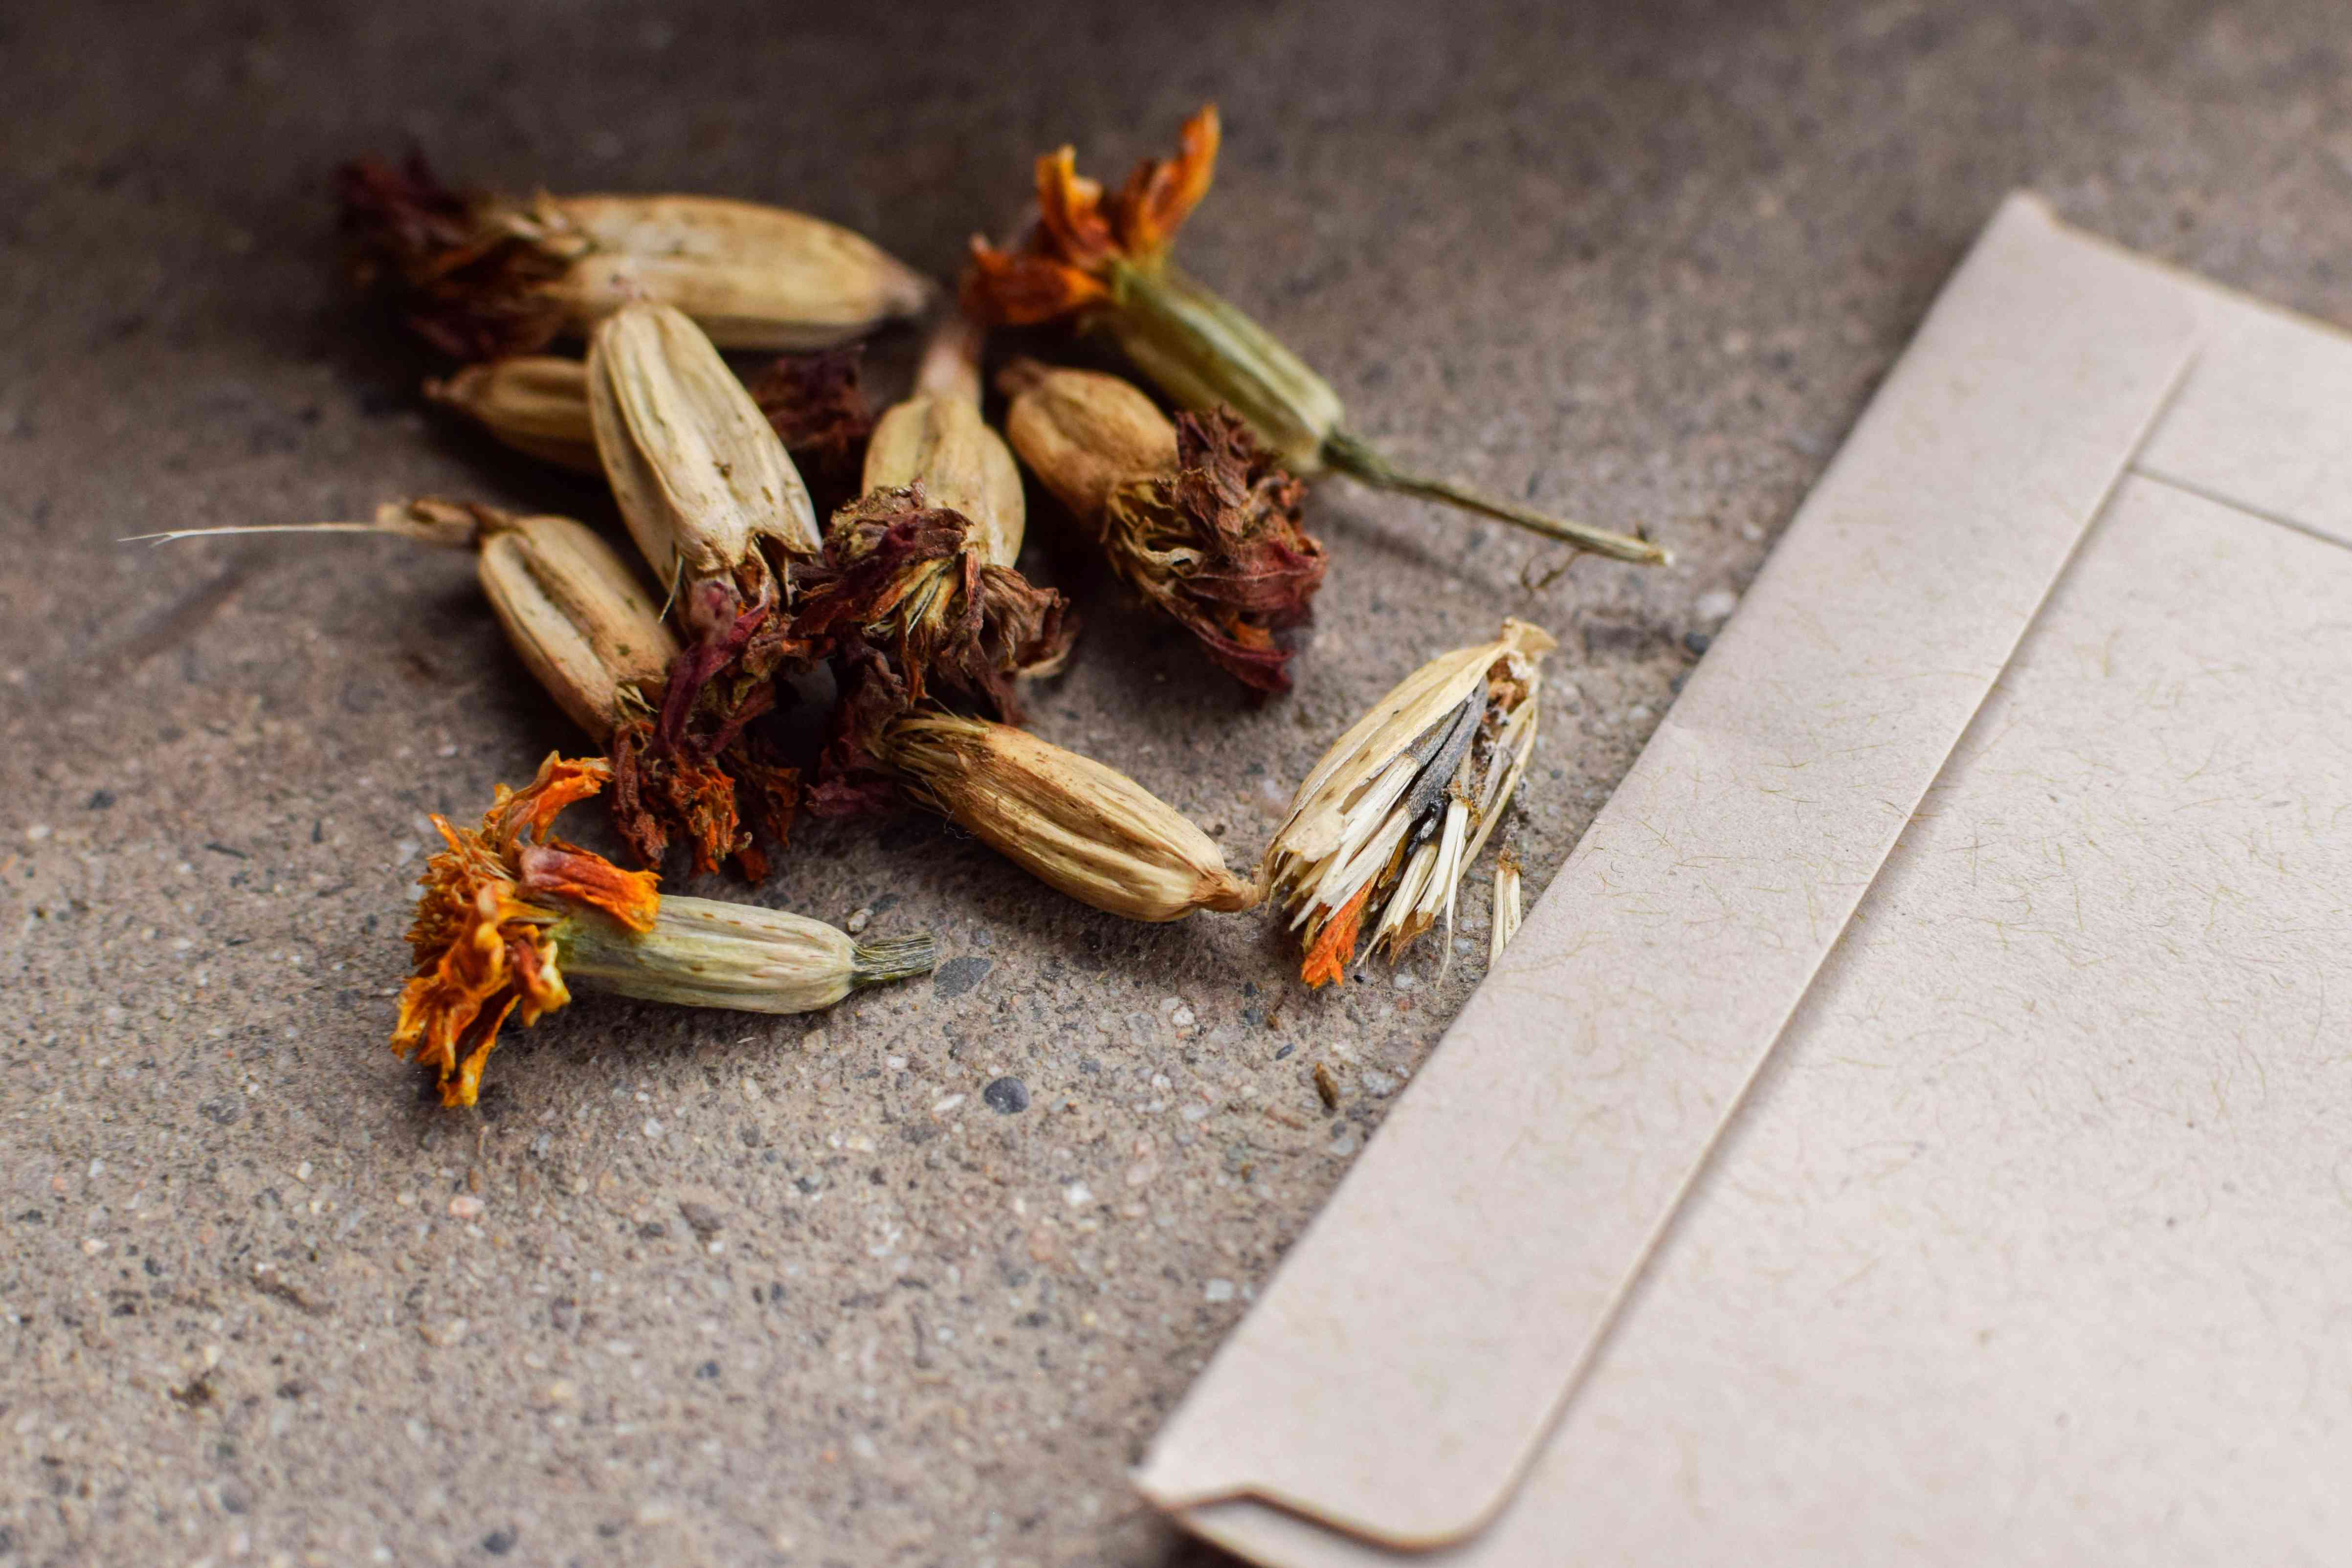
Common bedding marigolds are usually Tagetes (French, African, or signet types). Their “seeds” are slender, needle-like achenestypically black on one end and pale on the other. The dark tip is the actual seed; the light section is the attached fruit structure. (They look like tiny black-and-cream paintbrush bristles.)
Heads-up: “pot marigold” is often Calendula, not Tagetes. Calendula seeds look like little curled claws. Different plant, different seed-saving vibe.
Set Yourself Up for Good Seeds (Before You Snip Anything)
- Stop deadheading a few chosen plants. Let select blooms fully mature instead of cutting them off.
- Save from healthy, typical plantsthe ones with strong growth and the flower color/form you want next year.
- Prefer open-pollinated varieties if you want seed that comes “true.” Hybrids can produce surprise results.
Want the Same Variety Next Year? Here’s How to Avoid “Mystery Marigolds”
Marigolds can self-pollinate, but insects also visit the blooms and move pollen around. That means two things can change your results:
- Hybrids (often labeled F1): even if they don’t cross with anything else, saved seed may not match the parent plant.
- Cross-pollination between varieties: if you grow multiple varieties of the same species, bees may mix pollen and you’ll get offspring that look different.
If you’re not picky, this is actually funlike a low-stakes plant lottery. But if you want consistency, use one (or more) of these home-gardener methods:
- Designate one variety for seed. Grow other marigolds for display, but only collect seed from your “seed row.”
- Distance helps. The gold-standard for true-to-type seed involves isolating varieties. In real backyards, you usually can’t do a quarter-mile separation, but even separating beds (and saving from the most isolated plants) reduces mixing.
- Bag a few blooms. Slip a breathable mesh/organza bag (or even a paper bag) over a few flower heads before they fully open. Let those set seed, then harvest only from the bagged blooms. Label the stem so you don’t forget which ones are “the chosen ones.”
When to Harvest Marigold Seeds
Marigold seed saving is mostly a patience contest. Harvest when the seed head is:
- Dry and brittle (no soft green bits)
- Brown and papery at the base (the calyx/seed pod area)
- Paired with petals that are crispy, shriveled, or mostly gone
Choose a dry day after dew evaporates. If you’re worried about seeds dropping before you get to them, slip a small paper bag over a drying bloom to catch strays.
What You’ll Need
- Scissors or pruners
- A paper bag or bowl for collecting heads
- A paper plate/coffee filter/tray for drying
- Envelopes or paper packets + a permanent marker
- Optional: airtight jar + silica gel (or a little bag of powdered milk/rice)
How to Harvest and Save Marigold Seeds (Step-by-Step)
1) Collect fully dried seed heads
Leave a handful of blooms on the plant until they’re completely dry. Then pinch or snip off the heads into a paper bag. If it crumbles a little, congratulationsyou waited long enough.
2) Dry indoors a few more days
Spread heads in a single layer in a warm, shaded, well-ventilated spot. This “finish drying” is what keeps seeds from molding laterespecially in humid climates.
3) Pull out the achenes
Over a plate or sheet of paper, peel away the crispy petals and crack open the base. Inside is a bundle of achenes. Pull them free with your fingers.
4) Clean them up (optional, but satisfying)
Pick out big petal bits by hand. If you want cleaner seed, gently winnow by pouring between containers in front of a light fan so the fluff blows away. Don’t chase perfectionmarigolds will germinate just fine with a bit of “garden confetti” mixed in.
5) Check maturity fast
Mature achenes usually have a dark end and a pale end. If the whole thing is pale, it likely wasn’t ripe. Set those aside or toss them.
Drying Done Right (Because Mold Loves “Almost Dry” Seeds)
Seeds store best when they’re truly drynot “dry-ish.” After you extract achenes, let them sit spread out for several more days. Keep them out of direct sun (sun can overheat seeds) and away from steamy kitchens. In humid weather, longer drying is normal. A good sign you’re ready: seeds feel crisp, don’t bend, and don’t clump together.
Want an extra-safe method? Place seeds in a labeled envelope and put that envelope in a sealed jar with a separate envelope containing silica gel for a week or two. This gently pulls out the last bit of moisture without cooking the seed (unlike some dehydrators).
How to Store Marigold Seeds Properly
Three words: cool, dark, dry. Heat and moisture shorten seed life and invite mold.
Easy storage (works for most gardeners)
- Put seeds in labeled paper envelopes.
- Store envelopes in a sealed jar or container to block pests and humidity swings.
- Keep the container in a cool closet, basement shelf that stays dry, or the refrigerator.
“I want great germination” storage
- Add a desiccant (silica gel packet, or a small cloth bag of powdered milk/rice) to your jar to absorb leftover moisture.
- If insects are a concern, freeze fully dried seeds for a few days before long-term storage.
- For best longevity, aim for refrigerator-like temps. A consistent, cool spot beats a warm shelf that swings from chilly nights to hot afternoons.
How Long Do Marigold Seeds Last?
Stored in ordinary home conditions, many gardeners see strong germination for 1–2 years. Stored very dry and cool in airtight containers, marigold seeds can remain viable for several years (sometimes up to around five). The practical takeaway: store them well, but still test older seed before you bet your whole border on it.
Quick germination test (before you plant a whole tray of hope)
- Place 10 seeds on a damp (not dripping) paper towel.
- Fold it, seal in a plastic bag, and keep warm.
- Check for sprouts over the next week. Count what germinates.
If the rate is low, sow thicker or start extra seeds and keep the strongest seedlings.
Planting Saved Marigold Seeds Next Season
You can direct sow after frost, but starting indoors gives you earlier blooms and more control. A basic indoor routine:
- Start about 10 weeks before your outdoor planting date.
- Sow about 1/4 inch deep in seed-starting mix and keep evenly moist.
- Warmth speeds germination: often 5–8 days at 70–75°F.
- After sprouting, give bright light so seedlings stay stocky (not stretched and floppy).
Once seedlings have a few sets of true leaves, thin or pot up so the strongest plants get space. Harden off for a week before moving outdoors, and you’ll avoid the “why are you sunburned?” transplant drama.
Common Mistakes (So You Don’t Raise “Sad Seeds”)
- Harvesting too early: wait for brown, papery, brittle heads.
- Storing damp seed: dry longer, add a desiccant, use airtight containers.
- Expecting hybrids to come true: save open-pollinated varieties for consistency.
- Skipping labels: future-you deserves variety notes and dates.
Conclusion
To harvest and save marigold seeds, let a few blooms dry completely on the plant, pull out the achenes, dry them thoroughly indoors, and store them cool, dark, and dry in labeled packets. Do it once and you’ll have an endless supply of marigoldsplus the smug satisfaction of walking past seed racks like, “No thanks, I’m self-sufficient now.”
Experience Notes: What Actually Happened in My Garden (and What I’d Do Again)
The first year I saved marigold seeds, I treated it like a treasure hunt and ended up collecting… mostly disappointment. Not because marigolds are hard, but because I harvested too early. The flowers looked “finished,” but the bases were still a bit green, and the seeds were pale from tip to tail. I stored them carefully in an envelope, labeled them like a responsible adult, and thenmonths laterplanted them with the confidence of someone who had absolutely not earned that confidence. Germination was spotty, and the seedlings that did show up were slow and weak. Lesson learned: if the seed head isn’t brown and crunchy, it’s not done.
The next season I changed one thing: I picked my “seed plants” early and stopped deadheading them. It felt wrong at first. Leaving spent blooms on a plant is like leaving dishes in the sinkyou see it every day and it quietly judges you. But by late summer those seed heads were unmistakably ready: papery, brown, and dry enough to crumble. I harvested on a sunny afternoon after the dew was long gone, and I spread the heads on a paper plate in a spare room for several days. That extra indoor drying step mattered more than I expected. When I skipped it on a humid week, a few seed clusters felt cool and slightly tackyclassic “future mold” vibes.
Cleaning seeds turned out to be the most meditative part. I’d sit with a bowl, pull the heads apart, and watch the little black-and-cream achenes collect like tiny paintbrush bristles. I tried winnowing with a fan once and immediately learned that “gentle breeze” is a very specific setting. Too much airflow and you’re basically launching seeds into a new zip code. What worked best was low-tech: pick out the big petal bits by hand and accept that a few flecks of chaff will survive. Marigolds don’t care if their seeds are stored with a bit of confetti.
My biggest “aha” moment was labeling with details, not just a name. One year I saved seeds from two bedsone got full sun and one was in partial shade. The sun bed produced sturdier plants and fuller blooms, and saving those seeds gave me noticeably more robust seedlings the next spring. So now my packets say things like “Orange French marigoldbest border plantsfull sunSept 2025.” Those notes are gold when you’re choosing what to start indoors.
Storage-wise, the refrigerator improved my results. I put envelopes in a sealed jar with a silica packet, tucked it in the back where temperatures stay steady, and the following spring my germination rate jumped enough that I stopped over-sowing “just in case.” I also started doing a quick paper-towel germination test if seeds were older than two years. It takes a few minutes and saves you from wasting potting mix, tray space, and optimism.
And finally: embrace a little chaos. Even when I did everything “right,” a few saved seeds produced slightly different flowersmore singles than doubles, or a color that leaned more yellow than orange. Instead of getting annoyed, I started treating it like a free breeding program. The best-looking surprises got marked as “save seed from this one.” That’s the real magic of seed saving: you’re not just storing seedsyou’re slowly customizing your garden to your taste, one crunchy little seed head at a time.