There are few kitchen disappointments more tragic than pulling a beautiful roast from the oven, slicing into it with confidence, and discovering that it has the texture of a forgotten flip-flop. Dry meat happens to everyone: the ambitious Thanksgiving cook, the weeknight chicken-breast warrior, the person who “just looked away for one minute” and somehow invented edible cardboard.
The good news? Keeping meat moist in the oven is not magic. It is mostly moisture management, temperature control, and patience. Whether you are roasting chicken, baking pork chops, cooking turkey breast, reheating brisket, or trying to save a lean cut of beef from becoming a chew toy, the same basic rules apply. Salt ahead when possible. Cook gently and accurately. Let the meat rest before slicing. That is the holy trinity of juicy oven meat.
This guide breaks everything into three practical methods you can use immediately. You do not need restaurant equipment, a culinary degree, or a dramatic chef’s towel over your shoulder. You only need a little planning, a reliable meat thermometer, and the courage not to cut into the roast the second it leaves the oven.
Why Meat Dries Out in the Oven
Before we fix dry meat, we need to understand why it happens. Meat is made of muscle fibers, water, fat, connective tissue, and proteins. When meat heats up, those proteins tighten. As they tighten, moisture gets squeezed out. The hotter the meat gets, the more aggressively it loses moisture. This is why a chicken breast cooked to the correct temperature can be tender, while the same breast cooked far past that point tastes like it has been personally wronged by the oven.
Lean cuts dry out faster because they have less internal fat and connective tissue to protect them. Chicken breast, pork loin, turkey breast, lean beef roasts, and thin chops are common offenders. Fatty or collagen-rich cuts, such as pork shoulder, short ribs, chuck roast, and chicken thighs, are more forgiving because fat and connective tissue help create tenderness when cooked properly.
Moisture also depends on how quickly heat moves through the meat. A blasting-hot oven can brown the outside beautifully, but it may overcook the outer layers before the center reaches the right temperature. On the other hand, a moderate oven gives the meat more time to cook evenly. That does not mean high heat is bad; it means high heat needs a plan.
And finally, slicing too soon can undo your hard work. When meat comes out of the oven, its juices are still moving. Cut immediately, and the cutting board gets the reward instead of your dinner plate.
Way 1: Salt, Brine, or Marinate Before Cooking
The first way to keep meat moist in the oven begins before the meat ever sees heat. Salt is one of the most powerful tools in the kitchen because it does more than make food taste better. Used correctly, it helps meat hold on to moisture and season itself beyond the surface.
Use a Dry Brine for Better Flavor and Juiciness
A dry brine is simply salt applied directly to the meat, then given time to work. At first, the salt draws a little moisture to the surface. Then that moisture dissolves the salt and gets reabsorbed into the meat. The result is deeper seasoning, improved moisture retention, and better browning because the surface can dry out in the refrigerator.
For many oven-cooked meats, dry brining is easier than wet brining. There is no giant bucket of salty water taking over your refrigerator like an overly confident aquarium. You just season the meat, place it on a rack or plate, and let time do the heavy lifting.
For chicken pieces, pork chops, steaks, and small roasts, salting 1 to 4 hours ahead can make a noticeable difference. For larger cuts such as turkey breast, whole chicken, pork loin, or beef roast, seasoning the night before is even better. Use kosher salt if you have it, because it is easier to distribute evenly. A simple starting point is about 1/2 to 3/4 teaspoon kosher salt per pound of meat, adjusting based on taste and whether the meat has already been injected, cured, or pre-seasoned.
Try a Wet Brine for Very Lean Cuts
A wet brine is a saltwater solution. It can be useful for lean cuts that dry out easily, especially boneless skinless chicken breasts, pork chops, and turkey breast. The meat absorbs some seasoned liquid and becomes more forgiving in the oven.
A basic wet brine can be made with 4 cups cold water and 3 tablespoons kosher salt. You can add a tablespoon of sugar, cracked pepper, garlic, bay leaf, citrus peel, or herbs if you want extra flavor. For small pieces of chicken, even 15 to 30 minutes can help. For pork chops, 30 minutes to 2 hours is usually enough. Larger cuts may need longer, but do not overdo it; too much brining can make meat taste salty or give it a strange, bouncy texture.
After wet brining, always pat the meat dry before it goes into the oven. Surface moisture turns into steam, and steam is the enemy of browning. Moist inside is wonderful. Wet and pale outside is less exciting.
Use Marinades for Flavor, Not Miracles
Marinades can help with flavor, especially when they contain salt, aromatics, herbs, spices, oil, and a little acid. But marinades do not usually penetrate deeply into large cuts of meat. They work best on smaller or thinner pieces such as chicken thighs, drumsticks, pork tenderloin, kebabs, and flank steak.
Be careful with acidic marinades made with lemon juice, vinegar, wine, or yogurt. A little acid brightens flavor and can tenderize the surface. Too much acid for too long can make the exterior mushy while the inside remains unchanged. For most small cuts, a few hours is plenty. For delicate meats, less time is often better.
The main lesson: season early. Meat that is salted only at the last second can still taste good, but meat that is seasoned ahead has a better chance of staying juicy in the oven.
Way 2: Control Oven Heat and Use a Meat Thermometer
The second way to keep meat moist in the oven is to stop guessing. Guessing is charming when choosing a movie. It is less charming when deciding whether your chicken is safe or your pork loin is about to become a museum fossil.
A meat thermometer is the single best tool for juicy oven meat. Time charts are useful, but they are only estimates. Meat thickness, starting temperature, oven accuracy, pan material, bone-in versus boneless cuts, and fat content all change cooking time. A thermometer tells you what is actually happening inside the meat.
Cook to Temperature, Not Just Time
For safety, whole cuts of beef, pork, veal, and lamb should reach 145°F followed by a rest period. Ground meats should reach 160°F. Poultry, including chicken and turkey, should reach 165°F. These temperatures matter because they help reduce the risk of foodborne illness.
For quality, temperature matters just as much. Pulling meat from the oven at the right moment prevents overcooking. Lean cuts are especially sensitive. A pork loin may be juicy at the correct temperature and disappointingly dry just 10 or 15 degrees later. Chicken breast has a similarly narrow comfort zone. It does not politely whisper when it is overcooked; it simply turns dry and lets you discover the news at dinner.
Insert the thermometer into the thickest part of the meat, away from bone, fat pockets, or the pan. For whole poultry, check the thickest part of the breast and thigh. For roasts, check the center. For thin chops or chicken breasts, insert the probe from the side if needed so the tip reaches the middle.
Use Moderate Heat for Even Cooking
Moderate oven temperatures are often better for moisture than extreme heat. Roasting at 300°F to 350°F gives the inside time to cook before the outside becomes dry. This is especially helpful for pork loin, turkey breast, chicken breasts, and beef roasts.
High heat can still be useful. For example, you might start a roast at 425°F for 15 minutes to encourage browning, then reduce the oven to 325°F to finish gently. Another option is the reverse method: cook slowly at a lower temperature, then finish with a quick blast of high heat or a short broil for browning. The best approach depends on the cut.
For chicken thighs, drumsticks, and fatty cuts, higher heat can work beautifully because the extra fat protects the meat. For lean cuts, gentler heat is usually safer. The oven should cook the meat, not interrogate it.
Cover When Needed, Uncover for Browning
Covering meat with foil or a lid can help reduce moisture loss, especially during longer oven cooking. This is useful for braises, pot roasts, ribs, brisket, and reheating cooked meats. Covered cooking traps steam and keeps the environment humid, which helps tough cuts become tender over time.
However, covering meat also softens the surface. If you want browned skin or a crusty exterior, uncover the meat near the end of cooking. A good strategy is to cook covered until the meat is almost done, then uncover for the final 10 to 20 minutes so the outside can brown.
For lean meats, you can also add moisture to the pan. A splash of broth, stock, wine, apple juice, or water can help prevent drippings from burning and create steam around the meat. This does not magically inject liquid into the center, but it does improve the cooking environment and gives you delicious pan juices for serving.
Baste Smartly, Not Constantly
Basting can add flavor to the surface of meat, but it is not a cure-all for dryness. Every time you open the oven door, heat escapes. If you baste too often, you may slow cooking and interfere with browning. For large roasts or poultry, basting once or twice is enough. For small cuts, it may not be necessary at all.
If you want extra insurance, brush the meat with melted butter, olive oil, pan juices, or a glaze during the last part of cooking. This helps the surface look glossy and taste rich without turning the oven session into a full-time babysitting job.
Way 3: Rest the Meat Before Slicing
The third way to keep meat moist in the oven happens after cooking. Resting meat is simple, but it is also the step people love to skip because everyone is hungry and the roast smells unfairly good.
Resting gives the meat time to finish cooking gently and allows juices to settle. During cooking, heat pushes moisture toward the center and surface. If you cut immediately, those juices run out quickly. If you wait, more moisture stays in the meat where it belongs.
How Long Should Meat Rest?
Small cuts such as chicken breasts, pork chops, lamb chops, and steaks usually need 5 to 10 minutes. Medium roasts often need 10 to 20 minutes. Large roasts, whole chickens, turkey breast, or whole turkeys may need 20 to 45 minutes depending on size.
Tent the meat loosely with foil while it rests. Do not wrap it tightly unless you want to trap steam and soften the crust. The word “loosely” is doing important work here. Think cozy blanket, not aluminum prison.
Carryover cooking also matters. Meat continues to rise in temperature after it leaves the oven, especially larger cuts. This means you may need to pull a roast a few degrees before the final target temperature so it does not overshoot while resting. With poultry, make sure the final temperature reaches 165°F. With whole cuts of beef, pork, veal, and lamb, make sure the meat reaches 145°F and rests properly.
Slice Against the Grain
Resting protects moisture, but slicing affects tenderness. Look at the direction of the muscle fibers, also called the grain. Slice across those fibers, not parallel to them. Cutting against the grain shortens the fibers, making each bite easier to chew.
This is especially important for flank steak, skirt steak, brisket, tri-tip, London broil, pork shoulder, and roasts with obvious muscle lines. Even perfectly cooked meat can seem tough if it is sliced the wrong way. The knife is not just a tool; it is the final editor of your dinner.
Serve With Juices or Sauce
Even well-cooked meat benefits from a finishing touch. Spoon pan juices over sliced meat, serve with gravy, or add a bright sauce such as chimichurri, salsa verde, mustard cream, apple pan sauce, or lemon-herb butter. Sauce cannot fully rescue severely overcooked meat, but it can elevate properly cooked meat from “nice” to “please pass me another piece before I become dramatic.”
Best Oven Techniques for Different Types of Meat
Chicken Breast
Chicken breast is lean, popular, and very easy to overcook. For best results, brine it briefly or salt it ahead, bake at a moderate temperature, and use a thermometer. Pull it when it reaches a safe final temperature of 165°F. Let it rest for 5 to 10 minutes before slicing. For extra moisture, bake it in a covered dish with a splash of broth, then uncover briefly if you want light browning.
Chicken Thighs and Drumsticks
Dark meat is more forgiving because it contains more fat and connective tissue. It can handle higher oven temperatures and often tastes better when cooked a little longer than breast meat. Roast thighs and drumsticks until they are fully cooked and tender. Rest them before serving so the juices settle.
Pork Chops
Pork chops love brining. A short wet brine or a few hours of dry brining can make a big difference. Thick-cut chops are easier to keep juicy than thin ones. Bake them gently, use a thermometer, and rest them for several minutes. Avoid cooking them far beyond the safe temperature, because lean pork dries quickly.
Pork Loin and Tenderloin
Pork loin and pork tenderloin sound similar, but they cook differently. Tenderloin is smaller and cooks fast. Pork loin is larger and easier to overcook if you rely only on time. Both benefit from salting ahead, moderate heat, and careful temperature tracking. Slice after resting, and serve with pan sauce or fruit-based sauce for extra moisture.
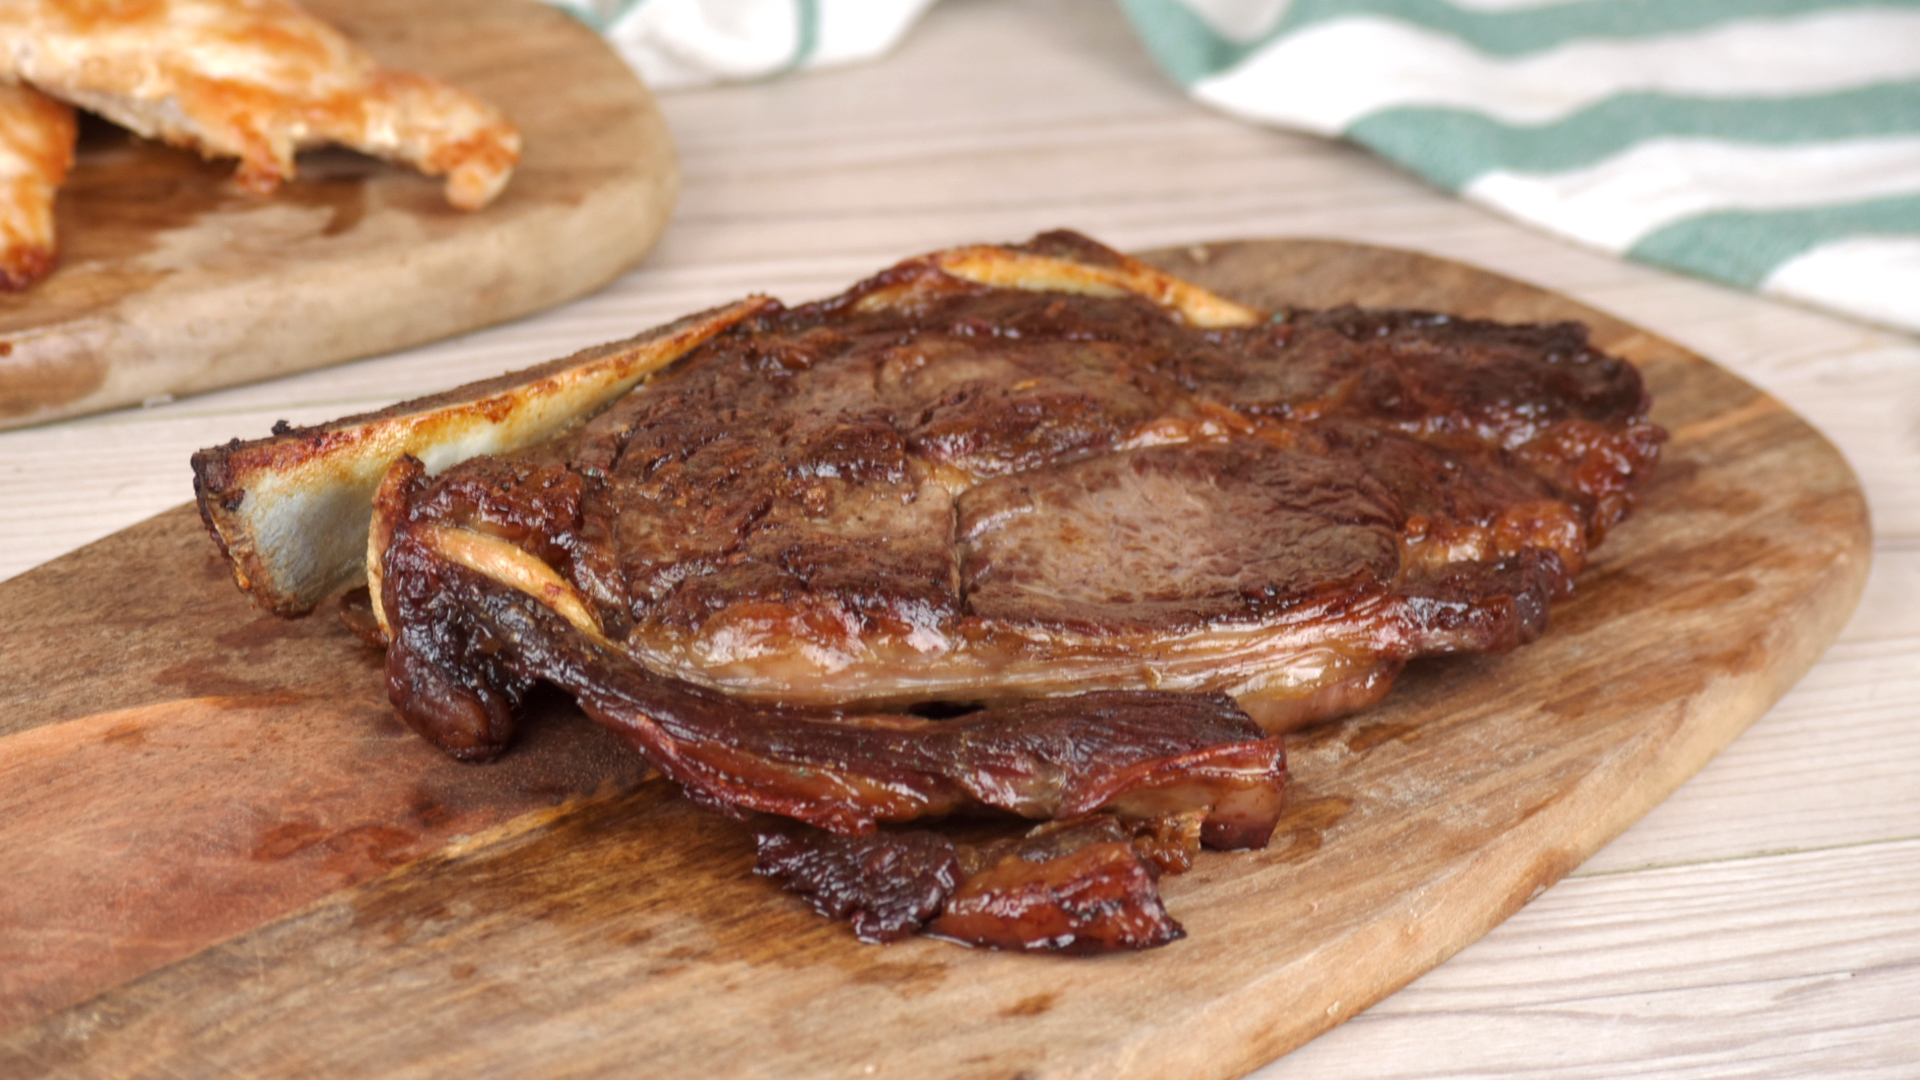
Beef Roasts
Beef roasts vary widely. Tender cuts like rib roast and tenderloin should be cooked carefully to avoid overshooting. Tougher cuts like chuck roast need longer, moist cooking to break down connective tissue. For tender roasts, dry brine, roast gently, rest well, and slice properly. For tough roasts, use covered cooking with liquid until the meat becomes tender.
Turkey Breast
Turkey breast is famous for drying out, mostly because it is lean and large. Dry brining overnight is a smart move. Roast gently, consider covering part of the cooking time, and use a thermometer in the thickest section. Rest before carving. A little gravy is not cheating; it is tradition wearing a delicious hat.
Common Mistakes That Make Oven Meat Dry
Cooking Straight From a Guess
Recipes often say “bake for 35 minutes,” but your oven and your cut of meat may not care about that schedule. Use time as a guide, not a guarantee. Temperature is the truth.
Skipping Salt Until the End
Sprinkling salt after cooking seasons only the surface. Salting ahead gives the seasoning time to work and helps the meat retain moisture. Even 30 minutes can help smaller cuts.
Using High Heat for Lean Cuts Too Long
High heat can brown meat beautifully, but lean cuts may dry out before they cook through. Use moderate heat or a two-stage method when cooking chicken breast, pork loin, or turkey breast.
Cutting Too Soon
This is the classic dinner-table crime. Rest the meat. The five minutes you spend waiting can be the difference between juicy slices and a puddle of lost flavor.
Forgetting Carryover Cooking
Large cuts keep cooking after they leave the oven. If you wait until a roast is already at the exact final temperature in the oven, it may climb higher while resting. Plan for that rise.
Extra Experience Notes: What Actually Works in a Home Kitchen
After cooking a lot of oven-roasted meat at home, the biggest lesson is that moisture is built in layers. No single trick does everything. A brine helps, but it will not save meat that is cooked 30 degrees too high. A thermometer helps, but the meat still tastes better if it was salted ahead. Resting helps, but it cannot fully reverse a dry roast. The best results come from stacking small smart habits together.
One of the most reliable habits is salting meat the night before. This is especially helpful for chicken, turkey breast, pork loin, and thick pork chops. The difference is not subtle. The meat tastes seasoned all the way through instead of salty only on the outside. The texture is also better: firmer, juicier, and less likely to leak a flood of liquid as soon as it is sliced. If you have ever wondered why restaurant roast chicken tastes more deeply flavored than home roast chicken, early seasoning is often part of the answer.
Another practical lesson is that smaller cuts need more attention than large ones. A big roast gives you a wider window. A thin pork chop gives you approximately the emotional lifespan of a soap bubble. It can move from perfect to dry very quickly. When cooking thin cuts in the oven, check early. If the recipe says 20 minutes, start checking at 12 or 15. Nobody has ever regretted checking meat early. Many people have regretted checking it after it already looks like a leather bookmark.
For chicken breast, the best home method is often gentle and covered. Place seasoned chicken breasts in a baking dish with a small splash of broth, cover loosely with foil or parchment, and bake until they reach the proper temperature. Then rest and slice. This method will not give you the crispiest exterior, but it is excellent for meal prep, salads, wraps, rice bowls, and any dish where juicy slices matter more than dramatic browning.
For pork chops, thickness is your friend. A thick pork chop is easier to keep moist because the center does not overcook as quickly. Brine it, pat it dry, sear it briefly if you want color, and finish it in the oven. Rest it before slicing. If you buy very thin chops, consider cooking them quickly on the stovetop instead of baking them for a long time. The oven is wonderful, but it is not always gentle with skinny meat.
For roasts, the best experience-based tip is to use the resting time wisely. While the meat rests, make a quick pan sauce. Put the roasting pan over medium heat, add a splash of broth or water, scrape up browned bits, and simmer for a few minutes. Add a small knob of butter or a spoonful of mustard if it fits the flavor. Suddenly, the resting period feels useful instead of like a test of personal discipline.
Finally, do not underestimate slicing. A roast can be perfectly cooked and still feel tough if cut with the grain. Before slicing, look closely at the lines in the meat. Turn the roast so your knife cuts across those lines. Use a sharp knife and cut clean slices. This one detail can make oven-roasted meat seem more tender without changing anything about the cooking process.
The real secret is not one fancy chef trick. It is respect for the meat’s limits. Salt it early. Cook it accurately. Rest it patiently. Slice it correctly. Do those four things, and your oven will stop producing dry disappointments and start producing the kind of juicy meat that makes people suspiciously quiet at the dinner table.
Conclusion
Keeping meat moist in the oven comes down to three dependable methods: season it ahead with salt, brine, or marinade; control the oven temperature and cook with a thermometer; and let the meat rest before slicing. These steps work because they address the real reasons meat dries out: moisture loss, overcooking, uneven heat, and rushed carving.
If you remember only one thing, remember this: juicy meat is not about luck. It is about timing and temperature. A dry brine gives you a head start. A thermometer keeps you from crossing the line between done and overdone. Resting protects the juices you worked so hard to keep. Add smart slicing and a simple pan sauce, and you have a reliable formula for better chicken, pork, beef, lamb, and turkey.
The oven can absolutely produce tender, moist, deeply flavorful meat. It just needs a little guidance. Treat the process like a calm conversation instead of a high-heat wrestling match, and dinner will reward you.
Note: This publishable HTML article is written from synthesized cooking and food-safety guidance, with source links intentionally excluded from the body content for clean web publication.