Some DIY projects require power tools, advanced patience, and the emotional strength to read a 27-step instruction manual. This is not one of them. This easy DIY project with a string of twinkle lights and a large bottle is charming, budget-friendly, beginner-approved, and almost suspiciously simple. You take one large glass bottle, add a soft strand of LED twinkle lights, style it a little, and suddenly your shelf looks like it has hired a tiny lighting designer.
Whether you want a cozy bedside glow, a romantic table centerpiece, a patio accent, a holiday decoration, or a handmade gift that does not scream “I made this in a panic,” this DIY bottle light project delivers. It turns an empty bottle into a glowing decorative lamp without drilling, cutting, wiring, or pretending to be an electrician. That is the kind of crafting we can all respect.
The best part is that this project is flexible. A clear bottle creates a clean, modern sparkle. A tinted bottle gives moody café energy. A frosted bottle softens the light like a tiny moon trapped indoors. Add ribbon, jute, dried flowers, painted details, or a label, and the same basic project can look farmhouse, coastal, boho, minimalist, rustic, or festive.
Why This DIY Twinkle Light Bottle Works So Well
The magic of this project comes from contrast. Glass is solid and still; twinkle lights are delicate and playful. Put them together, and the bottle becomes more than a container. It becomes a miniature lantern, a night-light, a centerpiece, and a conversation starter. It also gives you that warm “I have my life together” glow, even if there is laundry on the chair just outside the camera frame.
Using LED fairy lights or battery-operated twinkle lights is the smartest choice. LEDs stay cooler than old-style bulbs, use less electricity, and are widely available in short strands that fit neatly inside bottles. Battery-operated cork lights are especially convenient because the battery pack is built into a stopper-like top. No cord hanging out, no outlet drama, no furniture rearranging that ends with you questioning the entire layout of your home.
This project also fits beautifully into the upcycling trend. Instead of tossing a large glass bottle into the recycling bin immediately, you can give it a second life as home décor. A sparkling water bottle, juice bottle, vinegar bottle, or decorative glass bottle can all work. The ideal bottle has a wide enough neck to feed the lights inside and enough height to show off the glow.
Materials You Will Need
Gather your supplies before starting so the project feels relaxing instead of like a scavenger hunt sponsored by chaos.
- One large clean glass bottle, preferably clear, green, amber, or lightly tinted
- One short strand of LED twinkle lights or battery-operated fairy lights
- Mild dish soap and warm water for cleaning
- A bottle brush or long-handled cleaning brush
- A soft towel or paper towels
- Optional ribbon, jute twine, raffia, or decorative cord
- Optional faux greenery, dried flowers, small charms, or gift tags
- Optional adhesive felt pads for the bottom of the bottle
- Optional frosted glass spray or removable glass decals
A quick note about the lights: choose a strand that is clearly marked for indoor use if the bottle will stay inside. If you plan to use the bottle on a covered porch or outdoor table, choose lights rated for outdoor use and protect the battery pack from moisture. For the easiest version, use battery-operated LED cork lights designed for bottles.
Step-by-Step Instructions
Step 1: Choose the Right Large Bottle
Look for a bottle with personality. Tall glass bottles create elegant vertical light. Short, wide bottles feel cozy and lantern-like. Clear bottles show every sparkle, while green or amber bottles tint the light and make it feel warmer. A bottle with raised lettering or an interesting shape adds texture without extra effort, which is the DIY equivalent of finding money in a jacket pocket.
Avoid cracked, chipped, or unstable bottles. If the bottom wobbles, skip it. A glowing bottle should create ambiance, not perform a dramatic table dive during dinner.
Step 2: Clean the Bottle Thoroughly
Remove any labels if you want a clean look. Soak the bottle in warm, soapy water for 20 to 30 minutes, then peel away the label and scrub off remaining adhesive with a non-scratch sponge. Wash the inside with mild dish soap and a bottle brush. Rinse well, then let the bottle dry completely upside down.
Do not rush the drying step. Water droplets inside the bottle can make the lights look blurry, and moisture is not a friend to battery packs or electrical decorations. Let the bottle air-dry overnight if needed. Yes, waiting is annoying. Yes, it is still easier than trying to dry the inside of a bottle with a paper towel and pure optimism.
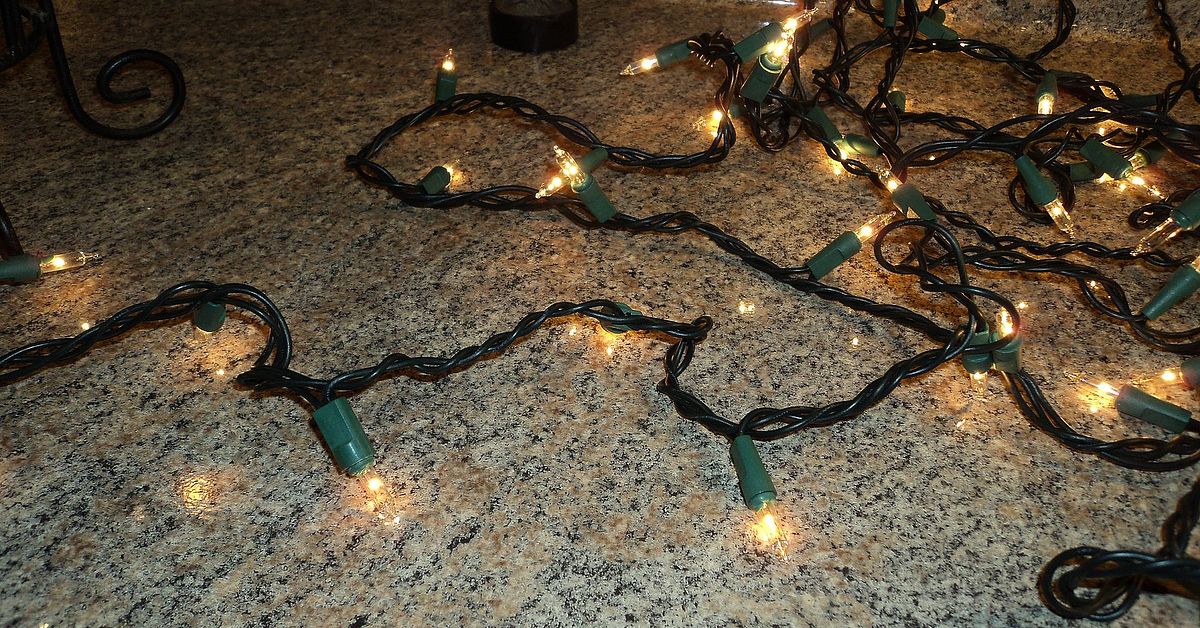
Step 3: Test the Twinkle Lights First
Before placing the lights inside the bottle, turn them on and check the full strand. Look for broken bulbs, loose wires, fraying, or anything that seems damaged. If the lights flicker strangely or the wire looks worn, replace the strand. This is a small decorative project, not a suspense movie.
Warm white lights create the most versatile glow. Cool white lights feel crisp and modern. Multicolor lights are fun for parties, kids’ rooms, holidays, and anyone who believes subtlety is overrated. If the lights have settings, test them before installation so you know whether you prefer steady glow, slow fade, or full disco-bottle mode.
Step 4: Feed the Lights Into the Bottle
Begin feeding the light strand into the bottle slowly. Let the wire fall naturally instead of forcing it into a tight clump. If the neck is narrow, use the handle of a wooden spoon or a long plastic straw to gently guide the lights downward. Do not use sharp metal tools that could damage the wire or scratch the glass.
For the prettiest effect, avoid packing all the lights at the bottom. Try to distribute them from base to shoulder. You can gently rotate the bottle as you add the lights so the strand spirals softly around the inside. The goal is a relaxed glow, not a tangled nest of tiny stars fighting for space.
Step 5: Hide or Style the Battery Pack
If you are using cork-style bottle lights, place the cork battery pack at the top. It usually looks intentional and tidy. If your lights have a small separate battery box, leave the switch accessible near the back of the bottle. You can hide it behind ribbon, tuck it behind the bottle on a shelf, or attach it discreetly with removable adhesive strips.
Do not seal the battery pack permanently inside the bottle. You need to access it to turn the lights on and off and replace batteries. A beautiful DIY lamp that cannot be operated is basically a glass paperweight with commitment issues.
Easy Design Variations
1. Minimalist Clear Bottle Light
Use a clean, label-free clear bottle and warm white LED lights. Add nothing else. This version looks great on a nightstand, console table, bookcase, or bathroom shelf. It works especially well in modern and Scandinavian-inspired spaces where the decorating philosophy is “calm, clean, and please hide the clutter.”
2. Rustic Farmhouse Bottle Lantern
Wrap the neck of the bottle with jute twine and tie a simple bow. Add a tiny faux greenery sprig or a kraft paper tag. The result feels cozy, handmade, and charming without drifting into “barn wedding exploded in the living room” territory.
3. Coastal Glow Bottle
Choose a blue or green bottle and add a few small shells, sea glass pieces, or sand-colored ribbon around the base. Keep decorations outside the bottle unless they are lightweight and dry. This version looks lovely on a porch, bathroom shelf, or summer tablescape.
4. Holiday Bottle Light
For winter holidays, use warm white lights with red ribbon, faux pine, mini ornaments, or metallic cord. For Halloween, try amber lights in a smoky glass bottle. For Valentine’s Day, add pink ribbon or heart-shaped tags. For New Year’s Eve, use silver accents and let the bottle sparkle like it knows where the good snacks are.
5. Frosted Glass Bottle Lamp
If you want a softer, diffused glow, use a frosted bottle or apply a removable frosted glass film. Frosted glass hides the wire more effectively and spreads the light evenly. This is a great choice for bedrooms because the glow feels gentle instead of bright.
Where to Use Your DIY Bottle Light
This easy DIY bottle light is surprisingly versatile. Place one on a bookshelf to create depth between books and framed photos. Use two matching bottles on a mantel for balance. Set one in the center of a dining table for a low-effort centerpiece that does not block conversation. Add one to a guest room so visitors have a soft night-light. Put a few on a covered patio for evening ambiance, as long as the lights and setup are safe for that location.
For events, bottle lights make excellent budget decorations. They can line a buffet table, brighten a dessert station, or mark an entryway. Because they are battery-powered, you do not need to run cords across the floor. That means fewer tripping hazards and fewer moments where someone says, “Who unplugged the magic?”
Safety Tips for Twinkle Light Bottle Projects
Safety is not the glamorous part of crafting, but neither is explaining to your family why the decorative bottle became “a learning experience.” Always use LED lights in this project because they are cooler and more energy-efficient than older incandescent light strands. Inspect lights before use, and do not use any strand with damaged wires, cracked sockets, loose connections, or signs of overheating.
Keep the bottle away from curtains, bedding, paper decorations, and heat sources. Turn the lights off before going to sleep or leaving the house. If using battery-operated lights, remove batteries when storing the decoration for a long time. If using plug-in lights, make sure the cord is not pinched under furniture, rugs, doors, or windows.
Also, avoid drilling holes in glass unless you have the right tools, training, and protective setup. The no-drill method is safer, faster, and cleaner for most people. In this project, the cord or battery pack can remain at the top or back of the bottle, so there is no need to turn your craft table into a glass workshop.
Common Mistakes to Avoid
Using a Strand That Is Too Long
A very long light strand can bunch up at the bottom and look messy. For most large bottles, a short micro-LED fairy light strand works best. The bottle should glow, not look like it swallowed a holiday storage bin.
Choosing Lights That Are Too Bright
Bright lights can be harsh inside clear glass. Warm white micro lights usually give the most flattering effect. If your lights have brightness settings, start low and increase only if needed.
Forgetting to Clean the Inside
Dust, water spots, and label residue become more noticeable once the bottle is lit. A clean bottle makes the finished project look intentional and polished.
Blocking the Switch
Decorating around the battery pack is fine, but make sure you can still reach the switch. Beauty is important. Function is what keeps you from taking the whole thing apart every evening.
Budget-Friendly Styling Ideas
You do not need expensive craft supplies to make this DIY twinkle light bottle look beautiful. Use leftover ribbon from gift wrapping, twine from packaging, dried flowers from an old arrangement, or a small tag cut from cardstock. A narrow strip of fabric tied around the neck can add color and texture. Even a simple handwritten label can make the bottle feel personal.
For a set of matching bottle lights, choose bottles with similar shapes but different heights. Odd numbers usually look best, so try grouping three bottles together on a mantel or sideboard. Keep the light color consistent for a cohesive look. If every bottle uses a different light color, the display can start to feel less “curated home décor” and more “tiny airport runway.”
How to Turn This Into a Handmade Gift
This project makes a thoughtful handmade gift because it feels personal without being overly complicated. Choose a bottle shape that matches the recipient’s style. Add a tag with a short message, wrap the neck with ribbon, and include extra batteries if the lights are battery-powered. That little practical detail makes the gift feel finished.
For a housewarming gift, use warm white lights and neutral ribbon. For a holiday gift, add seasonal greenery. For a dorm room gift, choose battery-operated lights and a fun bottle color. For a wedding shower or anniversary, use frosted glass and soft ribbon for a romantic glow.
Extra Experience: What I Learned From Making Twinkle Light Bottle Décor
The first thing you learn from making a large bottle with twinkle lights is that simple projects can still feel surprisingly satisfying. There is something almost ridiculous about how quickly the transformation happens. One minute, you are holding an empty bottle and wondering if you should recycle it. Ten minutes later, it is glowing on a shelf like it has a small, elegant secret.
The second lesson is that the bottle shape matters more than expected. Tall bottles look graceful and dramatic, especially on mantels or console tables. Rounder bottles create a softer lantern effect. Bottles with raised glass patterns are especially beautiful because the light catches on every curve and ridge. Clear glass is classic, but tinted glass can make the project look more expensive than it is. Amber glass gives a cozy golden glow. Green glass feels vintage. Blue glass feels coastal and calm.
I also learned that less decoration is often better. It is tempting to add ribbon, charms, greenery, beads, tags, and maybe a tiny decorative bird because the craft drawer got involved. But the lights are already the star. A simple wrap of twine or one small sprig near the neck is usually enough. When in doubt, step back and ask, “Does this look charming, or did I just accessorize a bottle like it is going to prom?”
Another practical discovery: always test the lights in the room where the bottle will live. A strand that looks perfect in bright daylight may feel too dim at night, or too bright beside a bed. Warm white lights tend to be the safest choice because they flatter most spaces. If the bottle is for a bedroom, a softer glow is better. If it is for a party table or patio, a brighter strand may work well.
Battery placement is the detail that separates a neat project from a slightly annoying one. Cork-style bottle lights are wonderfully tidy because the switch stays at the top. If the battery box is separate, hide it behind the bottle but keep it reachable. Do not bury it under ribbon or glue decorations around it. Future you will not appreciate that decision when the batteries need changing.
The best use for this project may be mood lighting. A bottle light will not replace a reading lamp, desk lamp, or overhead fixture. It is not trying to do taxes or illuminate a surgery. Its job is atmosphere. It makes a dark corner feel cozy, a dinner table feel special, and a plain shelf look styled. That is a respectable job for an empty bottle and a strand of tiny lights.
Finally, this project is a great reminder that DIY does not have to be complicated to be worthwhile. Sometimes the easiest projects are the ones people notice most. They are approachable, repeatable, and forgiving. If the ribbon looks wrong, untie it. If the lights bunch up, gently adjust them. If the bottle does not match your room, try another one. No drama, no sawdust, no mysterious leftover screws. Just a bottle, a glow, and a tiny bit of creative satisfaction.
Conclusion
An easy DIY project with a string of twinkle lights and a large bottle is proof that beautiful home décor does not need to be expensive, complicated, or stressful. With one clean bottle, a safe LED light strand, and a few optional accents, you can create a glowing centerpiece, shelf accent, night-light, patio decoration, or handmade gift in very little time.
The key is to keep the project simple: choose a stable bottle, use LED lights, test everything first, avoid damaged cords, and style the outside with restraint. The finished piece adds warmth and personality to almost any room. It is cozy, reusable, customizable, and just fancy enough to make guests ask where you bought it. When that happens, you are legally allowed to smile mysteriously and say, “Oh, I made it.”
Note: For best results, use cool-running LED twinkle lights, avoid drilling or cutting glass, and turn the lights off before sleeping or leaving home.