Why Embroidered Canvas Line Art Is Having a Moment
If you’ve scrolled through Pinterest lately, you’ve probably seen it: minimalist faces or florals drawn in a single line, stitched right into a painted canvas. It’s half modern art print, half cozy embroidery projectand completely addictive. Embroidered canvas line art combines the graphic punch of wall art with the texture and soul of hand stitching, making it a perfect weekend DIY or a thoughtful handmade gift.
On Hometalk and other DIY communities, this trend usually shows up as simple silhouettes or abstract faces stitched in contrasting thread over color-blocked backgrounds. You don’t need advanced embroidery skills or fancy suppliesbasic backstitch, a few skeins of floss, and a cheap canvas will do the trick. What you’re really creating is a piece of minimalist embroidered line art that fits right in with today’s clean, Scandinavian-inspired interiors.
What Exactly Is Embroidered Canvas Line Art?
At its core, embroidered canvas line art is a mashup of three things:
- A simple line drawing – most often a continuous line face, hand, or floral motif inspired by modern line art prints.
- A stretched canvas – the same kind you’d use for acrylic painting, usually in sizes like 8×10 or 9×12 inches.
- Embroidery stitches – typically backstitch, running stitch, or split stitch worked directly through the canvas or through a layer of fabric that’s been mounted on the canvas.
Instead of filling in big areas with paint or thread like traditional needlepoint, you let the negative space do the talking. A single stitched line outlines a face or plant, often layered on top of soft painted shapes in muted tonesterracotta, dusty blue, sage green. The result feels modern, airy, and surprisingly high-end for something you made while wearing sweatpants.
Supplies You’ll Need
Before you channel your inner modern artist, gather a few basic supplies. Most of these can be found at craft stores or ordered online:
- Stretched canvas (8×10, 9×12, or similar)
- Acrylic paint and a small brush (optional but great for color blocking)
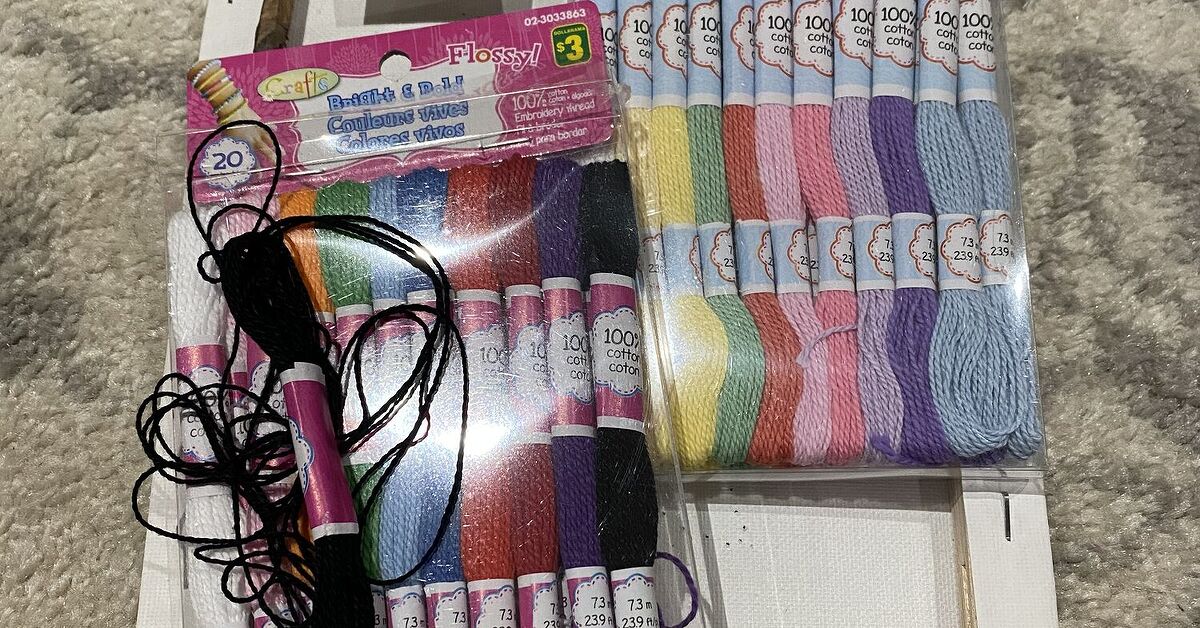
- Embroidery floss in one or two colors
- Embroidery needle with a sharp point (a must for piercing canvas)
- Pencil or washable fabric pen for sketching your design
- Printed line art or a simple drawing for reference
- Tape and a light source (window, light pad, or screen) if you’re transferring a pattern
- Optional: carbon/transfer paper or graphite pencil for easier transfers on darker surfaces
If you’re more comfortable stitching on fabric than directly on canvas, you can also stretch cotton fabric in an embroidery hoop, stitch your line art, then mount that finished piece onto the canvas with glue or staples. Sites that focus on embroidery transfers and techniques often recommend woven cotton for beginners because it’s easier to stitch through than stiff canvas.
Step-by-Step: How to Make Embroidered Canvas Line Art
Step 1: Choose or Create Your Line Art Design
Start with something simple. Minimalist one-line faces, side profiles, or a single stem with leaves are ideal. Look at digital line drawings or minimalist face prints for inspirationjust avoid directly copying a protected design if you plan to sell your artwork. Use them as a style reference instead.
If drawing isn’t your thing, print out a royalty-free line art graphic, resize it to fit your canvas, and use that as your template. The beauty of line art is that even a slightly wobbly line can look intentional and artsy.
Step 2: Prep and Paint the Canvas (Optional but Highly Recommended)
Painting your canvas first gives your finished piece more depth and dimension. Many DIYers like to paint:
- Diagonal color blocks – one half of the canvas in a rich color and the other in an off-white or cream.
- Organic blobs – overlapping shapes in neutrals or muted tones with the line art stitched on top.
- Solid backgrounds – great if you want your thread color to stand out clearly.
Let the paint dry completely. Acrylic usually dries quickly, but if you’re using thicker layers, give it a bit more time. You don’t want tacky paint grabbing your thread or gumming up your needle.
Step 3: Transfer the Line Art to the Canvas
There are several ways to get your design onto the surface:
- Window or screen tracing: Tape your printed design on a window or tablet screen, hold the canvas over it, and lightly trace the lines with a pencil.
- Graphite transfer: Shade the back of the paper with a soft pencil, place it on the canvas, then trace over the design to transfer the graphite.
- Carbon/transfer paper: Place transfer paper between the design and canvas, then trace with a stylus or penespecially useful on darker paint colors.
Keep your lines light. You only need enough to guide your stitching, and you don’t want dark marks peeking out from under your thread.
Step 4: Pre-Punch Holes (Your Fingers Will Thank You)
Canvas is tougher than fabric, so pre-punching holes along your drawn lines makes the embroidery smoother. Many makers use a needle, awl, or thumbtack to poke holes at regular intervals, just like some TikTok tutorials for embroidered canvas art show.
Space the holes evenlycloser together for tighter curves (like lips or eyes), and a bit farther apart on gentle curves or straight lines. This simple prep step keeps your stitches consistent and prevents sore hands.
Step 5: Stitch Your Line Art
Now for the relaxing part. Thread your needle with two or three strands of embroidery floss, knot the end, and come up from the back of the canvas through your first hole.
For clean, continuous lines, a backstitch is your best friendmany beginner line art embroidery tutorials rely on it because it creates a solid, unbroken line that’s easy to control.
Work slowly along your pre-punched path. Don’t pull the thread too tight; you want it to lie flat on the surface, not cut into the canvas. If the canvas bends a bit while you stitch, gently press it back into shape.
Step 6: Finish and Display
Once your design is fully stitched, secure the thread on the back with small knots and weave in the tails so nothing unravels. You can:
- Cover the back with felt or cardstock for a neat finish.
- Add hanging hardware or simply set the canvas on a shelf.
- Group several small canvases together for a gallery wall effect.
Many Etsy sellers use similar techniques to create minimalist embroidered canvases they sell as one-of-a-kind decor pieces, often combining painted shapes with stitched line art for a “boutique gallery” look.
Design Ideas to Try
1. Abstract Faces
The classic: overlapping line-drawn faces stitched in a single color. You can outline just the brows, nose, and lips and leave everything else blank. Use a contrast threadwhite on navy, black on terracotta, or gold on creamfor maximum impact. Inspiration for this style is everywhere in modern prints and canvas embroidery boards online.
2. Florals and Botanical Motifs
If faces feel intimidating, go floral. A simple stem in a vase, a single monstera leaf, or a cluster of wildflowers works beautifully. Paint abstract blobs behind the floral shapes, then stitch the outlines in dark green or deep blue for a sophisticated look.
3. Personalized Portraits and Nursery Art
Many crafters use embroidered canvas line art to create soft, unique nursery decor or couple portraits: a pregnant silhouette, a parent holding a child, or two overlapping faces representing a relationship. Pinterest boards inspired by Hometalk’s “Embroidered Canvas Line Art” project show these pieces used as sentimental nursery art or personalized gifts.
4. Mixed-Media Experiments
Once you’ve stitched a basic design, you can get playful:
- Combine painted florals with stitched outlines to add dimension.
- Use metallic thread for a subtle shimmer.
- Add beads or French knots for “flower centers” or stars in a night sky.
- Try thread painting techniques to partially fill shapes for a richer texture.
Mixed-media canvas embroidery is especially popular in online trends, where creators layer acrylic paint and stitching for a deeply tactile, gallery-worthy finish.
Tips for Success (and Sanity)
- Test on scrap first: If you’ve never stitched on canvas, try a few practice stitches on a spare corner or mini canvas.
- Choose the right needle: A sharp embroidery or crewel needle works better than a blunt tapestry needle on stiff canvas.
- Keep it simple: Minimalist designs look intentional and are easier to stitch than complex, detailed patterns.
- Mind the tension: Pull too tight and your canvas warps; too loose and your lines look floppy. Aim for firm but relaxed stitches.
- Work in good light: You’re punching and stitching through a thick surfaceyour eyes will thank you.
Where Embroidered Canvas Line Art Fits in Your Home
Embroidered line art on canvas works almost anywhere:
- Living room: Hang a trio of small canvases above a console for an affordable focal point.
- Bedroom: Soft, abstract faces or florals in muted colors bring calm to nightstands or above dressers.
- Nursery: Gentle silhouettes, simple animals, or parent-and-baby outlines make sweet, meaningful decor.
- Home office: Motivational phrases done as stitched line art can add personality without visual clutter.
Because these pieces are lightweight and relatively small, they’re perfect for renters, dorm rooms, and anyone who likes to switch up their decor seasonally without committing to heavy frames.
of Real-Life Experience with Embroidered Canvas Line Art
The first time you try embroidered canvas line art, you’ll probably have the same thought most people do: “Wait, why is this canvas so stubborn?” That’s totally normal. Unlike a soft cotton fabric, canvas makes you work a littlebut that’s also why the finished piece feels so substantial.
The most common learning curve is managing the combination of paint and thread. If you paint your background too thickly, your needle might drag or leave tiny chips of dried paint in the holes. A light-to-medium coat of acrylic is usually enough; you want color, not armor. Many crafters who share their process on DIY blogs and social media mention that their second or third canvas looks noticeably smoother because they found the sweet spot between coverage and stitchability.
Another big aha moment comes with design choice. On paper, it’s tempting to start with a super detailed facelots of overlapping lines, eyelashes, and hair. In reality, every extra line is more work for your needle, and too many overlapping stitches can make the surface look bulky. Most experienced makers eventually simplify their designs: a single closed eye with lashes, a continuous profile, or a single branch with leaves. Ironically, the simpler the design, the more “designer” the final piece looks.
Pre-punching holes is one of those steps people try to skip once…and never skip again. Working straight through unprepared canvas is possible, but it’s harder on your hands and tends to distort the fabric. When you punch firstspacing the holes like the dashes of a dotted lineyou can sit back with a movie and just follow the path with your thread. It turns into a relaxing connect-the-dots activity rather than a battle between you and the canvas.
There’s also a surprising emotional payoff. Unlike a printed poster, embroidered canvas line art has little imperfections that prove someone actually made it. A slightly crooked line suddenly feels charming, not wrong. Many people make these pieces as giftswedding or anniversary portraits, nursery art with a baby’s outline, or florals that reference someone’s favorite flower. Because the materials are affordable, you can experiment freely without fearing “ruining” expensive supplies, and you get to give something that’s both trendy and deeply personal.
Over time, you might notice your style evolving. Maybe you start with monochrome black thread on white canvas, then move into muted color blocks with dark embroidery, and eventually try bolder palettes or metallic accents. The technique is endlessly adaptable: you can recreate famous line drawings, doodle your own designs, or even trace family photos to turn them into stylized silhouettes.
Perhaps the biggest perk, though, is how beginner-friendly the whole process is. You don’t need to know dozens of stitchesone good backstitch can carry an entire design. You don’t need an art degreesimple line drawings are not only acceptable, they’re the goal. And you don’t need a full craft room of suppliesjust a canvas, some floss, and a free evening. By the time you hang your first embroidered canvas line art on the wall, you’ll understand why communities like Hometalk and countless Pinterest boards are so obsessed with this charming, modern craft: it makes your space feel more “you” with every single stitch.