Note: This article synthesizes practical coffee-brewing guidance from reputable U.S. coffee organizations, food-safety resources, culinary publications, and expert-tested home brewing advice. It is written as original web-ready content for publication.
A good pot of coffee is not a miracle. It only feels like one at 7:03 a.m. when your eyes are open but your soul is still buffering. The truth is, making great coffee at home is mostly about controlling a few simple variables: fresh beans, clean water, the right grind, proper coffee-to-water ratio, good brewing temperature, and equipment that is not secretly flavored with last Tuesday’s bitterness.
The best part? You do not need a lab coat, a mustache wax subscription, or a $4,000 machine that looks like it could launch a satellite. Whether you use a classic drip coffee maker, a French press, a pour-over setup, or a humble kitchen scale that has seen more flour than coffee, you can learn how to make a good pot of coffee with consistent, flavorful results.
This guide walks through the science, the routine, the common mistakes, and the small upgrades that make your morning brew taste richer, smoother, and more intentional. Think of it as coffee therapy, except the couch is your kitchen counter and the breakthrough smells like roasted beans.
What Makes a Good Pot of Coffee?
A good pot of coffee should taste balanced. That means it is neither painfully sour nor aggressively bitter. It should have aroma, body, and enough flavor clarity that you can tell the difference between “nice breakfast blend” and “something went wrong in the bean department.”
The main keyword here is simple: how to make a good pot of coffee. But the answer depends on several related elements: coffee brewing ratio, grind size, water temperature, coffee freshness, brew time, and clean equipment. Ignore one of these, and your coffee may still be drinkable. Ignore all of them, and you are basically making hot bean soup with ambition.
The Core Formula
For most drip coffee makers and pour-over methods, a practical starting point is a coffee-to-water ratio between 1:15 and 1:17. In everyday terms, that means about 1 gram of coffee for every 15 to 17 grams of water. A common household shortcut is about 2 tablespoons of ground coffee for every 6 ounces of water, though measuring by weight is more accurate.
For a standard 8-cup coffee maker, try starting with about 60 grams of coffee to 1 liter of water. If the coffee tastes weak, use a little more coffee or grind slightly finer. If it tastes bitter or heavy, use a little less coffee or grind slightly coarser. Coffee is forgiving, but only after you stop guessing wildly.
Step 1: Start With Fresh Coffee Beans
Fresh coffee beans are the foundation of a good brew. Coffee begins losing aroma and flavor after roasting, and it fades faster once ground because more surface area is exposed to oxygen. That is why whole-bean coffee usually tastes better than pre-ground coffee when brewed correctly.
Look for beans with a visible roast date when possible. You do not need coffee roasted five minutes ago by a man named Jasper in a denim apron, but fresher beans generally produce a livelier cup. For daily home brewing, buying smaller bags more often is better than buying a giant bargain sack that slowly turns into caffeinated sawdust.
Choose the Right Roast
Light roasts often taste brighter, fruitier, and more acidic. Medium roasts tend to be balanced, sweet, and friendly to most coffee drinkers. Dark roasts are deeper, smokier, and heavier, sometimes with chocolatey or toasted notes. None is automatically better. The best roast is the one that makes you say, “Ah, yes, I am now fit to interact with humans.”
For a crowd, medium roast is usually the safest choice. It works well in drip coffee makers, pairs nicely with milk, and does not scare people who think “single-origin natural process” sounds like a hiking injury.
Step 2: Store Coffee the Right Way
Good coffee storage protects beans from their main enemies: air, moisture, heat, and light. Store coffee in an airtight, opaque container in a cool, dry cabinet. Avoid clear jars on sunny countertops unless your goal is kitchen decor with declining flavor.
Do not store everyday coffee in the refrigerator. Coffee can absorb odors, and temperature changes can introduce moisture. Nobody wants a brew with subtle notes of onion, leftover pizza, and regret. Freezing can work for longer storage only when coffee is sealed very well in small portions, but for everyday use, room-temperature storage is simpler and better.
Step 3: Grind Right Before Brewing
Grinding coffee right before brewing is one of the easiest ways to improve flavor. A burr grinder is ideal because it produces a more consistent grind than a blade grinder. Consistency matters because coffee particles extract at different speeds. Fine particles can over-extract and taste bitter, while large chunks can under-extract and taste sour or weak.
Match Grind Size to Brewing Method
Use a medium grind for most automatic drip coffee makers. It should look a little like beach sand. For French press, use a coarse grind so the coffee does not turn muddy. For pour-over, use medium to medium-fine depending on the brewer and filter. For espresso, use a fine grind, though espresso is its own dramatic little universe and deserves separate attention.
If your coffee tastes sour, thin, or sharp, the grind may be too coarse or the brew time too short. If it tastes bitter, harsh, or dry, the grind may be too fine or the brew time too long. Your grinder is not just a gadget; it is the steering wheel of flavor.
Step 4: Use Good Water
Coffee is mostly water, so water quality matters. Use fresh, cold, filtered water if your tap water tastes strongly of chlorine, minerals, or “municipal swimming pool.” Avoid distilled water because coffee needs some minerals for proper extraction and better flavor. Avoid heavily softened water, too, because it can make coffee taste flat.
The goal is not fancy water. The goal is clean-tasting water. If you would not drink it by itself, do not ask coffee beans to perform magic in it. They are beans, not wizards.
Step 5: Get the Coffee-to-Water Ratio Right
The coffee brewing ratio is where many home pots go sideways. Too little coffee makes the brew weak and hollow. Too much coffee can taste muddy, bitter, or expensive in a way that hurts your feelings.
Here is a simple ratio guide for drip coffee:
- Small pot: 30 grams coffee to 500 grams water
- Medium pot: 45 grams coffee to 750 grams water
- Large pot: 60 grams coffee to 1,000 grams water
- Stronger brew: Use a 1:15 ratio
- Lighter brew: Use a 1:17 ratio
If you do not own a scale, start with 2 tablespoons of ground coffee per 6 ounces of water. Then adjust based on taste. A scale simply makes the process more repeatable, which is helpful if your morning personality cannot handle surprises.
Step 6: Brew at the Right Temperature
For hot coffee, the ideal brewing temperature is generally around 195°F to 205°F. Water in this range extracts flavor efficiently without scorching the grounds. Many quality automatic drip coffee makers are designed to brew in this range, but cheaper or older machines may run too cool, leading to weak or sour coffee.
If you are boiling water manually for pour-over or French press, bring it to a boil and let it sit for about 30 to 60 seconds before pouring. That usually gets it close to the sweet spot. No thermometer? No panic. Just do not pour violently boiling water directly onto the grounds like you are punishing them.
Step 7: Use the Right Filter
Filters influence the body and flavor of coffee. Paper filters trap more oils and fine particles, producing a cleaner cup. Metal filters allow more oils through, creating a fuller body and heavier texture. Neither is wrong; they simply create different experiences.
If using paper filters, rinse the filter with hot water before brewing when possible. This helps remove papery taste and warms the brewer or basket. Then discard the rinse water before adding coffee. It is a tiny step, but tiny steps are how coffee becomes “surprisingly good” instead of “technically brown.”
Step 8: Keep Your Coffee Maker Clean
A dirty coffee maker can ruin good beans. Coffee oils build up over time and turn rancid, creating bitter or stale flavors. Mineral deposits from water can also slow brewing and affect temperature. If your coffee tastes dull even when you use fresh beans, your machine may be asking for a spa day.
Daily Cleaning
After each use, wash the carafe, filter basket, and removable parts with warm, soapy water. Let them dry fully before reassembling. Do not leave wet grounds sitting in the basket all day unless you are trying to start a compost-themed science project.
Monthly Descaling
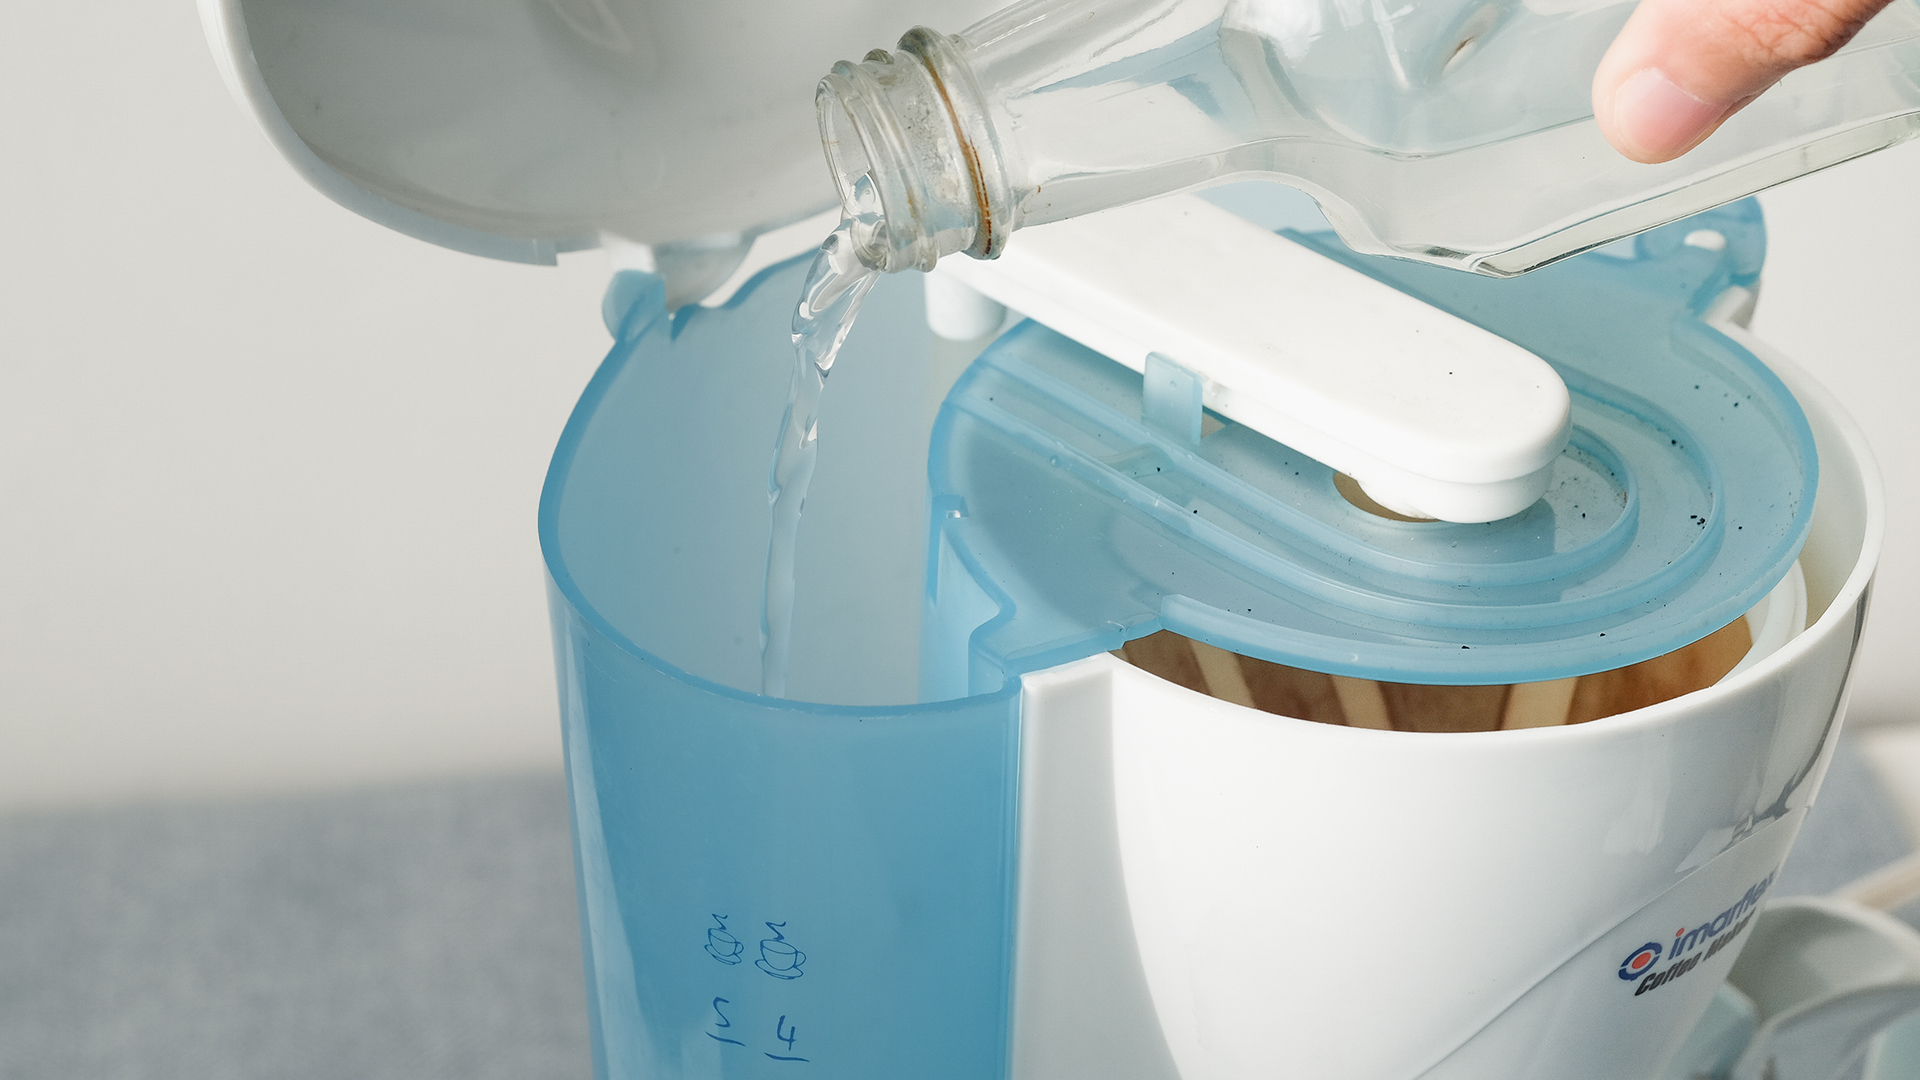
For many drip coffee makers, descaling every one to three months helps remove mineral buildup. Some machines can be cleaned with a vinegar-water solution, while others require manufacturer-approved descaling products. Always check the manual, especially for pod machines or espresso machines, because vinegar can damage some systems or leave unwanted flavors.
How to Make a Good Pot of Drip Coffee
Drip coffee is the classic American kitchen method: dependable, convenient, and capable of excellence when treated with respect. Here is a practical step-by-step process.
Drip Coffee Recipe
- Use fresh, whole-bean coffee and grind it to a medium texture.
- Measure 60 grams of coffee for 1 liter of water, or adjust between 1:15 and 1:17.
- Use fresh, filtered water.
- Place a clean filter in the basket and rinse it if practical.
- Add the grounds evenly and gently shake the basket to level them.
- Start the machine and allow the full brew cycle to finish.
- Stir the finished pot gently before serving so the flavor is even from first cup to last.
- Serve soon after brewing, preferably from a thermal carafe instead of leaving it on a hot plate for hours.
That last point matters. A hot plate can keep coffee warm, but it can also make it taste cooked, stale, and bitter. If you like drinking coffee slowly, transfer it to a thermal carafe. Your future second cup will thank you.
How to Adjust Coffee Flavor Like a Pro
Once you understand the basics, improving coffee becomes simple troubleshooting. Your taste buds are the diagnostic tool. They may not wear a lab coat, but they know when something tastes like sadness.
If Your Coffee Tastes Sour
Sour coffee is often under-extracted. Try grinding slightly finer, using hotter water, increasing brew time, or using a bit more coffee. Light roasts can naturally taste brighter, so do not confuse pleasant acidity with a brewing problem.
If Your Coffee Tastes Bitter
Bitter coffee is often over-extracted. Try grinding slightly coarser, reducing brew time, using slightly less coffee, or cleaning your equipment. Dark roasts can also taste bitter if brewed too aggressively.
If Your Coffee Tastes Weak
Weak coffee usually needs more coffee, a finer grind, or better water temperature. It may also come from an automatic machine that does not heat water properly. Before blaming the beans, check your ratio.
If Your Coffee Tastes Flat
Flat coffee can come from old beans, poor storage, distilled or overly softened water, or stale pre-ground coffee. Start by buying a smaller bag of fresh beans and grinding just before brewing.
Common Coffee Mistakes to Avoid
Most bad coffee is not caused by one giant disaster. It is usually death by tiny shortcuts. The good news is that every mistake is fixable.
Using Random Scoops
A heaping scoop today and a shy scoop tomorrow will not produce consistent coffee. Measure your coffee and water. Even a simple tablespoon routine is better than chaos with a handle.
Grinding Too Early
Pre-ground coffee is convenient, but grinding fresh gives better aroma and flavor. If you must buy ground coffee, buy smaller amounts and store it carefully.
Ignoring the Machine
Your coffee maker needs cleaning. If the carafe has brown stains, the basket smells oily, or the brew cycle takes much longer than it used to, it is time for maintenance.
Using the Wrong Grind
Fine espresso grind in a drip machine can clog the filter and taste bitter. Coarse French press grind in a drip machine can taste weak and sour. Match the grind to the method.
Letting Coffee Sit Too Long
Freshly brewed coffee is at its best shortly after brewing. After a while, aroma fades and flavor changes. Reheating old coffee is sometimes necessary, but let us not pretend it is a lifestyle goal.
Should You Use a Scale?
Yes, if you want repeatable results. A digital kitchen scale does not make coffee complicated; it makes it predictable. Once you find the ratio you like, you can repeat it every morning instead of playing “Will This Pot Be Watery?” before sunrise.
Still, you can make good coffee without a scale. Use tablespoons and cup markings, then adjust slowly. The key is consistency. Use the same scoop, the same water level, and the same grind setting until you know what needs changing.
Best Coffee Add-Ins Without Ruining the Pot
A well-made pot of coffee should taste good black, but there is no shame in adding milk, cream, sugar, cinnamon, cocoa, vanilla, or a splash of maple syrup. Coffee purity contests are exhausting, and nobody wins except the person quietly enjoying their cup.
If brewing for a group, keep the pot simple and let people customize their mugs. If you want flavored coffee, add spices sparingly to the grounds before brewing. A tiny pinch of cinnamon or cardamom can be lovely. Too much can make the pot taste like a candle got ambitious.
My Experience: Lessons From Many Pots of Coffee
The first lesson I learned about making good coffee is that confidence is not the same thing as accuracy. For years, I used the “looks about right” method. Some mornings the coffee was strong enough to file taxes by itself. Other mornings it tasted like someone whispered the word “coffee” over hot water. I blamed the beans, the machine, the weather, and occasionally my own character. The real issue was that I was not measuring anything.
When I finally started using a basic coffee-to-water ratio, the improvement was immediate. Not fancy. Not dramatic in a lightning-from-the-sky way. Just reliable. A medium pot with 45 grams of coffee and 750 grams of water tasted like the same coffee every time. That consistency made it easier to adjust. If I wanted more body, I used slightly more coffee. If the brew felt too heavy, I backed off. Suddenly, coffee stopped being a gamble and became breakfast engineering with better smells.
The second big lesson was grind size. I once used very fine coffee in a drip machine because I thought finer meant stronger. Technically, it did make the coffee stronger, in the same way shouting makes a conversation stronger. The brew was bitter, slow, and unpleasant. When I switched to a medium grind, the coffee opened up. It tasted smoother and more balanced. That was when I realized strength and quality are not the same thing. Strong bad coffee is still bad coffee; it just has more confidence.
Freshness also changed everything. Whole beans ground right before brewing had more aroma than pre-ground coffee that had been living in the pantry since an uncertain historical period. The difference was especially clear with medium roasts. The cup had sweetness, gentle acidity, and a pleasant finish instead of that dusty flavor people politely call “classic.” Buying smaller bags helped too. A giant bag may look economical, but if half of it goes stale before you use it, the savings taste suspiciously like cardboard.
Cleaning the coffee maker was the humbling lesson. I did not want cleaning to matter. It felt unfair. Surely coffee should be about beans, not scrubbing removable plastic parts before I am fully awake. But after washing the basket thoroughly and descaling the machine, the coffee tasted cleaner. The bitterness I had blamed on dark roast was partly old coffee oil. That discovery was both exciting and mildly embarrassing.
Water quality was the quiet upgrade. Filtered water did not turn my kitchen into a café overnight, but it removed odd flavors and made the coffee taste clearer. It also made lighter roasts more enjoyable because the acidity tasted crisp instead of sharp. If your tap water tastes fine, you may not need to overthink this. But if it tastes like a swimming pool wearing a mineral sweater, filter it.
The most useful habit I developed was stirring the finished pot before pouring. In drip coffee, the first liquid through the filter can be different from the last. A quick stir evens out the flavor. It is such a small move that it feels silly until you try it. Then you become the person saying, “Actually, stir the pot first,” which is annoying but correct.
Finally, I learned that the perfect pot of coffee is personal. Some people want bright and delicate coffee. Others want a rich, sturdy cup that can survive cream. Some want a morning ritual with a burr grinder and a timer. Others want to press one button and receive emotional support in a mug. Both are valid. The goal is not to impress imaginary coffee judges. The goal is to make a pot you look forward to drinking.
Conclusion: Better Coffee Starts With Better Habits
Learning how to make a good pot of coffee is really about building a simple, repeatable routine. Start with fresh beans, store them well, grind just before brewing, use clean filtered water, measure your coffee-to-water ratio, brew at the right temperature, and keep your equipment clean. These steps sound small, but together they can transform your daily cup from “necessary liquid” into something genuinely enjoyable.
You do not have to become a coffee snob. You do not have to weigh your feelings in grams. But if you treat coffee like a recipe instead of a random morning event, your pot will taste better, your kitchen will smell better, and your day may begin with fewer negotiations between you and consciousness.