A beautiful fence can survive crooked pickets, mismatched stain, and even a neighbor who insists on discussing property lines at breakfast. What it cplains two dependable ways to install a wood fence post: setting it in concrete for maximum strength or packing it in crushed gravel for better drainage and easier future repairs.
Important note: Contact 811 several business days before digging, verify your property boundaries, and check local permit, setback, fence-height, and frost-depth requirements. Utility markings identify the approximate location of buried lines, so excavate carefully near marked areas.
Why Proper Fence Post Installation Matters
Fence posts are the structural backbone of a wood fence. Rails, pickets, panels, gates, and hardware all depend on them. When the posts lean, loosen, rot, or rise during freeze-thaw cycles, the rest of the fence follows them like a row of wooden dominoes.
Correct installation protects against four common problems: wind pressure, shifting soil, frost heave, and moisture-related decay. Privacy fences are especially demanding because their solid panels catch wind like sails. Corner posts, end posts, and gate posts also carry more force than ordinary line posts and usually need stronger footings.
Moisture deserves special attention. According to wood-preservation guidance, the greatest decay risk for a fence post occurs near the ground line, where wood repeatedly becomes wet and dries slowly. Posts buried in soil or concrete should therefore be pressure-treated and rated for ground contact, not merely labeled for above-ground exterior use. AWPA Use Category UC4A specifically includes sawn fence posts exposed to ground-contact conditions.
Method 1 vs. Method 2: Which Should You Choose?
Choose Concrete for Maximum Stability
Concrete is generally the better choice for six-foot privacy fences, windy locations, sandy or loose soil, heavy panels, gate posts, corner posts, and end posts. It creates a wide, rigid footing that resists sideways movement and helps keep the post plumb.
The tradeoff is permanence. A concrete-set post is harder to replace, and careless installation can allow water to collect around the wood. A gravel drainage layer and a properly shaped concrete surface reduce that risk.
Choose Compacted Gravel for Drainage and Repairability
Compacted crushed gravel can be a practical option for line posts supporting picket fences, garden fences, split-rail fences, and other relatively open structures. Water can drain through the stone, and a future post replacement will not require excavating a miniature concrete meteorite.
This method works best in firm, cohesive, well-drained soil. It is less dependable in loose sand, saturated ground, extremely windy locations, or situations where local code or the fence manufacturer requires concrete. Tractor Supply’s installation guidance similarly describes crushed gravel as suitable for heavier soils but less appropriate for loose, sandy ground.
Tools and Materials
Basic Tools for Either Method
- Tape measure
- Wood stakes and mason’s string
- Marking paint
- Post-hole digger, digging bar, or power auger
- Shovel
- Four-foot level or post level
- Hand tamper or narrow tamping bar
- Scrap 2-by-4 boards for bracing
- Exterior-rated screws
- Work gloves, eye protection, hearing protection, and dust mask
Materials for the Concrete Method
- Ground-contact-rated pressure-treated post
- Three-quarter-inch crushed stone or drainage gravel
- Fast-setting post concrete or standard concrete mix
- Clean water
- End-cut wood preservative when required by the lumber manufacturer
Materials for the Gravel Method
- Ground-contact-rated pressure-treated post
- Angular crushed gravel with a compactable blend of particle sizes
- Optional landscape fabric for unstable hole walls
- End-cut wood preservative when required
Avoid rounded pea gravel for structural backfill. Its smooth pieces tend to roll instead of locking together. Angular crushed stone compacts more firmly around the post.
Planning the Fence Post Layout
Confirm the Property Line and Local Rules
Do not assume an old fence, hedge, or mowing pattern marks the legal boundary. Review your survey, locate boundary pins when appropriate, and consult a licensed surveyor if the line is uncertain. Also check local rules concerning setbacks, permits, maximum height, corner visibility, and the finished side of the fence.
Mark the Fence Line
Drive stakes beyond the first and last post locations, then stretch mason’s string tightly between them. The string should represent one consistent face of the posts rather than their centers. Keeping every post lightly touching the same reference line produces a straighter fence.
Mark post centers according to your panel width or rail plan. Many residential wood fences use spacing close to eight feet on center, but actual spacing must match the panel, rail length, wind exposure, and manufacturer’s specifications. Measure every bay instead of trusting that the yard will politely divide itself into equal sections.
Determine the Correct Hole Depth
A widely used rule is to bury a post approximately one-third of the fence height above ground. A six-foot fence, for example, commonly needs about two feet of buried post, plus several inches for a gravel base. Taller fences, high-wind areas, weak soil, and heavily loaded posts may require greater depth.
In cold climates, the footing may need to extend below the local frost line. Otherwise, freezing soil can lift the post and gradually turn a level fence into a wooden roller coaster. Local code and manufacturer instructions take priority over general rules. Home Depot recommends holes roughly one-third as deep as the post is tall, a diameter about three times the post width, and greater depth where necessary to reach below the frost line.
Choose the Hole Diameter
For a standard nominal 4-by-4 post, a hole approximately 10 to 12 inches in diameter is common. Gate posts and larger 6-by-6 posts usually need wider holes. A wider footing provides more resistance to lateral movement, but unnecessarily oversized holes increase concrete cost and excavation work.
Method 1: Install a Wood Fence Post in Concrete
Concrete offers the most dependable support for a heavy wood fence when it is installed with drainage and moisture control in mind.
Step 1: Inspect and Prepare the Post
Confirm that the lumber tag identifies the post as suitable for ground contact. Place the factory-treated end in the hole whenever possible. If you cut the buried end, apply an approved end-cut preservative according to the lumber supplier’s instructions because cutting can expose untreated interior wood.
Avoid sharpening the bottom into a point. A flat end rests more evenly on the gravel base and makes it easier to control the finished height.
Step 2: Dig a Straight, Properly Sized Hole
Dig to the planned depth and keep the sides reasonably vertical. A bell-shaped hole that is slightly wider at the bottom can improve resistance to uplift in some soils, but local frost practices vary. Remove loose soil from the bottom instead of leaving a soft cushion beneath the footing.
Stop if you encounter an unidentified pipe, cable, conduit, or unusual structure. Utility markings are approximate, not magical force fields.
Step 3: Add a Gravel Drainage Base
Pour approximately four to six inches of gravel into the bottom of the hole and compact it. The gravel keeps the end grain away from direct soil contact, creates a level bearing surface, and gives incidental water somewhere to drain.
Major U.S. installation guides commonly recommend a gravel base beneath wood posts. Quikrete specifically describes a six-inch gravel base and concrete sloped away from the post as popular moisture-protection measures.
Step 4: Position and Brace the Post
Set the post on the compacted gravel. Adjust its height, align its face with the string, and check it for plumb on two adjacent sides.
Fasten two temporary 2-by-4 braces to neighboring stakes. Recheck the post after tightening each brace because correcting one direction can pull the post out of alignment in the other. Do not rely on a helper to hold the post throughout the pour unless that helper has the patience of a statue.
Step 5: Add the Concrete
Follow the concrete manufacturer’s directions exactly. Some fast-setting products are designed to be poured dry into the hole before water is added. Other mixes must be combined thoroughly with water before placement. Adding an improvised amount of water can produce weak, soupy concrete or dry pockets that never hydrate correctly.
Place the concrete evenly around the post. Use a narrow stick or rod to work out large air pockets without aggressively disturbing the post. Recheck alignment and plumb before the material begins to stiffen.
Fast-setting post concrete may become firm within roughly 20 to 40 minutes under normal conditions, but initial setting is not the same as full curing. Loads should be applied only after the waiting period specified by the product manufacturer.
Step 6: Shape the Top for Drainage
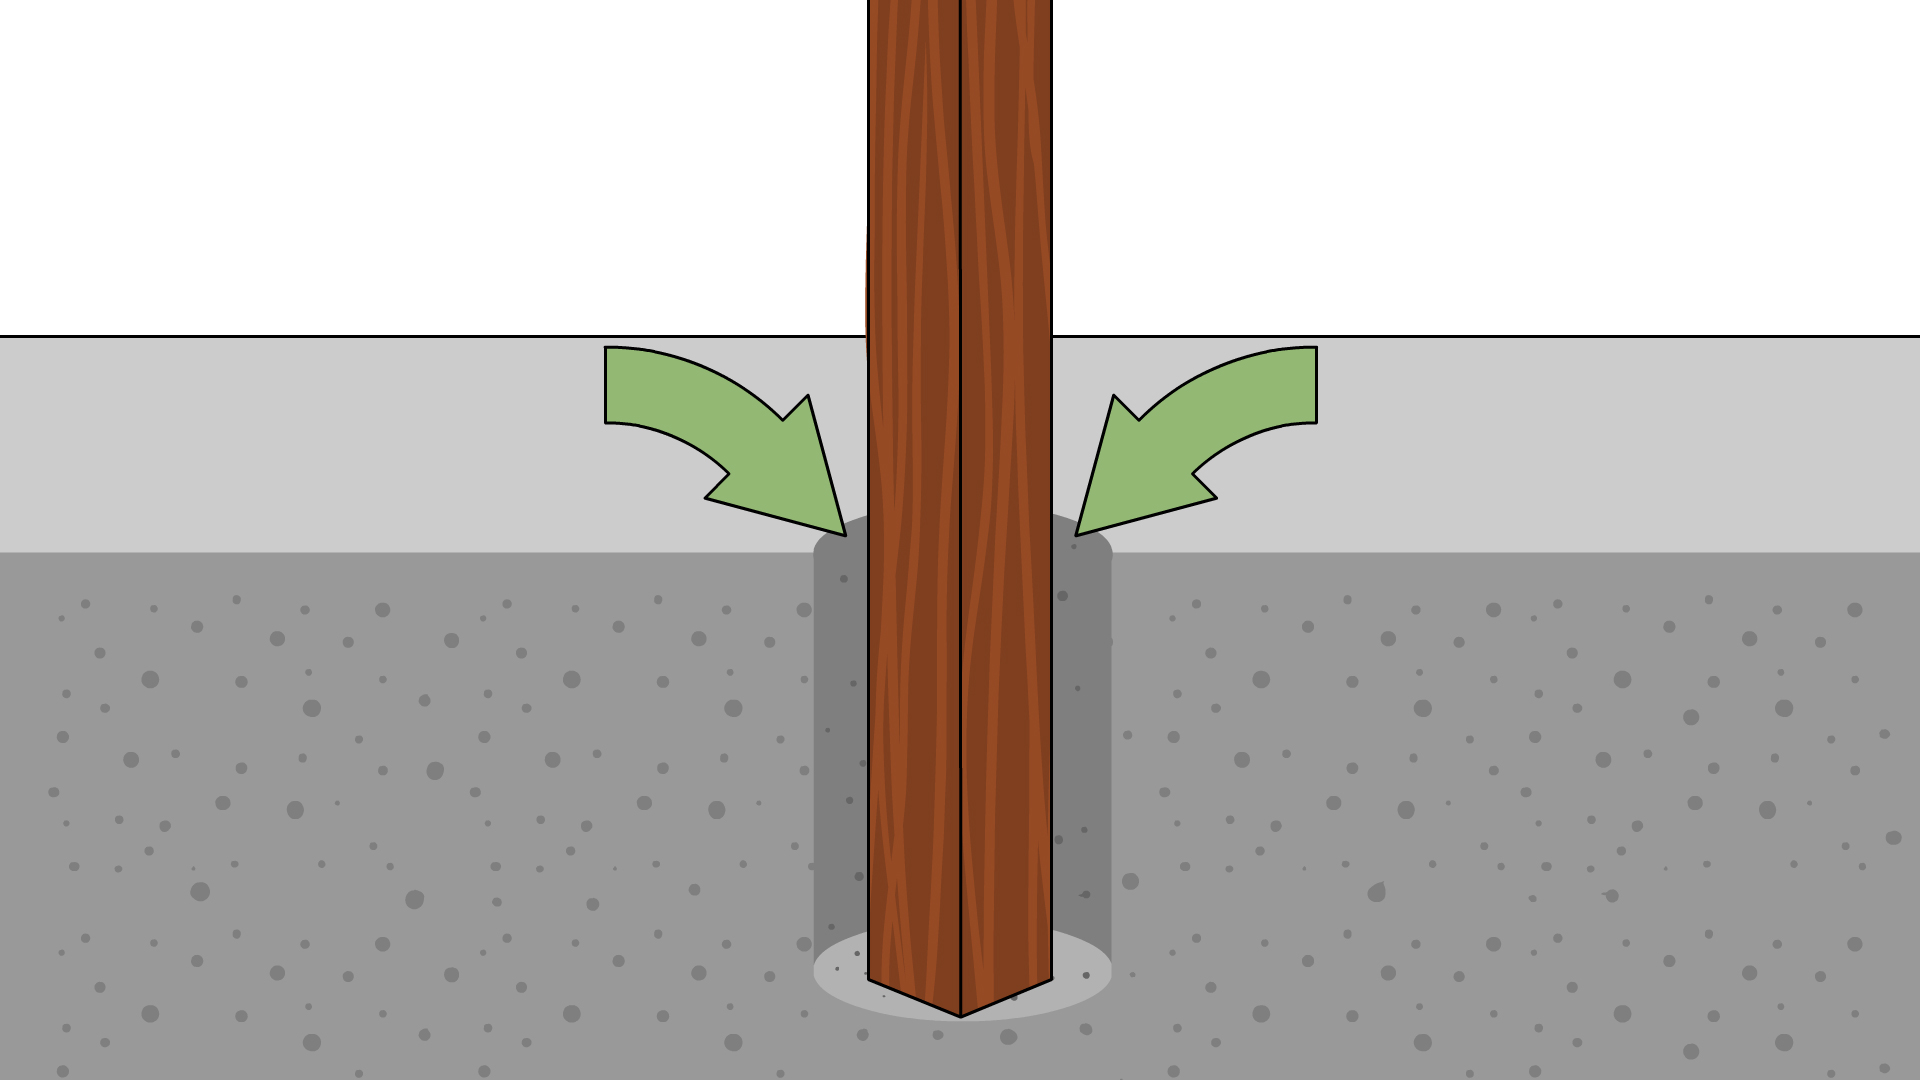
Finish the concrete slightly above the surrounding soil or leave enough room for the manufacturer-recommended soil cover. Shape the exposed surface so it slopes downward away from all four sides of the post. Do not create a flat concrete saucer that holds rainwater against the wood.
Keep mulch, leaves, and soil from accumulating around the post. The wood-to-concrete transition near grade is already the most vulnerable area; burying it under wet mulch gives decay a complimentary hotel room.
Step 7: Allow the Footing to Cure
Leave the braces in place until the footing can hold the post without movement. Wait for the concrete manufacturer’s specified curing period before installing heavy panels, tensioned wire, or a gate. Standard concrete generally requires more patience than fast-setting post mix.
Method 2: Install a Wood Fence Post With Compacted Gravel
The gravel method replaces the rigid concrete footing with layers of tightly compacted crushed stone. It promotes drainage and makes replacement easier, but successful installation depends heavily on careful tamping.
Step 1: Dig the Hole
Use the same depth guidelines as the concrete method and follow any local frost-depth requirement. The hole should provide enough working room to compact gravel around every side of the post. Straight walls make consistent compaction easier.
Step 2: Compact the Gravel Base
Add four to six inches of crushed gravel and compact it until firm. Confirm the depth before placing the post. Adding more stone later is much easier than discovering that every post stands three inches too tall after the rails arrive.
Step 3: Set, Align, and Brace the Post
Position the post on the gravel base. Check its height, align it with the mason’s string, and brace it plumb in both directions. Gravel does not flow evenly around a post like wet concrete, so good bracing is essential during tamping.
Step 4: Add Gravel in Thin Lifts
Pour approximately four to six inches of crushed gravel around the post. Compact it firmly with a narrow tamping bar, alternating between all four sides. Add another lift and repeat.
Thin layers matter. Dumping the entire hole full and tamping only the top creates a hard crust over loose gravel. That post may look sturdy during construction but loosen after the first season of wind and rain.
Step 5: Check the Post Repeatedly
After every lift, confirm that the post remains plumb and aligned with the string. Small corrections are easy while the hole is half full. Once compacted gravel reaches grade, adjustments become a serious upper-body workout.
Step 6: Finish at Ground Level
Continue compacting until the gravel is within roughly two inches of grade. You may finish with compacted soil if grass will grow around the post, but shape the surface to shed water. Do not pile soil or mulch against untreated portions of the wood.
Unlike concrete, compacted gravel has no curing period, so rails can generally be installed immediately after the post is stable. However, delay heavy loading if the surrounding soil is wet, recently disturbed, or still settling. Guidance for gravel-set posts recommends crushed stone placed and tamped in repeated lifts rather than one large fill.
Concrete and Gravel Method Comparison
| Factor | Concrete Footing | Compacted Gravel |
|---|---|---|
| Strength | Excellent for high lateral loads | Good for lighter fences in suitable soil |
| Drainage | Good when a gravel base and sloped top are used | Excellent with angular, free-draining stone |
| Best applications | Privacy fences, gates, corners, ends, sandy soil | Picket, garden, rail, and lighter line posts |
| Installation speed | Requires setting or curing time | Usable immediately after compaction |
| Future replacement | More difficult | Easier to excavate |
| Common failure | Pooled water or premature loading | Loose backfill caused by inadequate tamping |
Common Wood Fence Post Installation Mistakes
Using Above-Ground Lumber Underground
Exterior-rated does not automatically mean ground-contact-rated. Read the treatment tag rather than choosing a post based only on color.
Digging Every Hole to a Different Depth
Uneven post heights complicate rail and panel installation. Mark the intended ground line on each post or use a consistent top reference string.
Ignoring the Frost Line
A shallow footing in freezing soil can be pushed upward. Once one post rises, rails twist and panels become difficult to align.
Skipping the Gravel Base
Setting end grain directly on wet soil increases moisture exposure. A compacted drainage base is inexpensive compared with replacing a rotten post.
Using Too Much Water in Concrete
More water may make concrete easier to pour, but it can reduce strength and increase shrinkage. Follow the amount printed on the bag.
Attaching Fence Panels Too Soon
A footing can feel hard at the surface while remaining weak inside. Heavy panels may pull the post out of plumb before curing is complete.
Failing to Compact Gravel in Layers
Gravel must be tamped around all sides in thin lifts. Surface compaction alone cannot stabilize loose stone lower in the hole.
Allowing Water to Pool at the Ground Line
Slope concrete and finish grade away from the post. Keep sprinklers, mulch, and garden soil from maintaining constant moisture around the base.
How to Make Wood Fence Posts Last Longer
Inspect the fence at least once a year, particularly after severe storms or winter freeze-thaw cycles. Push gently on each post, look for movement, and probe suspicious ground-line areas with a screwdriver. Soft wood, deep cracking, fungal growth, and persistent dampness may indicate decay.
Apply a compatible water-repellent stain or sealer to exposed wood according to the product schedule. Seal end grain carefully and use post caps or angled tops to reduce water absorption from above. Keep pickets and rails from touching the soil, and trim vegetation that prevents airflow.
Where wood posts are mounted above an existing concrete slab, use a properly engineered post base suitable for the intended fence load. Some metal bases maintain approximately one inch of separation between the wood and concrete, helping reduce moisture exposure at the post end. Surface-mounted hardware should not be assumed to provide the same wind resistance as a buried footing unless the manufacturer specifically approves that application.
Practical Experience: Lessons From Real-World Fence Post Projects
The following observations summarize recurring experiences reported by homeowners, fence installers, and experienced DIY builders. They are useful because fence projects rarely fail during the satisfying part when everything is new, clean, and perfectly lined up. Problems appear months or years later, usually during a storm, a wet winter, or the exact weekend when nobody wants to dig another hole.
The First Post Deserves Extra Time
Builders often discover that the first corner or end post controls the accuracy of the entire run. When that post is a fraction out of plumb, the error becomes more visible as rails and panels are added. Taking an additional ten minutes to brace and measure the first post can save an hour of wrestling with later sections.
A useful routine is to check the post from three perspectives: with the level on two adjacent faces, along the string line, and from several yards away. The distant visual check frequently reveals a lean that appears acceptable when viewed from arm’s length.
Soil Can Change Within a Few Feet
One hole may pass through firm clay while the next contains loose fill, roots, construction debris, or sand. Treating every hole identically can produce inconsistent support. A line post in dense soil may perform well with compacted gravel, while a nearby gate post in disturbed fill may need a larger concrete footing.
This is also why a power auger should not replace judgment. An auger creates holes quickly, but it may polish clay walls, widen unexpectedly in loose soil, or twist dangerously when it meets a large root or rock. Cleaning and inspecting each hole by hand before placing the post improves consistency.
Bracing Is Faster Than Repositioning
New DIYers sometimes avoid temporary braces because holding a post “for just a minute” seems easier. Then concrete is poured, the post shifts, someone attempts a heroic correction with one boot, and the footing begins setting during the debate.
Two scrap braces and two stakes turn the job into a controlled process. Bracing also allows one person to install posts without maintaining a full-time human post-holding department.
Small Alignment Errors Become Large Visual Errors
A post can be perfectly plumb yet still sit half an inch away from the fence line. When several posts wander in opposite directions, the finished rails develop visible waves. Keeping one consistent face of every post against the string is just as important as checking vertical alignment.
Wind can move a long string, so it should be pulled tightly and supported where necessary. The post should barely meet the line rather than pushing it sideways.
Drainage Details Matter More Than Decorative Details
Homeowners naturally focus on stain color, cap style, and picket spacing. Years later, the posts that survive are usually the ones with proper treatment, drainage, and grading. A beautifully stained fence supported by posts sitting in permanent moisture is still a future repair project wearing nice clothes.
The most dependable installations combine several small protections: ground-contact-rated lumber, a compacted gravel base, concrete sloped away from the post when concrete is used, exposed wood sealed appropriately, and soil or mulch kept below the vulnerable ground-line transition.
Gate Posts Should Be Treated as a Separate Structural Problem
A gate repeatedly pulls sideways on its hinge post, and the force increases as the gate becomes wider and heavier. Many otherwise successful fences develop their first problem at the gate because its posts were installed like ordinary line posts.
A deeper or wider concrete footing, a larger post, compatible structural hardware, and adequate curing time are inexpensive compared with rehanging a sagging gate every spring. The latch post also needs precise placement; a small spacing error can leave too little adjustment for the latch hardware.
The Best Method Is the One That Matches the Site
There is no universal winner in the concrete-versus-gravel argument. Concrete provides greater rigidity, while compacted gravel offers drainage and easier replacement. Experienced installers choose according to fence style, soil, climate, wind exposure, post function, and local requirements rather than loyalty to one material.
For a tall privacy fence, concrete is usually the conservative choice. For an open garden or split-rail fence in firm soil, compacted gravel may provide plenty of support. When uncertain, strengthen the high-load posts first: gates, ends, corners, and transitions.
Conclusion
Learning how to install a wood fence post is mostly a lesson in careful preparation. The visible post is simple; the hidden footing determines whether it remains straight and solid.
Use ground-contact-rated lumber, call 811 before digging, verify local depth requirements, add a compacted gravel base, and check the post for plumb in two directions. Select concrete for demanding loads and unstable soil. Choose compacted crushed gravel for suitable lighter fences when drainage and future repairability are priorities.
Most importantly, resist rushing the first few posts. A fence rewards accuracy and remembers shortcuts. Install the foundation correctly, and the finished project should stand quietly for yearswithout leaning toward the neighbor as though it has gossip to share.