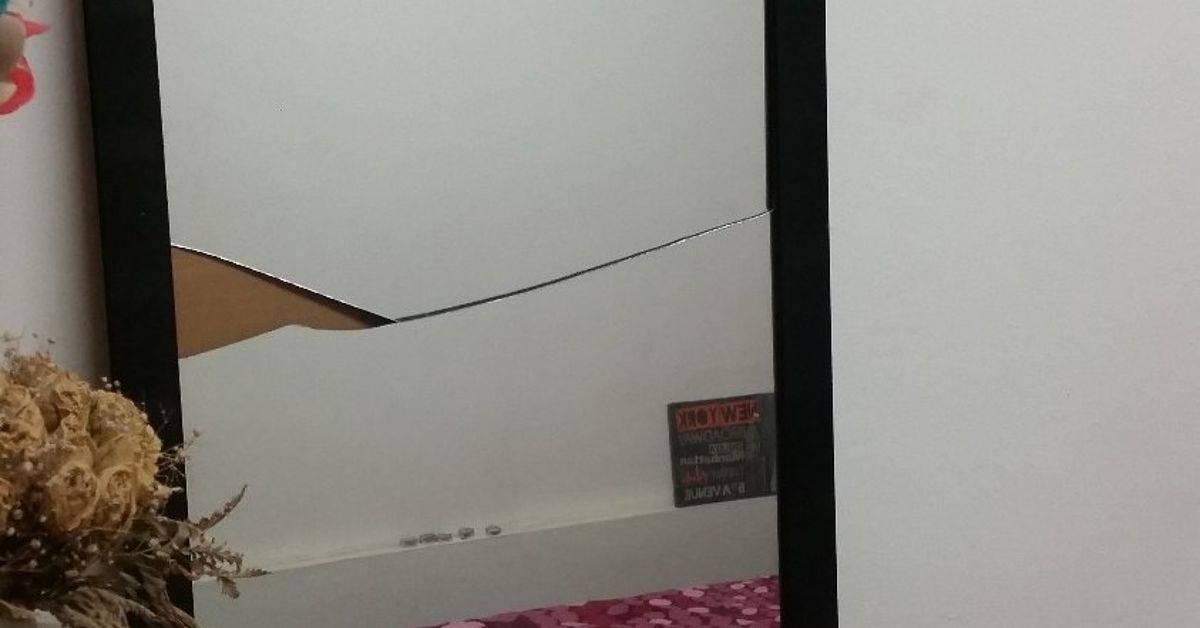
A broken mirror frame may look like it has reached the end of its decorating career, while empty toilet paper rolls usually head straight toward the recycling bin. Put them together, however, and these two household castoffs can become surprisingly elegant wall art. Yes, the humble cardboard tube that once supported bathroom tissue is about to receive a major promotion.
This DIY project transforms an empty or damaged mirror frame into a decorative canvas filled with floral, geometric, or abstract shapes made from cut cardboard rolls. The finished piece can resemble carved wood, wrought iron, or modern metalworkwithout requiring expensive materials or advanced woodworking skills.
The project is affordable, customizable, and ideal for anyone interested in upcycled home decor. More importantly, it provides a safe way to reuse the frame without turning sharp mirror fragments into a questionable living-room hazard. The design uses the frame, not exposed broken glass.
Why This Upcycled Wall Art Project Works
The success of toilet paper roll wall art comes from a simple trick: when a cardboard tube is flattened and sliced into narrow rings, each ring becomes a pointed oval. Those ovals can be arranged as flower petals, leaves, circles, stars, branches, or interlocking geometric patterns.
Once painted, the cardboard texture becomes far less obvious. Black creates the look of iron scrollwork, gold resembles decorative metal, and white produces a clean plaster-like appearance. Deep green works beautifully for botanical patterns, while mixed metallic finishes can make the design look like something discovered in a boutique rather than rescued from the recycling bin.
The old mirror frame gives the lightweight cardboard artwork structure and visual importance. Ornate frames complement floral arrangements, while simple rectangular frames suit modern grids and repeating patterns. Even a chipped frame can work because a distressed finish often makes imperfections appear intentional. In DIY decorating, “intentional distressing” is the sophisticated cousin of “I dropped it.”
Safety First: Inspect the Broken Mirror Frame
Before reaching for glue or paint, determine exactly what is broken. A damaged frame is usually manageable. A shattered mirror requires considerably more caution.
If the Mirror Glass Is Broken
Wear safety glasses, closed-toe shoes, and cut-resistant work gloves. Keep children and pets away from the work area. Place the frame flat on a protected surface rather than carrying it around with loose glass still attached.
Carefully remove large pieces without placing your hands beneath them. Small fragments can hide under frame edges, backing paper, clips, and hanging hardware. Use stiff cardboard, a brush and dustpan, or another appropriate tool to collect fragments instead of using bare fingers. Dispose of broken glass according to local waste requirements.
Do not include sharp mirror shards in this wall art. Although mosaic projects sometimes use mirror pieces, exposed or poorly secured edges can cut someone during construction, cleaning, hanging, or an accidental fall. A piece of decor should start conversations, not emergency-room paperwork.
If the Frame Has Old Paint
Be cautious with antique frames or frames that may have been painted before 1978. Dry sanding, scraping, or grinding old coatings can release hazardous dust if lead-based paint is present. Consider testing the finish or using professional lead-safe assistance rather than aggressively sanding an unknown coating.
If the Frame Is Structurally Damaged
Check every corner joint. Minor separation in a wooden frame may be repaired with wood glue and clamps. Resin, plastic, plaster, and composite frames require an adhesive labeled for the specific material. If a frame is badly cracked, crumbling, or unable to support its own weight, use it only as a decorative template or choose another frame.
Materials and Tools
- One empty mirror frame with all broken glass removed
- Approximately 12 to 25 clean toilet paper rolls
- Sturdy backing board, thin plywood, foam board, or heavy illustration board
- Sharp scissors or a craft knife
- Metal ruler and cutting mat
- Pencil and measuring tape
- Craft glue or thick tacky glue for cardboard
- Hot glue gun for optional quick assembly
- Wood glue or material-compatible adhesive for frame repairs
- Acrylic craft paint or spray paint
- Primer suitable for the frame material
- Small paintbrushes or foam brushes
- Painter’s tape
- Clear matte or satin sealer, if desired
- Picture-hanging hardware rated for the finished weight
- Safety glasses and protective gloves
Use clean, dry cardboard tubes. Discard any tube that is damp, stained, moldy, crushed beyond repair, or carrying a mysterious bathroom history that no amount of paint can emotionally erase.
Choose a Design Before Cutting
Planning the pattern first reduces wasted material and keeps the artwork balanced. Trace the inside opening of the frame onto paper. Use this outline as a full-size design template.
Floral Medallion
Arrange five or six pointed loops around a small central ring to form a flower. Connect several flowers with leaf-shaped loops. This style works especially well inside round, oval, or ornate frames.
Modern Geometric Grid
Position the loops in repeating rows, diamonds, or interlocking circles. Keep the spacing consistent and leave some empty areas. Negative space prevents the finished art from looking like an overly ambitious cardboard beehive.
Botanical Branch
Use thin strips of cardboard for stems and pointed loops for leaves. Let the branch rise diagonally across the frame for a more natural, less symmetrical composition.
Sunburst or Mandala
Begin with a small cardboard ring in the center and build outward in circular layers. Alternate petal sizes to create depth. This design looks dramatic in metallic gold, copper, or matte black.
How to Make Wall Art From a Broken Mirror Frame and Toilet Paper Rolls
Step 1: Empty and Clean the Frame
Remove the mirror, backing, clips, nails, and loose hanging wire. Save reusable hardware in a labeled container. Clean the frame with a method suitable for its material. A lightly damp cloth is often enough for painted wood or resin, but avoid soaking decorative plaster or unfinished wood.
Allow the frame to dry completely. Glue and paint perform poorly on dusty, oily, or damp surfaces.
Step 2: Repair the Frame
Apply the correct adhesive to separated joints or decorative pieces. Align the parts and clamp or tape them in place according to the adhesive instructions. Wipe away excess glue while it is still workable.
Let repairs cure fully before painting or hanging the frame. “Dry to the touch” and “ready to support weight” are not always the same thing, so follow the product label rather than negotiating with the glue.
Step 3: Refinish the Frame
If the existing finish is sound, lightly clean and prime it as needed. Paint the frame with acrylic paint or a coating formulated for wood, metal, plastic, or resin. Apply several thin coats instead of one heavy coat to reduce drips and preserve carved details.
When using spray paint, work outdoors or in a properly ventilated area. Protect surrounding surfaces from overspray, follow the manufacturer’s safety directions, and allow the frame to dry for the recommended time.
Step 4: Prepare the Toilet Paper Rolls
Flatten each cardboard tube gently with your hand. Press along the folds to create two clean edges. Measure and mark cutting lines across the tube.
Half-inch-wide sections are a practical starting point. A standard tube can usually produce several consistent rings. Narrower sections create delicate patterns, while wider sections make bold petals with more visible depth.
Cut straight across the flattened tube. Use one finished section as a guide for the remaining cuts. Consistent width is more important than microscopic perfection; this is wall decor, not aerospace engineering.
Step 5: Shape the Cardboard Pieces
Most cut sections will already resemble pointed ovals. For rounder petals, gently open the center. For sharper leaves, pinch both ends. Small circles can be formed from shorter strips glued into rings.
Create tighter curls by wrapping thin cardboard strips around a pencil. These spirals are useful for flower centers, decorative scrolls, and filling awkward spaces near the frame.
Step 6: Build Small Design Units
Instead of assembling the entire design at once, make individual flowers, leaf clusters, or geometric modules. Apply a small amount of thick craft glue where the cardboard edges touch. Hold the pieces together with clothespins, binder clips, or painter’s tape while they dry.
Hot glue can speed up construction, but use it sparingly. Large blobs remain visible and can make lightweight cardboard pieces sit unevenly. Thick tacky glue generally provides a cleaner bond for paper-to-paper connections, although it requires more drying time.
Step 7: Arrange the Full Pattern
Place all completed units on the paper template. Start with the largest central element, then add secondary shapes. Step back periodically and examine the composition from several feet away.
Check the balance of positive and negative space. The design does not need to fill every inch. Open areas allow shadows to form behind the raised cardboard, adding depth once the art is mounted.
Photograph the final arrangement before moving anything. That reference image will be extremely helpful when one innocent sleeve catches a flower and suddenly your carefully planned mandala becomes modern chaos.
Step 8: Paint the Cardboard Design
You can paint each module before final assembly or glue the complete pattern together and paint it as one piece. Acrylic craft paint offers good control and allows easy color mixing. Use a small brush to reach the inner edges of every loop.
Spray paint provides an even finish but must be applied in light passes. Heavy paint can saturate cardboard, soften its shape, and cause warping. Spray one side, let it dry, turn the design over, and coat the reverse and exposed edges.
For a dimensional finish, paint the cardboard black first and lightly brush metallic paint across the raised edges. This dry-brushing technique creates the appearance of aged iron, bronze, or gilded metal.
Step 9: Add a Backing
A backing panel makes installation easier and protects the cardboard pattern. Cut thin plywood, foam board, or sturdy art board to fit inside the frame. Paint the backing in a contrasting or coordinating color.
For maximum shadow and texture, choose a dark backing behind metallic or light-colored cardboard. For a subtle monochromatic effect, paint the frame, backing, and pattern the same color.
Glue the finished cardboard design to the backing at multiple contact points. Apply only enough adhesive to create a secure bond. Allow the assembly to dry flat so gravity does not quietly redesign it overnight.
Step 10: Install the Artwork in the Frame
Place the backing inside the rear frame opening and secure it with frame clips, small brads, flexible points, or another appropriate fastening method. Avoid driving fasteners through thin or fragile decorative areas.
Check the front for alignment before permanently closing the back. The composition should appear centered unless the design is intentionally asymmetrical.
Step 11: Seal the Finished Piece
A clear matte or satin sealer can help protect the paint from dust and minor moisture. Test the product on a leftover painted cardboard piece first. Apply light coats so the cardboard does not become oversaturated.
This artwork should remain indoors and away from high humidity. It may have been born near a bathroom, but that does not mean it dreams of returning to one.
Step 12: Hang It Securely
Weigh the completed artwork and choose hanging hardware rated above that weight. Use hardware compatible with the wall material. Whenever practical, fasten heavier pieces into a wall stud or use an appropriate drywall or masonry anchor.
Lightweight adhesive picture strips may work for some small projects, but only when the wall surface, frame material, dimensions, and total weight fall within the manufacturer’s directions. Do not hang a questionable frame above a bed, crib, sofa, or other place where falling decor could cause injury.
Creative Variations
Add a Safe Reflective Center
Place a small intact craft mirror or lightweight acrylic mirror in the center of a floral pattern. Use an adhesive specifically labeled as compatible with mirrors or the selected plastic. Some general adhesives can damage a mirror’s reflective backing, so product compatibility matters.
Create an Ombre Pattern
Divide the cardboard pieces into three or four groups. Paint each group a progressively lighter shade of the same color. Arrange the darkest pieces along one side and transition toward the lightest shade.
Mix Tube Sizes
Combine toilet paper rolls, paper towel tubes, and sturdy mailing tubes. Different diameters produce varied petal sizes and make large compositions more dynamic.
Use a Two-Tone Finish
Paint the frame one color and the paper design another. A navy frame with gold cardboard, a white frame with charcoal petals, or a natural wood frame with sage-green leaves can suit many decorating styles.
Leave Some Cardboard Natural
For Scandinavian, rustic, or eco-inspired interiors, preserve the natural kraft-brown surface. Seal it with a clear matte finish and pair it with a white, black, or unfinished wooden frame.
Common Mistakes to Avoid
Using Too Much Glue
Excess adhesive squeezes between the pieces and remains visible after painting. Apply glue with a toothpick or fine-tip bottle for greater control.
Skipping the Dry Layout
Gluing immediately can lead to uneven spacing and a pattern that does not fit the frame. Arrange every major component first and take a reference photo.
Cutting Uneven Rings
Small variations add handmade charm, but major differences make repeating patterns appear unbalanced. Mark the tube before cutting and use a sample ring as a guide.
Applying Heavy Paint Coats
Cardboard absorbs moisture. Thick coats may cause sagging, swelling, or warped petals. Build the color gradually with thin layers.
Ignoring the Back of the Project
A decorative front cannot compensate for weak hanging wire, loose staples, or a crumbling frame joint. Inspect and reinforce the rear hardware before installation.
Using Sharp Mirror Pieces
Exposed shards are unnecessary for this project. Reuse the empty frame and dispose of damaged glass safely. For reflective accents, choose intact craft mirrors or acrylic mirror pieces with smooth edges.
How to Clean and Maintain the Wall Art
Dust the piece with a soft brush, clean makeup brush, or low-power handheld vacuum fitted with a brush attachment. Avoid wet cleaning because water can soften unsealed cardboard and weaken paper-based joints.
Keep the artwork away from direct splashes, cooking grease, fireplaces, and prolonged direct sunlight. Check the hanging hardware and frame joints periodically, especially if the piece is large.
Experience-Based Lessons From Making This Project
The first lesson most makers discover is that collecting toilet paper rolls takes longer than expected. A medium-size frame may require more cardboard pieces than the early sketch suggests, particularly when the design includes multiple layers. It is helpful to collect extra rolls and cut a test batch before committing to a final pattern. Paper towel tubes can fill the supply gap, but their thickness and diameter may differ, so they are best used deliberately rather than mixed randomly.
The second lesson is that the dry layout usually looks better after one round of editing. The initial temptation is to fill the entire frame with petals, curls, and flowers. Once everything is packed together, however, the pattern can become visually heavy. Removing several pieces often improves the design. Empty space gives each shape a clearer outline and allows the backing color to participate in the composition.
Cutting consistency also has a major effect on the finished appearance. Measuring every half-inch mark may feel tedious, but the rhythm becomes faster after the first few tubes. Cutting several rolls at once is not recommended because the layers can slip. One tube at a time produces cleaner rings and fewer bent edges.
Another practical discovery is that paint changes the personality of the cardboard dramatically. Before painting, the arrangement may look unmistakably like recycled bathroom packaging. After a careful coat of matte black, it begins to resemble decorative ironwork. Metallic gold creates a glamorous result, while chalky white emphasizes the shadows between the loops. Testing two or three colors on spare pieces prevents an entire afternoon of repainting.
Glue choice influences both speed and neatness. Hot glue delivers immediate hold, which is useful when building large flowers. Unfortunately, it can create strings and thick joints. Tacky craft glue dries more slowly but allows small adjustments and usually leaves cleaner connections. A hybrid approach often works best: craft glue for visible paper joints and a few tiny dots of hot glue in hidden areas that need instant support.
The frame itself may demand more attention than the cardboard design. Old corner joints sometimes loosen after the mirror is removed because the glass and backing were helping the frame remain square. Before measuring the new backing, place the empty frame on a flat surface and confirm that opposite corners align. Repairing and squaring the frame early prevents an awkward situation in which the new panel fits perfectly on one side and appears to have developed personal boundaries on the other.
Painting the design before attaching it to the backing makes it easier to reach the sidewalls and inner curves. However, lightweight cardboard modules can move under spray pressure. Temporary loops of painter’s tape beneath the design help keep it in place. Several light passes are more successful than trying to achieve full coverage immediately.
Finally, the most satisfying part of the project is the transformation. The raw materials are ordinary and almost free, but the completed wall art can look detailed, intentional, and highly personal. Small irregularities rarely matter once the piece is framed and viewed from a normal distance. In fact, they often give the work more character than a perfectly manufactured decoration.
Conclusion
Making wall art from a broken mirror frame and toilet paper rolls is an inventive way to turn two disposable or damaged objects into distinctive home decor. The basic processrepairing the frame, cutting cardboard loops, arranging a pattern, painting the design, and installing it on a backingis approachable even for beginners.
The project can be adapted to nearly any decorating style, from rustic botanical art to bold geometric wall decor. Careful preparation matters more than expensive supplies. Remove all hazardous glass, choose adhesives suited to each material, apply paint in light coats, and hang the finished piece with properly rated hardware.
Most importantly, allow the design to evolve. A few cardboard petals may become a flower, several flowers may become a mandala, and one discarded frame may become the piece everyone asks about. You are not merely saving toilet paper rolls. You are giving them a surprisingly respectable retirement plan.
Note: This project reuses the empty mirror frame only. Remove and safely discard all sharp, cracked, or loose mirror glass before beginning.