Tower placement pathing separates casual tower defense players from true tacticians who can conquer the most punishing endless maps. Instead of relying purely on raw firepower, mastering the geometry of the map allows you to force incoming hordes into tightly controlled lanes, maximizing your overall damage per second. Whether you are experimenting with effective wave control strategies to stall aggressive swarms or fine-tuning your base layout to handle unexpected surprises, understanding how enemy pathfinding logic operates is essential for survival.
Throughout this guide, you will learn how to calculate optimal firing arcs, construct efficient multi-layered mazes, and coordinate your defensive arsenal to crush even the toughest boss waves. By moving away from random turret placement and adopting a deliberate architectural mindset, you will turn every choke point into an impenetrable fortress.
1. Mastering Tower Placement Pathing Mechanics for Efficiency
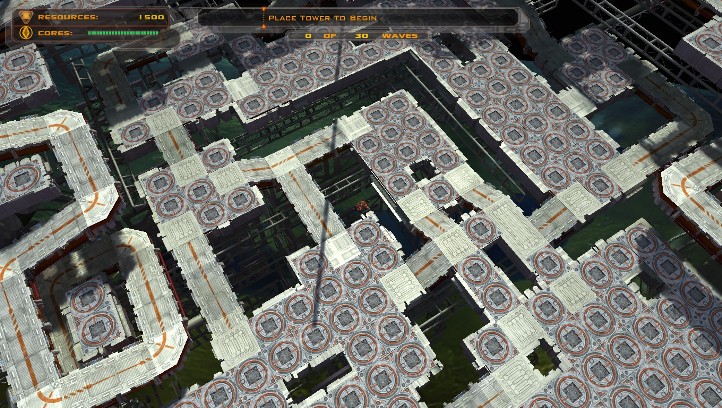
Tower placement pathing forms the foundational backbone of any successful defense strategy. By understanding how enemy units interact with spatial boundaries, tacticians can manipulate movement to maximize damage output and resource efficiency. Every square inch of the map dictates how long a threat remains under fire, making precise geometry a core priority for high-level play.
1.1 Understanding Enemy Behavior and Geometry
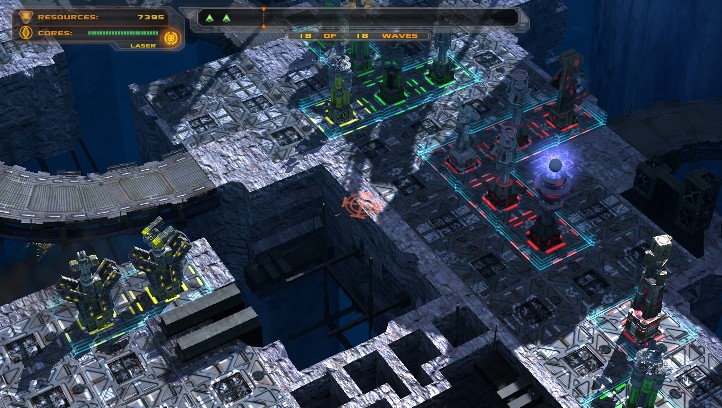
Predicting computer-controlled adversary movement requires analyzing the underlying grid systems that dictate tactical navigation. Developers program artificial intelligence to seek the path of least resistance toward the objective, which players can exploit using deliberate blockades.
1.1.1 Calculating Effective Range Circles
Every defensive structure features a specific radius of influence. Calculating these effective range circles ensures zero overlap waste while eliminating blind spots along the route. Overlapping perimeters allow multiple offensive units to engage a single threat simultaneously, drastically increasing your cumulative damage per second.
1.1.2 Avoiding Pathing Reset Bugs and AI Logic Errors
Drastic structural changes made midway through a round can trigger pathing reset bugs, causing enemy units to recalculate routes improperly or bypass choke points entirely. To maintain stable AI logic, build your maze incrementally rather than selling and rebuilding entire barriers on the fly.
1.1.3 The Impact of Unit Speed on Targeting Prioritization
Fast-moving threats frequently outpace slower tanks, breaking standard targeting priorities. Placing rapid-fire suppressors near spawn points helps manage these velocity discrepancies, ensuring that your heavy artillery stays focused on high-health targets instead of minor scouts.
1.2 Strategic Maze Construction and Layout Optimization
Constructing efficient layouts goes beyond simple blockades; it is about engineering a gauntlet that forces adversaries to spend maximum time exposed to your offensive arsenal.
1.2.1 Designing Zig-Zag and Looping Paths for Maximum Exposure
Implementing zig-zag and looping corridors forces units to pivot repeatedly, slowing their advance and multiplying their exposure window. This geometric manipulation is essential for executing effective wave control strategies that prevent your defenses from becoming overwhelmed.
1.2.2 Establishing Kill Boxes at Critical Chokepoints
Concentrating your defensive investments into tight, centralized kill boxes creates localized areas of extreme damage density. When adversaries bunch together in these narrow corridors, secondary effects like area-of-effect blasts and burning status ailments achieve maximum efficiency.
1.2.3 Managing Dead Ends and Forced Retracing
Advanced map designs occasionally allow for temporary dead ends that trick the artificial intelligence into taking suboptimal detours. While modern pathing algorithms usually prevent total backtracking, clever layout designs can still stall aggressive groups long enough for your cooldowns to reset.
1.3 Balancing Tower Composition Within Fixed Paths
A successful defensive grid relies on a healthy mix of specialized units working in tandem rather than relying on a single overpowered structure type.
1.3.1 Creating Overlapping Fields of Fire
Interlocking weapon ranges guarantee that if a target slips past one defensive line, subsequent units immediately pick up the slack. This redundancy prevents sudden breakthroughs during intense, multi-pronged assaults.
1.3.2 Coordinating Crowd Control and Splash Damage
Pairing slow or stun-inducing structures directly with explosive artillery creates devastating elemental damage synergies that obliterate massive clusters of enemies before they can breach your inner perimeter.
1.3.3 Positioning Short-Range Support Units Versus Long-Range Artillery
Frontline squares should host short-range utility and debuff structures, while long-range artillery commands the back rows to pick off surviving stragglers. This hierarchical placement ensures optimal line-of-sight and prevents shorter weapons from blocking the trajectories of heavy, long-distance bombardments.
Advanced Defensive Tactics and Pathing Troubleshooting
Adapting Tower Placement Pathing to Specialized Wave Types
Countering Fast-Moving and Stealth Units
Standard mazes often fail when specialized units enter the grid. Fast-moving enemies can rush past your primary damage zones before your heavy artillery can acquire targets. To counter this, position rapid-fire or instant-hit turrets at critical chokepoints where traffic concentrates. Stealth units present a different headache, requiring detector towers or reveal mechanics embedded directly along the main travel route. Ensuring proper wave control strategies allows you to bunch up rapid runners, making them vulnerable to splash damage.
Managing Multi-Path and Split-Wave Scenarios
Maps featuring multiple spawn points and intersecting routes demand flexible blueprints. Instead of committing all your resources to a single mega-maze, divide your assets into modular, self-sustaining defense clusters. Keep an eye on enemy distribution and utilize quick structural tweaks to redirect secondary waves into your primary kill zones, preventing your defense from stretching too thin.
Economic Balancing and Farming Tower Real Estate
Every square tile on the map represents potential revenue or lost DPS. Advanced players balance offensive setups with dedicated economic nodes—such as resource-generation structures placed safely away from the front lines. Maximizing your return on investment requires you to calculate when to sell underperforming early-game units to free up crucial real estate for late-game powerhouses.
Identifying and Correcting Common Strategic Errors
The Pitfalls of Front-Loading Damage
A frequent mistake is placing all high-damage units at the very beginning of the map. While this obliterates the first few incoming waves, it leaves your backline defenseless against tougher bosses that survive the initial gauntlet. Instead, stagger your heavy hitters deeper into the map where enemies have already been slowed or softened up by crowd control effects.
Resolving Line-of-Sight Blockage from Tall Structures
Tower height matters immensely in well-designed grid layouts. Bulky, high-tier structures placed improperly can block the projectiles or line of sight of smaller support turrets sitting behind them. Always review your vertical tier placement to ensure your primary damage dealers have unobstructed firing arcs across the entire grid.
Adjusting Defensive Layouts for Mid-Game Enemy Immunities
As matches progress, enemies often gain specific immunities to stun, elemental status effects, or physical damage. Relying on a single type of utility structure is a quick path to defeat. Incorporating elemental damage synergies ensures that if a unit shrugs off your frost slows, your secondary fire or lightning towers can pick up the slack without requiring a complete structural overhaul.
Frequently Asked Questions
Best Methods for Slowing Fast Enemies in a Maze
The most effective method is combining continuous low-tier chill auras with high-impact stun nodes placed right after sharp corners. Because enemies decelerate when turning, placing crowd control elements immediately following a tight bend maximizes their exposure time to your damage dealers.
Upgrading Existing Towers Versus Expansion Strategies
Generally, maxing out the level of an existing tower located at a high-traffic intersection yields a better return than building multiple low-level units elsewhere. Expand your footprint only when your current setup is leaking units or when you need to secure new territory for specialized aerial threat defense.
How to Handle Maps with Multiple Simultaneous Paths
Focus on central convergence points where separate lanes merge into a single choke point. Establishing a versatile layout here lets you concentrate your heavy artillery where it can impact multiple enemy streams at once.
Reasons for Enemy Pathing Glitches and Shortcuts
Pathing glitches usually occur when a newly constructed tower completely seals off a legal route without leaving an alternative path open to the base. Always verify that your maze construction leaves a continuous, valid route so the enemy AI does not trigger fallback logic or attempt to clip through boundaries.
Mastering tower placement pathing is ultimately what separates an average defensive strategist from an elite tactician. By shifting your focus from simply reacting to incoming threats to proactively manipulating enemy movement, you transform chaotic battlefields into streamlined, highly efficient kill boxes. Whether you are experimenting with intricate maze construction, leveraging elemental damage synergies to melt high-health targets, or reinforcing your base against unpredictable split waves, every tile and placement decision matters.
Remember that defensive mastery is an iterative process. Take time to analyze where your layouts fail, watch how specific units interact with your chokepoints, and continuously refine your approach as harder waves introduce new tactical hurdles. With a solid grasp of geometry, range circles, and unit behavior, you will be well-equipped to hold your ground against any onslaught. To further enhance your tactical setup and streamline your overall gameplay performance, consider checking out our guide on graphic settings optimization to ensure smooth frame rates during heavy wave combat.